The Myth Of “Clean Sound”: What Marketers Won’t Tell You

Your Ears Aren’t Objective Instruments
You want to believe a $300 amplifier sounds objectively better than a $30 one because that justifies the cost and proves you’re discerning. Here’s the mechanism: human hearing operates through psychoacoustics, not physics alone. Your brain fills gaps, predicts patterns, and assigns meaning based on expectation and context. Placebo effects in audio are measurable and real. This isn’t weakness. It’s how perception works.
Most people can’t distinguish a quality difference between amplifiers in blind listening tests when they don’t know which device is running. Volume level, familiarity with the music, and room acoustics matter more than circuit design in determining what you perceive as “clean.” Your opinion becomes unreliable data the moment you know the price tag. Stock amplifiers built into receivers and audio interfaces handle the actual work of delivering current to headphones without audible distortion at normal listening levels. The margin between adequate and excellent performance is smaller than the marketing wants you to think.
Why Most Amplifiers Do The Job
The common advice says you need a dedicated headphone amp to unlock hidden detail in your music. That’s incomplete. A headphone amplifier’s sole function is voltage amplification and impedance matching. Most modern DACs and audio interfaces already contain these circuits. They work fine because the engineering is straightforward: amplify the signal without introducing noise or distortion.
The real threshold for perceiving a difference is whether your current device produces audible distortion, channel imbalance, or insufficient volume at your preferred listening level. If your headphones play at comfortable volume without crackling or channel dropout, your source is already performing the core task. Building or buying a separate amp only matters when you’re using high impedance headphones, driving multiple devices from one source, or your current output has measurable problems. Otherwise, you’re chasing diminishing returns that reward expensive equipment more than listening pleasure.
Why “Diy Headphone Amplifier” Is The Ultimate F**k You To Mainstream Audio

Escaping The Trap Of Disposable Audio
You want control back. Manufacturers have spent decades engineering products to fail, forcing replacement cycles that pad their margins while you fund their R&D on repeat. A DIY headphone amplifier breaks this contract. You own the schematic. You own the components. You own the lifespan. When a capacitor fails in five years, you replace it for three dollars instead of buying new headphones. This isn’t nostalgia. It’s economics applied to audio.

The real mechanism here comes from industrial design, where planned obsolescence functions as revenue strategy. In that field, “supply chain lock-in” means customers can’t service their own gear. A DIY amplifier inverts this entirely. You source parts independently, repair what breaks, upgrade individual stages without replacing the whole unit, and eliminate the middleman’s margin. That’s not a feature. That’s structural independence.
The Engineering Becomes Your Signature
Building your own amp forces you to understand what you’re actually listening to. Most people buy finished products and never touch the variables. You will touch them. You’ll understand why a particular op-amp sounds different from another. You’ll know your power supply topology, your feedback network, your output impedance. This isn’t hobbyist dabbling. It’s the difference between owning an experience and consuming one.
The satisfaction compounds because you’ve eliminated the guessing game. Commercial audio sells mystery. Tube warmth. Digital clarity. Soundstage. None of those words mean anything until you’ve built a circuit, measured it, heard it, and changed it yourself. The act of construction teaches faster than any review ever could. When you solder your last joint and power on the amplifier for the first time, you’re not just listening to music. You’re listening to something you engineered into existence.
The “Cmoy Headphone Amplifier Circuit Diagram” Deception: Simplicity As A Stumbling Block
Why The Topology Actually Matters
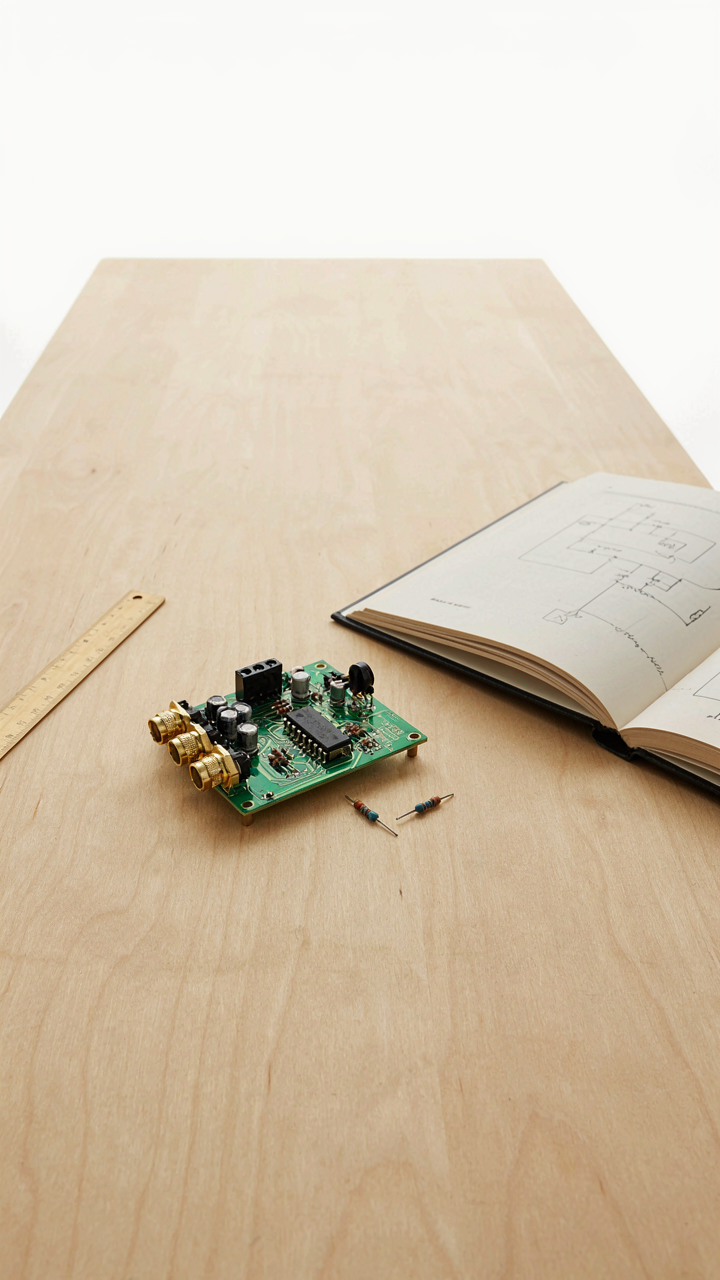
You want to build a headphone amp and think a diagram alone is enough because you’re afraid of looking stupid if you admit you don’t understand what’s actually happening. The real mechanism: topology determines how the amplifier converts input voltage into output current, and skipping this understanding leaves you guessing when something doesn’t work. A Cmoy uses a voltage amplifier stage feeding a buffer, but most builders treat it like a recipe instead of a system.

The topology also defines your noise floor, impedance characteristics, and headphone compatibility. You can’t troubleshoot a bad build or choose the right parts without knowing why the circuit is shaped the way it is. This isn’t academic gatekeeping. It’s the difference between a working amp and three hours spent chasing a problem that was baked into your design choice.
The Diagram Lies Through Omission
Common advice says “just follow the schematic” and that’s incomplete at best. The schematic shows connections but hides the actual impedance matching problem: your audio source outputs at high impedance, your headphones need low impedance drive, and the buffer stage bridges that gap by converting voltage gain into current delivery. Most diagrams don’t label this function, so builders miss why component values matter.
The real trap is tolerances and part substitution. A Cmoy diagram shows an opamp, but using a TL072 instead of an OPA2134 changes your noise performance and frequency response. Component sourcing decisions ripple through the entire circuit. You need to understand not just what connects where, but which specific parts do what job and why swapping them breaks things.
The “DIY Simple Headphone Amp Tutorial” Trap: What They Leave Out

Understanding Your Actual Circuit, Not Just Wiring Points
You want to build something and have it work immediately without learning why it works. That’s the real reason you’re here. Most DIY amp guides treat a headphone amplifier like flat-pack furniture: follow the schematic, solder the parts, plug it in. This is circuit design borrowed from mechanical engineering, where you can often assemble something functional without understanding load impedance, gain staging, or feedback loops. A headphone amp demands the opposite.

The difference between a working amp and one that sounds broken lives in how voltage and current move through each stage. A typical headphone amp uses a preamp stage to boost weak signals, then a power stage to deliver current to low-impedance loads like headphones. Most tutorials skip the relationship between these stages entirely. You need to know why your coupling capacitors matter, what your feedback resistors actually do, and how impedance mismatches distort the signal path. This knowledge prevents you from chasing phantom problems later.
Problem Solving Requires Building Your Diagnostic Method
Troubleshooting a DIY amp is not decorative. When sound cuts out, distorts, or disappears in one channel, most builders panic and start replacing components randomly. Real problem solving uses a signal flow approach: inject a known test signal at the input, measure the output at each stage with a multimeter or oscilloscope, and locate where the signal degrades or vanishes. This is systematic. Random replacement wastes money and time.
Start by verifying power supply voltages at each stage before you suspect any active component. Check for cold solder joints by visual inspection and mechanical testing. Measure DC offset at headphone outputs, which should stay under fifty millivolts on most designs. Use a signal generator if you have one, or generate tones from your phone through an aux cable as a makeshift test source. Document what you measure at each point so you can identify the exact stage that fails. This protocol saves you weeks of guessing.
How To Build A Cmoy Headphone Amplifier: The “Minimum Viable Product” Of Audiophilia
Pick Parts Like An Economist, Not A Collector
You want to believe that spending more money produces better sound. It doesn’t. The mechanism here comes from economics: you’re optimizing for signal-to-noise ratio per dollar, not total noise floor. A Cmoy amplifier works because its circuit topology is fixed, so your only variables are the op-amp, power supply quality, and component tolerances. Most of the sonic difference people hear comes from impedance matching between your headphones and the amplifier’s output, not from premium resistors.

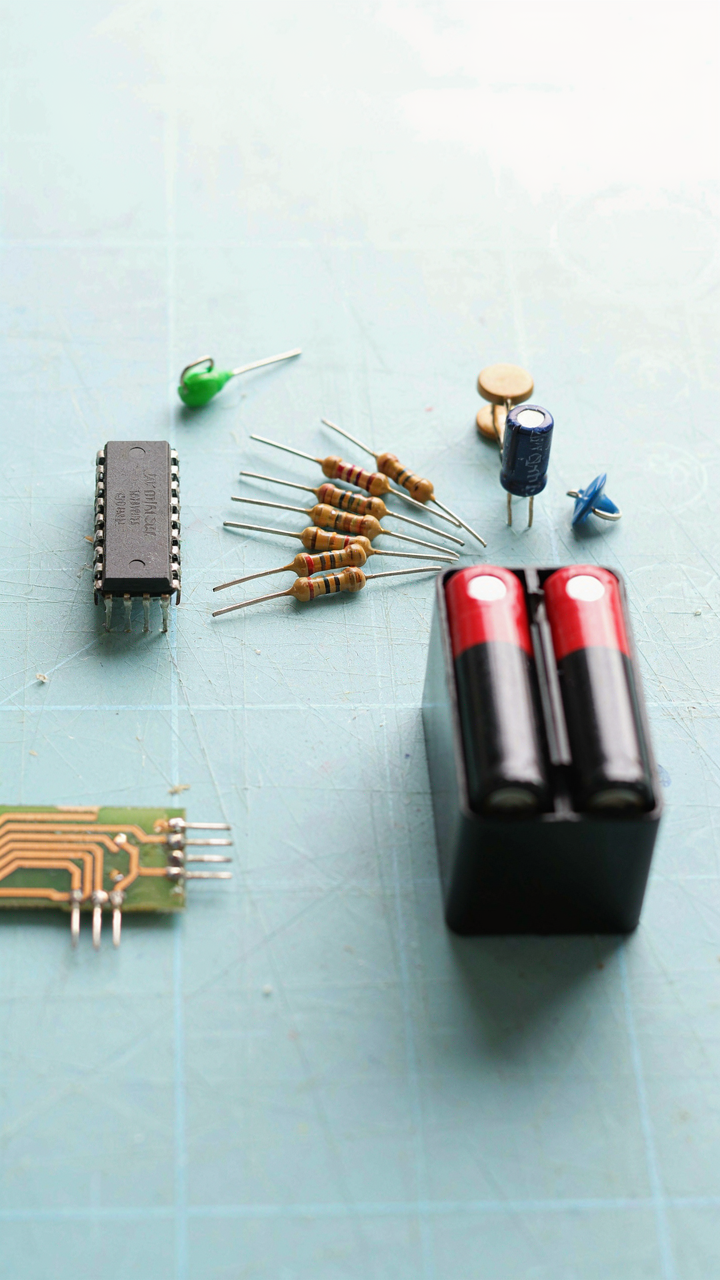
Start with a TL072 or NE5532 op-amp. These cost three to five dollars and measure flat across the audible range. Buy metal film resistors rated to one percent tolerance, not five percent. Use a dual-rail power supply built from two nine-volt batteries in a battery holder, or a regulated supply if you want stability without the bulk. The total component cost lands under thirty dollars. Every dollar beyond that buys diminishing returns until you hit the ceiling of your headphone’s actual capability, which most people never reach.
Enclosure Design As Functional Extension
The box isn’t decoration. It’s electromagnetic shielding and mechanical stability working together. If you route your signal wires next to your power rails without a physical barrier, you induce noise into the audio path. A metal enclosure or shielded Tupperware container solves this. Your enclosure also manages heat and vibration, which compounds electrical noise if ignored.
- Aluminum Hammond Box: 1455 series or equivalent provides shielding and dissipates heat from the op-amp without active cooling. Cost is eight to fifteen dollars.
- PCB Layout Density: Pack components tightly to minimize wire runs, especially power and ground planes. Shorter traces mean less inductance and radiation loss.
- Star Grounding: Run all ground connections to a single point, then one wire to the negative battery terminal. This prevents ground loops that manifest as hum.
- Cable Entry Isolation: Use shielded RCA or 3.5mm cable with ferrite cores on the input. This blocks RF interference from entering your circuit.
- Potentiometer Placement: Mount the volume control on the enclosure wall closest to the output jack, minimizing the distance between pot and output stage.
Most guides skip this part and wonder why their build sounds like it has a sixty-hertz hum underneath everything. The enclosure is your first line of defense. Before you solder your first component, drill your case, label your jacks, and plan your internal layout. Mount the battery holder to the base with adhesive backed foam, then position your PCB above it. Run power wires through strain relief holes, not floating loose inside the box. This discipline determines whether you build something that works or something that barely functions.
The Signal Chain As A Food Web Protocol: Optimizing Your Headphone Amp Circuit

Where Energy Enters And Exits Your Circuit
You want your amp to sound “clean” because you’re afraid it already doesn’t, and you can’t hear why. The real mechanism is energy transfer. In ecology, energy flows from the sun through plants to predators with loss at each step. Your headphone amp works the same way: power supply to input stage to output stage to headphones, with signal degradation at every junction. Most builders ignore this because it’s not glamorous. They chase component names instead of tracing where their signal actually loses integrity.

Your power supply isn’t just “delivering power.” It’s the primary energy source determining how much distortion gets introduced before your audio even hits the amplification stages. A noisy supply injects noise directly into every subsequent stage. Clean power in means the signal has room to breathe without fighting background hash. A 9V battery doesn’t degrade like a wall adapter switching at 60Hz. This isn’t preference. This is thermodynamics applied to audio circuits.
Noise As The Dominant Species In Signal Space
Distortion and noise don’t exist separately in your amp. Noise is the predator, distortion is its prey, and your signal is the hunting ground. In predator-prey dynamics from ecology, populations regulate each other through feedback. Your headphone amp has the same relationship: noise creates distortion, distortion masks signal, masked signal demands higher output voltage to be heard, higher voltage pushes components into their nonlinear regions where they generate more noise. The cycle accelerates.
Most guides say “use low-noise op-amps” like that ends the problem. It doesn’t. A low-noise op-amp in a poorly grounded circuit still sits in a noisy environment. You need to starve the noise before it enters the amp at all. That means ground planes that connect every stage directly to a single point, shielded cables that physically separate audio signals from power traces, and capacitors placed within quarter-inch of power pins so noise never travels. Your output stage doesn’t clean up trash the input stage already let in.
Beyond The Buzz: When “Tube Headphone Amplifier Circuit” Is Just Nostalgia
Tubes Versus Transistors: What Actually Happens
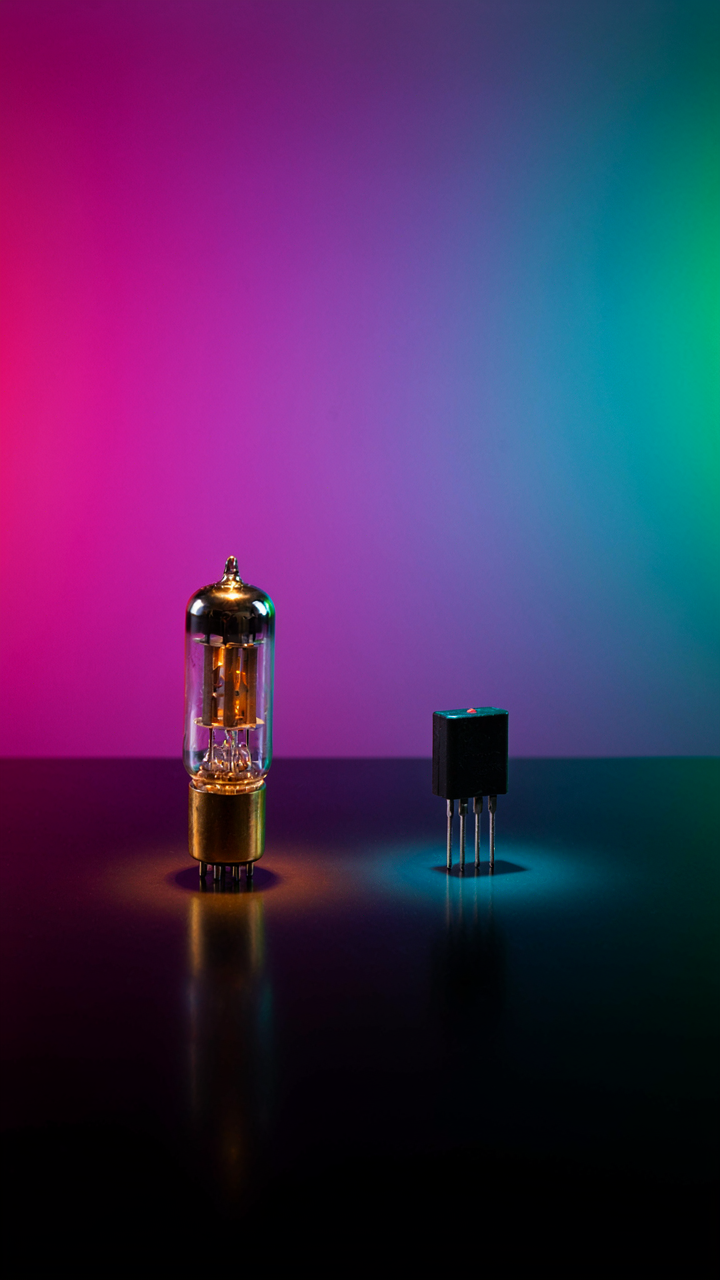
You want tubes because they sound more expensive and feel like you understand something others don’t. Here’s the actual mechanism: vacuum tubes amplify by boiling electrons off a heated cathode and steering them across a vacuum to a plate. Transistors do the same job using a semiconductor junction and no heat. Both amplify voltage. Both distort if pushed hard. The physics doesn’t care about your preference.

Tubes generate more harmonic distortion at lower levels because their transfer function isn’t linear. Transistors stay cleaner until clipping. This means tube circuits color the signal earlier and more noticeably. That’s not magic. That’s not warmth. That’s measurable nonlinearity that your ear detects before your brain can name it. Whether you want that coloration depends on your headphones and source material, not on whether you read a forum post calling tubes “alive.”
Clean Measurements Versus The Story You Tell Yourself
The common advice is wrong: “tubes sound better because science doesn’t measure what matters.” That’s lazy thinking that lets you avoid making a choice. Frequency response, total harmonic distortion, and impedance output are all measurable. They all matter. A tube headphone amplifier with 5 percent THD at 1 watt isn’t mysteriously superior to a solid state design with 0.1 percent THD. The first one adds distortion. The second doesn’t. What you do with that fact is your decision.
If your headphones have a bright treble peak, solid state won’t fix it but won’t mask it either. A tube amplifier adds even-order harmonics that can make brightness feel less edgy. That’s useful. That’s also not an accident or a secret. Measure your source, measure your headphones, then pick the amplifier type that compensates for what you actually have. Build your tube circuit only if you’re adding distortion you specifically want, not because you believe in a story.
Your First “DIY Headphone Amp”: It Won’t Be Perfect, And That’s The Point

Build Before You Study
You want your first amp to work flawlessly so you look like you knew what you were doing all along. That’s not how this works. The real mechanism here comes from systems thinking: feedback loops. Your amp is a closed loop system with gain stages, impedance matching, and signal degradation at every connection point. You only see these failures when current flows through your actual circuit, not when you read about them. Build a simple Class A amp using a tube or solid state gain stage first. Use standard designs like the Ruby amp or a basic op amp buffer. Don’t optimize yet. Don’t chase specifications. Measure what actually happens.

The gap between theory and your breadboard reveals everything. You’ll find impedance mismatches you didn’t predict. Your power supply will introduce noise you didn’t account for. Your component tolerances will shift frequency response in ways the datasheet didn’t warn you about. This isn’t failure. This is data collection. Every mistake teaches you how the circuit actually behaves under load with real headphones and real music. Document what breaks and why.
Debugging Is Where Real Understanding Lives
People say “learn from mistakes” like it’s motivational advice. Wrong framing. In circuit design, debugging is reverse engineering your own work. You built something that produces noise, distortion, or weak output. Now you trace backwards through the signal path to find where the mechanism broke. Is the preamp stage clipping? Check your input impedance and gain calculations. Is there hum at 50 or 60 Hz? Look at your power supply filtering and grounding topology. Is one channel quieter? Measure DC offset and component values with a multimeter.
The debugging process builds pattern recognition faster than any book. You’ll start to see which design choices cause which failure modes. A poorly selected op amp creates different artifacts than a weak power supply. A ground loop produces a different noise signature than inadequate coupling capacitor sizing. When your next build happens, you’ll avoid these traps by instinct, not memory. Start with a simple tube buffer amp on a breadboard, powered by a wall adapter. Measure output impedance at different frequencies. Adjust component values and document the results.
The Real ROI Of “How To Make A Headphone Amplifier”: Skill Acquisition, Not Just Sound

Engineering Principles That Transfer Everywhere
You want to believe building a headphone amp will fix your audio. It won’t. The real payoff is learning how signal flows through a circuit, how impedance matching works, and why component choice matters at all. This is systems thinking, borrowed from electrical engineering: treating the amplifier as a chain where each stage’s output becomes the next stage’s input, and weak links collapse the whole thing. A headphone amp teaches you this because you can’t hide behind marketing when you’re soldering the connections yourself.

The skills stack fast. Once you understand how a simple Class A amplifier converts voltage into usable current for drivers, you stop accepting black boxes. You read datasheets. You predict failure modes. You design around real constraints instead of hoping. This transfers to any project requiring signal integrity: microphone preamps, line-level mixers, guitar effects. The knowledge compounds because the underlying principles don’t change. You’re not learning headphone amps. You’re learning how circuits actually work.
Self Reliance Cuts Through Consumer Dependence
Most people won’t admit they’re stuck. They buy gear, wait for it to disappoint, then buy more. A DIY headphone amplifier forces you past that cycle because there’s no company to blame if it doesn’t work. You either debug the circuit, source better components, or accept the limitations you created. That friction is the feature. It kills the fantasy that the next purchase will solve the problem.
The mechanism is simple: when you build something, you own the entire causal chain. You can’t outsource judgment to reviews or specs. You measure twice, test three times, and trust only what you can verify. This discipline spreads. You stop accepting vague product claims everywhere. You read documentation. You test assumptions. You build things instead of consuming things. That shift compounds across everything you touch.
The Art Of Listening: Why Your Brain Matters More Than Your Headphone Amp Circuit

Your Brain Is The Actual Bottleneck
You built a DIY headphone amplifier because you wanted proof that your ears work better than everyone else’s. Here’s the mechanism: psychoacoustics is the study of how the brain interprets sound waves, not how sound waves behave. Your amp circuit outputs voltage swings. Your brain outputs meaning. The circuit is a tool. The brain is the instrument that decides if the tool matters.
Most people skip this part because admitting your brain might be untrained feels like weakness. It’s not. The cochlea and the auditory cortex don’t care how clean your amplifier is if your neural pathways haven’t learned what to listen for. You can have a textbook-perfect circuit and still miss 70 percent of what’s actually happening in the signal. Training beats equipment every time.
Hearing Versus Listening Are Different Skills
The common advice says “just listen more” and assumes that ears work like cameras. They don’t. Hearing is passive. Listening is a skill you build through repetition and specific protocol. Your DIY amplifier reveals information that was always there. Your brain has to learn what to do with it.
Start with frequency isolation. Use a test tone generator or sine wave sweeps across the full audible range while wearing your amp. Spend three to five minutes at each octave. Your job is to map what 250Hz actually feels like in your head versus 500Hz versus 2kHz. Don’t judge the sound. Observe it. Write down what you notice. Repeat weekly for six weeks. Your auditory cortex rewires through this repetition, and suddenly you hear differences in recordings that were invisible before.
Stop Chasing Phantom Cleaner Sound And Start Building For The Sound You Actually Want. The Real Audiophile Listens With Their Hands

Most people never build an amp because they wait for perfect specs that don’t matter. You don’t need measurements to prove your amp works. You need your ears and a soldering iron. Pick a circuit this week. Order the parts. The only way to stop consuming audio gear is to start making it. Your hands will teach you what your wallet never could.