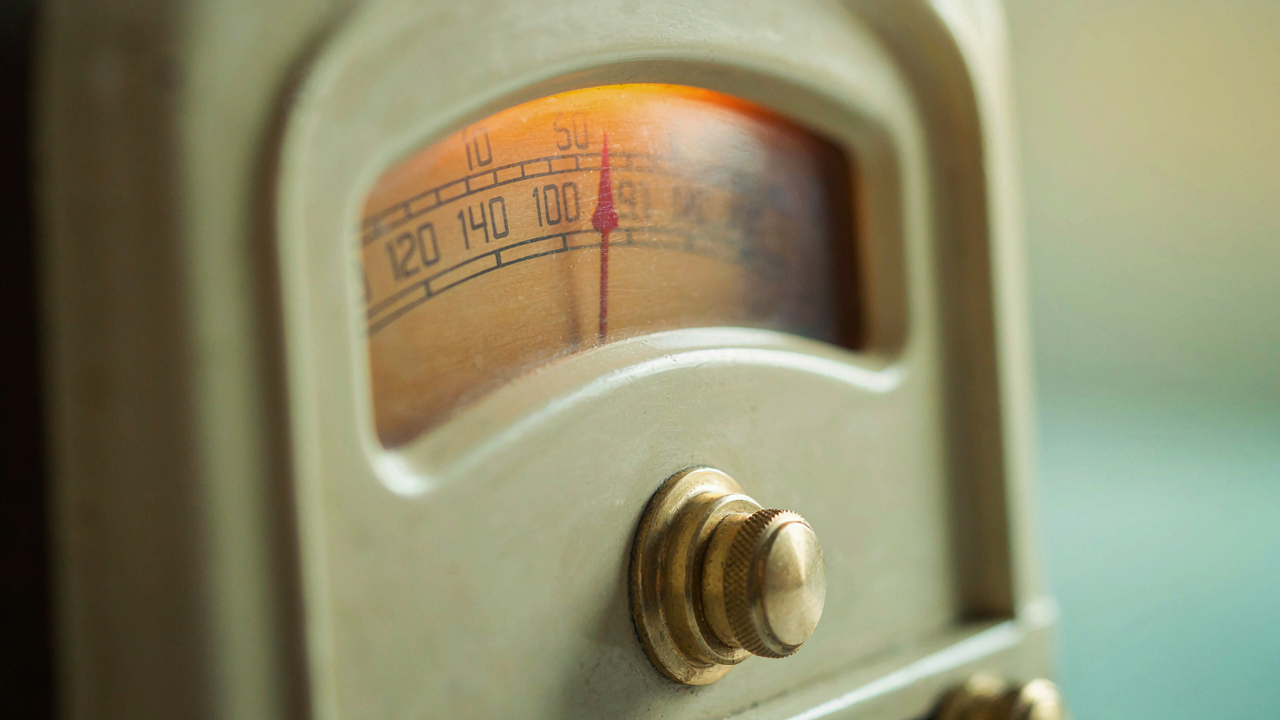
The Myth Of Good Enough Vintage Radio Dial Tuning

Generic Fixes Sabotage Sound Quality
You want the radio to work without thinking about it. That desire kills the actual repair. Most people apply surface-level fixes—lubricating the dial cord, adjusting the needle—without understanding signal path mechanics. They treat tuning as a single isolated system when it’s actually coupled to capacitor drift, mechanical binding, and calibration error. One bad fix compounds into three problems.
The common advice tells you to clean the dial and oil the shaft. That’s incomplete. A sticky dial often signals a worn or misaligned tuning capacitor, not friction. Lubricant masks the real failure. You apply grease, the dial moves freely for two weeks, then binds again because the capacitor plates are eccentric. You’ve bought time but guaranteed a return visit. The mechanism driving poor tuning is usually invisible until you stop treating symptoms.
Ignoring Alignment Costs More Than Time
Alignment drift in vintage radios operates like creep in mechanical engineering, where loads gradually shift a system out of spec. On a radio dial, capacitor plates separate unevenly as temperature cycles and solder joints fatigue. A misaligned dial reads ten kilohertz off by the time you reach the far end of the AM band. Most owners accept this as normal aging. It isn’t.
Skipping realignment forces the radio into constant compromise. The antenna coupling weakens. Adjacent stations bleed through. The tuning capacitor works harder to reach distant frequencies, accelerating plate separation further. Six months later, the radio stops tracking stations altogether. Prevention costs one afternoon with a signal generator and oscilloscope. Neglect costs component replacement and weeks without function. Proper alignment requires measuring capacitance variance across the dial and adjusting trimmer capacitors to hold frequency response flat across the tuning range.
Deconstructing The Vintage Radio Dial: More Than Just A Pointer

How Radio Dials Actually Work
You want to fix your dial because you’re afraid it’s broken beyond recovery and you’ll waste money on a repair tech. Here’s the mechanism: most vintage radio dials operate on a cable-and-pulley system or a gear-driven linkage that translates the tuning knob’s rotation into pointer movement across the frequency band. The dial pointer itself is either a painted needle or a separate indicator that rides on a shaft connected directly to the tuning capacitor. When you turn the knob, you’re not moving the pointer mechanically—you’re adjusting the capacitor, and the dial simply follows that mechanical relationship. This coupling between knob rotation and pointer position is the entire system. If the pointer moves but the station doesn’t change, your problem lives in the capacitor, not the dial.

The dial face itself is typically printed on paper, cardboard, or bakelite and glued to a metal backing plate. Behind that face sits the pointer mechanism, usually a thin brass or aluminum rod. The critical detail: the pointer doesn’t float—it’s fixed to the same shaft or linkage that moves your tuning capacitor. Wear, corrosion, or misalignment of this linkage breaks the dial’s core function. The dial doesn’t fail because it’s “broken”—it fails because the mechanical translation between input and output has degraded or separated.
Where Dials Fail And Why
The common advice says dials wear out from age, which is lazy thinking. They fail at specific, predictable points. The cable connection between the tuning knob and the pointer mechanism is the first failure zone—the cable either frays, stretches, or detaches entirely. Metal gears that drive the pointer develop stripped teeth or corrosion that locks them in place. The shaft bearings oxidize, creating friction that prevents smooth rotation. Paper dials deteriorate under heat and moisture, cracking where the pointer passes. None of this happens evenly—it concentrates where movement occurs most.
The linkage pivot points corrode first because they’re exposed to air and humidity inside the radio chassis. Solder joints connecting the pointer mechanism to the tuning capacitor crack from thermal cycling, breaking electrical and mechanical continuity. The dial face’s connection to the backing plate separates, and the pointer catches on the loose edge. Paint wear on the dial numbers makes station selection harder but doesn’t affect the mechanical function. When you’re diagnosing, check the cable tension first, then inspect gear engagement, then examine solder joints—this is the protocol that finds ninety percent of problems.
The Precision Protocol: Calibrating Your Vintage Radio Tuning Dial

Dial String Tension And Pointer Alignment
You want this to work because a loose dial makes you feel like you own a broken thing. The mechanism is mechanical resonance: dial string tension directly controls pointer lag and backlash. Too tight and the string stretches or snaps. Too loose and the pointer drifts during tuning, refusing to hold frequency. Most people skip this step entirely and blame the radio.
- Measure baseline tension with a gram scale: Place the pointer at dial center, hang a small weight from the string, and record the pull force needed to move the pointer one inch. Most vintage AM/FM radios require 40 to 80 grams of tension for smooth operation without binding.
- Inspect the string for wear and fraying: Examine the full length of the dial string for cuts, stretching, or fabric breakdown. Original string often deteriorates into powder over decades. Replace with nylon fishing line or period-correct cloth dial cord if damage exists.
- Adjust string tension at the anchor points: Locate where the string attaches to the dial mechanism or tuning capacitor shaft. Loosen the fasteners slightly, apply even tension by hand, then retighten. Work both anchor points equally to avoid pointer skew.
- Test pointer movement across the full dial range: Slowly rotate the tuning knob from one end of the band to the other while watching for stick points, binding, or lag. The pointer should track smoothly with no dead zones or sudden jumps.
- Account for spring return force: Many vintage radios use a return spring to snap the pointer back to zero when you release the knob. Verify this spring hasn’t weakened or rusted. Replace it if the pointer no longer snaps back or snaps too hard.

Dial string tension appears simple but it controls every tuning interaction the radio permits. Get this wrong and no calibration step that follows will matter. Set it right and the pointer becomes an extension of your hand instead of a liability.
Pointer Calibration Against Known Frequencies
Forget what you read about “setting the pointer by ear.” That’s guesswork masquerading as method. Calibration requires external reference: either a signal generator or trusted broadcast stations with known frequencies. You align the pointer mechanically so it displays exactly what the tuning capacitor is actually tuned to.
Start at 1000 kHz on the AM band because it’s a standard reference frequency with strong, stable signals in most regions. Tune until you lock onto the signal clearly, then observe where the pointer sits on the dial. If the pointer reads 1010 or 990 when you’re actually on 1000, the pointer has slipped on its shaft or the dial scale itself has shifted. Loosen the pointer setscrew, slide it to the correct position, and retighten. Repeat this at three to five points across the band to ensure linear tracking. The pointer must track consistently across the full range or frequency display remains unreliable.
Lubrication Logic: Silencing The Squeaks In Antique Radio Dial Mechanisms

What Oil Actually Does Here
You want the dial to feel smooth because a rough tuning experience makes you question whether you restored it right. That’s the real fear. Here’s the mechanism: dial mechanisms use friction to hold position, but friction also creates resistance and noise when tolerances tighten over decades. Oil reduces friction between the pointer shaft and its bearings, the dial cord and pulleys, and the tuning capacitor plates where they contact. The right lubricant dissolves old grime without attracting new dust or gumming up the mechanism in five years.

Most people grab whatever oil sits in their garage and call it done. That’s incomplete. Vintage radio dials need low-viscosity oils that don’t thicken in cold storage and won’t break down from the heat generated by tube operation. Light machine oil or clock oil works. Avoid WD-40 for long-term lubrication, it evaporates. Never use heavy motor oil or grease unless you’re targeting one specific sticky component like a worn pointer pivot.
How To Apply Without Creating Problems
Precision matters more than saturation. You’re not soaking the mechanism, you’re targeting the exact points where metal contacts metal and movement happens. Use a needle applicator or single-drop oil bottle, not a brush or spray. The dial cord needs oil only where it wraps around the tuning capacitor pulley and where it runs through any guide posts. The pointer shaft bearing gets one small drop at its base where it enters the dial plate. The tuning capacitor rotor shaft, if accessible without disassembly, gets one drop where it protrudes from the housing.
Apply the oil, then manually rotate the dial dial ten to fifteen times to distribute it evenly. Wipe away any excess that pools or drips. Excess oil attracts dust and creates sticky spots instead of smooth movement. Let the radio sit for an hour before testing. If the dial still binds or squeaks after oil application, the problem isn’t lubrication, it’s mechanical wear, corrosion on the shaft, or a bent pointer that needs straightening or replacement.
Beyond The Surface: Restoring Clarity To Vintage Radio Dials

When The Dial Face Goes Opaque
You want your radio to look like it did when it left the factory, not like a relic someone pulled from a basement. That’s not sentimentality—it’s the mechanism of value. The dial face collects decades of dust, oxidation, and UV damage that renders the markings invisible or nearly so. Most people attack this wrong by scrubbing hard, which scratches the printing underneath. The real move is understanding that dial clarity depends on what’s between the viewer and the printed surface.

Isopropyl alcohol cuts through oxidation without dissolving the inks used on most vintage dial faces from the 1930s through 1970s. Use 90 percent concentration minimum and apply it with a soft microfiber cloth in circular motions, letting the alcohol do the work rather than pressure. For heavier buildup, let the alcohol sit for thirty seconds before wiping. Dial lume, the radioactive material that glowed on certain models, requires separate handling—if you see luminescent areas, leave them untouched and clean only the surrounding dial plate. After the alcohol pass, follow with distilled water on a clean cloth to remove any residue, then dry immediately with a lint-free cloth to prevent water spots.
Bringing Back Faded Markings
The common advice here is wrong: you cannot restore original printing once the ink has genuinely faded from UV exposure. What you can do is make faded markings readable again through contrast enhancement. Think of this in terms of signal-to-noise ratio from electrical engineering—the marking is the signal, the dial background is the noise, and fading reduces the signal strength until noise dominates perception. The mechanism isn’t restoring what’s lost; it’s increasing the difference between mark and background.
Apply a matte-finish protective clear coat specifically formulated for radio restoration to the dial face after cleaning. This eliminates gloss spots that reflect light unevenly and obscure faint markings. If markings remain too dim after coating, selective touch-up with period-correct ink or paint restores legibility without repainting the entire dial. Use a fine-point brush and apply thin layers rather than one heavy coat. Let each layer cure fully before assessing visibility. The touch-up should match the original ink color—typically black, red, or green depending on the manufacturer and frequency bands indicated—and should only fill existing markings, never extend beyond them.
The Antifragile Approach To Retro Radio Dials Collection Maintenance

Build Strength Through Controlled Stress
You want your collection to survive decades without intervention, which means you’re really asking how to stop being reactive. Antifragility, borrowed from systems theory in engineering, means a dial mechanism doesn’t just resist failure—it gets stronger when exposed to the right kind of stress. Most collectors treat their radios like museum pieces: sealed, untouched, isolated. This creates fragility.

The mechanism is simple. A dial that never moves calcifies. Lubricants thicken. Gears and springs lose their travel range. The Bakelite or phenolic dial face becomes brittle from temperature swings in static storage. Instead, operate your radios on a schedule. Monthly tuning cycles—moving the dial through its full range ten to fifteen times—keeps mechanisms loose and lubricants mobile. This controlled stress prevents the real damage: complete mechanical lock or dial cord separation.
Redundancy Beats Perfection Every Time
The common advice says keep spare parts on hand. That’s incomplete. Redundancy in dial upkeep means building systems that fail gracefully, not trying to prevent all failure. A dial cord that breaks mid-use teaches you nothing if you have no replacement mechanism ready. Two identically-built radios from the same era allow you to diagnose problems faster because you can compare behavior directly.
Stock dial cord material, replacement potentiometers, and basic lubricant formulations rated for vintage electronics before they become scarce. Maintain at least one radio in your collection as a reference unit—one you don’t restore aggressively, so you have a baseline for how original mechanisms behave. When dial issues surface on another unit, you troubleshoot against known performance rather than guessing at factory specifications that may not exist in documentation.
Rewiring Your Expectations: Electrical Contact Restoration For Vintage Silvertone Radio Dial
When Oxidation Kills The Signal
You want this working because a broken dial makes the radio worthless to you, and you know the problem isn’t the tube or the transformer. The real mechanism is oxidation. Silvertone radios use brass or copper contacts in their tuning gang capacitors and selector switches, and these metals oxidize when exposed to air and moisture over decades. Oxidation creates an insulating layer that blocks current flow. The dial pointer moves but no station locks in because the electrical signal can’t complete its path through corroded contact surfaces.

Most people reach for sandpaper or steel wool and wreck the contact geometry in the process. You need actual chemistry working for you. Start by identifying which contacts matter: the variable capacitor plates in the tuning gang, the band selector switch terminals, and the IF transformer slugs if they have mechanical tuners. Use a dental pick or soft brass brush under magnification to expose bare metal without deforming the contact surface. The oxidation itself tells you the corrosion depth. Green or black patina means deep oxidation. Bright copper oxide means surface only.
Building Resistance To Failure
Electrical engineering treats contact resistance as the enemy. Contact resistance is the opposition to current flow at the junction between two conductors, and in a radio dial it’s the difference between a station coming in crystal clear and nothing but hum. A corroded contact introduces resistance that either blocks the signal entirely or weakens it so much the local oscillator can’t lock. Your job is to restore conductivity by removing the barrier layer, not by making the contact shiny.
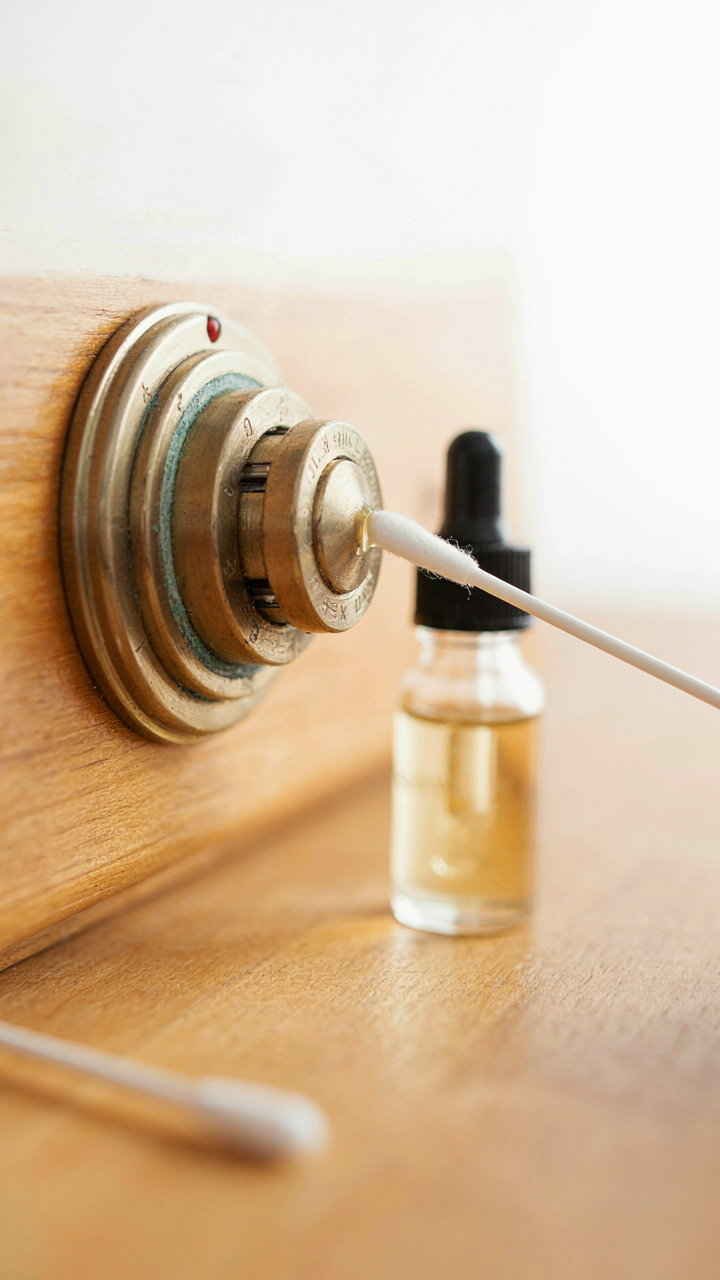
After you clean the bare metal, the contact needs a protective layer to stay stable. Silvertone radios benefit from a thin coat of contact lubricant designed for electronics, not general-purpose oil. DeoxIT or similar products displace moisture and create a conductive barrier that prevents re-oxidation without adding bulk. Apply it sparingly with a cotton swab, work the contact through its full range of motion five times, then wipe away excess. Test the tuning by rotating the dial through the full frequency range and confirming each band locks stations without drift or crackling. Stable connections show up as consistent tuning response across the entire dial.
The Geometry Of Smooth Tuning: Realigning Warped Antique Radio Dials

When Dial Faces Bend Out Of Square
You want this fixed because a warped dial makes you look incompetent as a restorer, and you can’t sell it without addressing the mechanical failure underneath. The mechanism here is simple: dial warping happens because bakelite and printed cardstock expand and contract differently based on humidity and temperature, and they do this over decades. Metal dials warp from impact or from the stress of repeated tuning tension against poorly seated bearings.

Assessment requires a straightedge and patience. Place a metal ruler across the dial face in multiple directions—12 o’clock to 6 o’clock, 3 to 9, and diagonally. Any gap between the ruler and the dial surface tells you how far out of plane it is. Document the direction and magnitude of warp before attempting correction, because understanding where the stress concentrates determines your repair strategy.
Tension And Release: The Core Discipline
Mechanical engineers call this stress redistribution, and vintage radio dial repair uses the identical principle. A warped dial doesn’t need force applied directly to the high point, it needs controlled tension released from the entire surface. Bakelite dials respond to gentle heat and gradual repositioning. Metal dials require bearing realignment first, because the dial itself is often blameless—the warp is symptom, not cause.
Heat bakelite dials to 140 to 160 degrees Fahrenheit using an oven or heat gun held twelve inches away. Warping happens because materials want to return to their original state under the right conditions. While warm, clamp the dial in a press or use dead weight distributed across the face. Let it cool completely before removing pressure, which locks the material in its new geometry. Metal dials need the pivot point inspected and the shaft checked for runout using a dial indicator before any repositioning work begins.
When To Delegate: Knowing Your Limits In Vintage Radio Dial Repair

Problems Beyond Amateur Repair
You want to believe you can fix this yourself because paying someone else feels like admitting defeat. Here’s the mechanism: dial repair involves tolerances measured in thousandths of an inch, and your tools and workspace probably cannot hold them. Mechanical dial systems use cast zinc or stamped steel pointers that ride on friction-fit shafts. If the pointer binds, slips, or refuses to center, the problem lives in either the shaft taper, the pointer’s bore, or the mechanical stop engagement. These require precision tools you don’t own.

Dial cord systems present a harder limit. Early radios use cotton or silk cords under specific tension wrapped around drums and pulleys. The cord degrades, slips off, or binds because of worn pulleys or misaligned drums. Rewinding requires you to understand the original routing, tension specs that vary by model, and the skill to tie knots that hold under thermal cycling. Many shops refuse this work. If you cannot access a service manual for your specific radio model, you’re gambling with time and materials.
Locating Qualified Radio Technicians
Finding someone who still does this work requires thinking like a supply chain manager. Technicians cluster where old radio enthusiasts congregate: vintage radio collector groups, ham radio communities, and restoration forums have actual referral networks. These people know which shops still maintain the skill and which ones claim to but swap parts until something works. Call ahead and ask specifically about dial repair experience, not just radio repair in general. A tech who specializes in cabinet restoration or tube replacement may have zero dial experience.
Ask for evidence before committing. Request photos of past dial work, whether they’ve handled your radio’s brand, and what they charge per hour versus flat rate. Reputable shops give you a written quote after inspection and outline what they’ll replace versus what they’ll restore. Get your radio back in the condition you need, not just working. Most technicians require you to ship the radio or travel to them, so factor in logistics cost and time. The interaction ends when they hand you back the radio with a clean dial and smooth tuning across the full band.
The Cognitive Bias Of Easy Fixes In Vintage Radio Dials
Why Quick Solutions Often Backfire
You want to believe the problem is smaller than it is. That’s the real reason you’re reading this. Dial repair attracts the quick-fix mindset because radios look simple. Apply systems thinking here: a vintage dial mechanism operates as an interconnected chain. One component failure doesn’t isolate. Forcing a stuck dial pointer, tightening a loose spring without diagnosis, or spraying lubricant into sealed gearing creates downstream damage. You trade visible friction for hidden wear inside the mechanism. The pointer moves again. The problem hasn’t resolved.
Most people skip the diagnostic phase because it feels invisible compared to physical action. They see the stuck dial, apply force or penetrant, and call it done. This leaves bearing wear, stripped gear teeth, or misaligned cams intact beneath the surface. Six months later the dial stutters, catches, or fails completely. The original fault doubled. What looked like a shortcut became technical debt you pay in labor hours.
The Methodical Path Wins
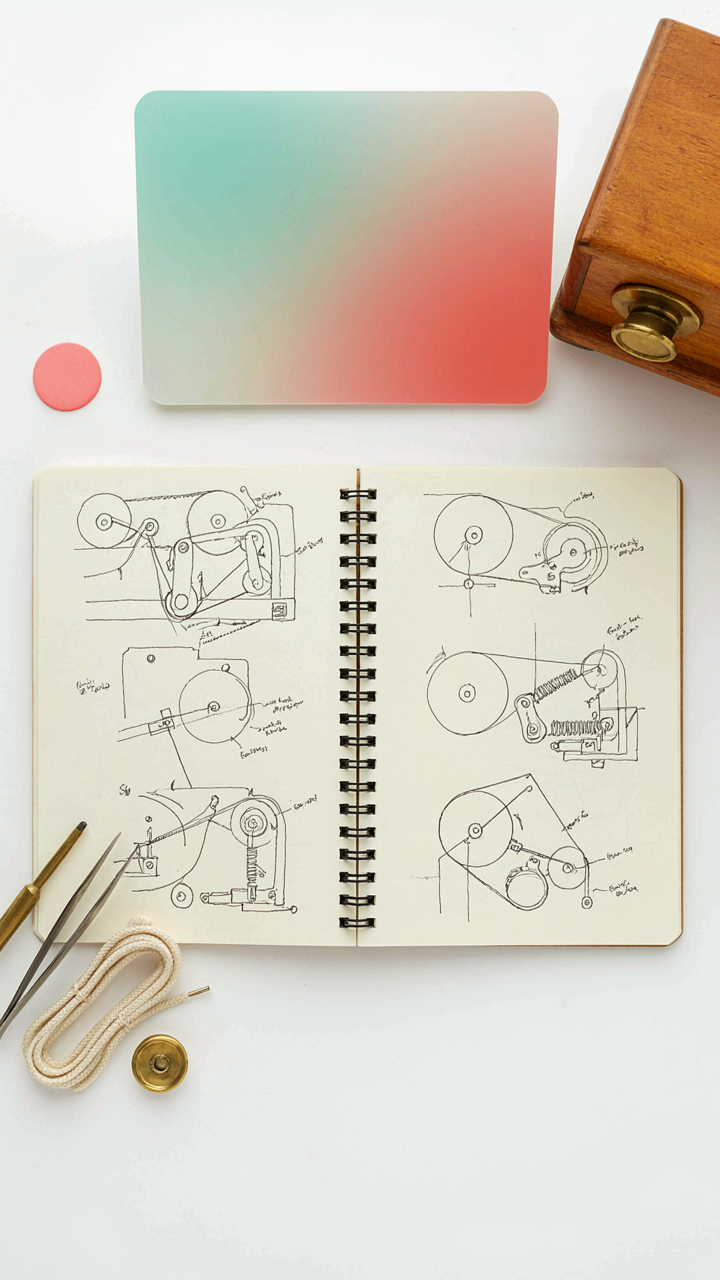
Systematic repair means understanding the dial’s actual state before touching it. Inspect under magnification first. Photograph the assembly in its original position. Remove only what the repair requires. Test after each step rather than assembling fully then hoping it works. This approach takes longer upfront but prevents the cascade of secondary failures that turn a two-hour job into a complete rebuild.
Documentation is your operating protocol. Note how each spring was tensioned. Track backlash in gear meshes. Mark dial cord paths before removal. When you return to reassembly, you’re following a record, not memory. The mechanism responds with smooth, predictable tuning because every component sits in its intended relationship. Dial repair isn’t faster this way. It’s permanently correct this way.
The Real Obstacle Isn’t Broken Parts, It’s Your Resistance To Understanding The System

Most people quit vintage radio dial repair because they treat symptoms instead of causes. You replace a gear. It breaks again. You never learned how the escapement actually works. Stop blaming the radio. Pull one apart today, not to fix it, but to see how friction moves the needle. Once you understand the mechanism, every dial repair becomes obvious. Understanding the system beats tools every single time.



