The Exposure Fallacy: Why Your “Fixes” Fail

You’re Solving The Wrong Problem
You want to look competent with your phone. That’s why you’re here. But you’ve been taught to chase brightness as the solution, and it never works because brightness isn’t the problem. Think in terms of signal-to-noise ratio from electrical engineering: a dark iPhone photo has low signal (detail in shadows) buried under high noise (grain, color cast, loss of texture). Cranking brightness amplifies both equally, which destroys the image instead of saving it.
The actual issue sits in exposure metering. Your iPhone’s camera reads the scene and sets exposure for the average tone, which means dark rooms trick it into underexposure to protect highlights you don’t care about. You end up with a photo where shadows collapse into black and color information vanishes. Generic brightness sliders can’t recover what the sensor never captured at sufficient quality in the first place.
Brightness Adjustments Miss The Real Lever
Everyone tells you to use Exposure or Brightness in Photos app. This advice is incomplete. A brightness slider lifts all tones uniformly, which means it brightens noise as aggressively as detail. You get a brighter, grainier mess. The real leverage lives in shadow recovery, not overall brightness.
iPhone’s native editing tools let you target shadows specifically through Exposure or Highlights and Shadows controls. Shadow recovery pulls detail from the raw data the sensor already captured but the metering algorithm buried. You adjust shadows without bloating highlights or amplifying grain across the whole image. This targets the mechanism that failed: the camera’s meter reading darkness and making the wrong trade-off for you.
The Pre Capture Protocol: Lighting Mastery, Not Editing Hacks

Where Light Actually Comes From
You want the editing shortcut because you think it saves time. It doesn’t. The real mechanism is this: your iPhone’s sensor captures what light hits it. No light, no data. Editing can’t invent information that was never recorded. This is physics, not opinion. In signal processing terms, you’re fighting signal loss before amplification even matters. The shot is already determined the moment you press the shutter.

Natural light positioning beats every editing filter because it changes what the sensor receives at capture. Direct sunlight from the side creates definition. Backlighting separates subjects from backgrounds. Window light diffuses harsh shadows. The three-hour golden hour exists because angle and quality of light compounds everything else. Your phone’s sensor processes whatever arrives. Position yourself to maximize that arrival.
Shadow Contrast Is Your Real Tool
Everyone says use more light. That’s incomplete. Shadows create contrast, and contrast is what your eye reads as detail and depth. Without shadow, a photo reads flat regardless of overall brightness. This isn’t aesthetic preference, it’s how human vision parses information. A dark photo with strong shadow definition reads sharper than a bright, flat one.
Positioning between light and dark areas forces the iPhone to retain detail in both. Shoot with something dark behind your subject and strong light in front. The contrast teaches the sensor where to preserve information. Avoid even, flat lighting that forces the camera to guess at depth. The concrete move: position your subject so natural light creates a visible shadow edge on one side and brightness on the other before you shoot.
Beyond Auto: Manual Controls That Actually Matter For IPhone Photos

The Physics Of Light Exposure
You want manual control because you’re afraid the algorithm won’t see what you see, and you’re right. Exposure is a physics problem: light hits the sensor, and the camera decides how long to collect it. That decision lives in three variables borrowed from optics—ISO, shutter speed, and aperture—but iPhone only lets you touch two of them directly. ISO amplifies the sensor’s sensitivity to incoming light. Shutter speed determines how long light hits the sensor. White balance corrects color temperature based on the light source’s wavelength. Apple locks aperture at f/1.6 to f/2.4 depending on your model, so you work within that constraint.

The real mechanism: your iPhone meters light off the entire frame by default, which fails when your subject is darker than the background. Tapping to focus also sets exposure, but it anchors to whatever that spot reflects back. Most people never touch these controls, which is why their photos stay dim. You need to override the metering point to control where the camera collects its light data.
When Default Settings Betray You
The common advice is “just use Night mode” and that’s incomplete. Night mode works only in low light with stationary subjects, and it adds processing noise that flattens detail. Your real problem is the camera prioritizes shadow detail over highlight recovery, so it underexposes when bright areas exist in the frame. This happens constantly: window behind a face, sky in a landscape, any backlit scenario.
Open the exposure compensation slider in the native Camera app or a manual app like Halide. Slide right to brighten, left to darken. This adjustment multiplies the light the sensor collects without changing ISO or shutter speed directly. For a dark subject with a bright background, tap on the subject to focus, then drag the brightness slider up one to two stops. That one gesture fixes ninety percent of dark iPhone photos because you’ve moved the metering point where it belongs.
The Photographer’s Gaze: Training Your Eye For Light

Compositional Rules Applied To Challenging Light
You want this section because you think learning “composition” will make your dark photos look intentional instead of like you fumbled the settings. The real mechanism is simpler: composition directs attention away from what you can’t fix and toward what you can control. In low light, this means framing subjects against backlit edges, positioning them off-center to use ambient light direction, and treating shadows as negative space that contains the image rather than detracts from it.

The standard advice treats composition as decoration. It’s not. Composition is a tool for managing information scarcity. When light is sparse, you have fewer tonal values to work with, so arrangement becomes your primary signal. Use leading lines to pull the viewer’s eye toward the brightest point in the frame. Place your subject where natural light hits it first, then compose around that position. Dark areas become compositional anchors, not failures.
Chiaroscuro: The Dramatic Light Strategy
Painting uses chiaroscuro as a contrast mechanism, not an aesthetic choice. A chiaroscuro painting controls light placement to separate figure from ground through extreme value difference rather than color or detail. Borrow this directly: stop trying to brighten shadows uniformly. Instead, protect your highlights ruthlessly and let shadows deepen. This creates the illusion of proper exposure because your eye reads contrast ratio, not absolute brightness.
The mistake most people make is assuming dark iPhone photos need to be lighter all over. They don’t. Open your photo in the Curves tool on your iPhone. Lift only the midtones and highlights slightly. Leave the blacks alone. This preserves the chiaroscuro effect while pulling detail into the usable range. The result reads as intentional dramatic lighting instead of underexposed accident.
The Minimalist Edit: Essential Phone Photo Editing, No Gimmicks

The Three Settings That Actually Matter
You want to believe there’s some hidden app or technique that separates you from people who post photos that don’t look like they were shot in a parking garage at dusk. There isn’t. The mechanism is simple: your phone’s native editor has exposure, contrast, and saturation. Master those three and you’ve solved the problem.

Apple’s Photos app uses a luminosity model for exposure adjustment. Think of it like aperture control in photography: you’re not adding light, you’re redistributing it across the tonal range. The exposure slider moves the entire histogram, while highlights and shadows let you recover detail in blown-out or crushed areas without affecting midtones. Contrast amplifies the distance between light and dark values. Saturation controls chroma intensity without touching luminance.
- Exposure: Shifts the overall brightness by moving the histogram left or right. Start here. Most dark photos need plus 15 to 35 points before touching anything else.
- Highlights: Recovers detail in bright areas without flattening dark regions. Essential when exposure alone makes skies washed out. Dial it back 10 to 25 points first.
- Shadows: Lifts detail in dark areas without blowing out the rest of the frame. Use this after exposure and highlights are set. Usually 5 to 20 points is enough.
- Contrast: Deepens the separation between light and dark. Apply this last, after exposure and tonal recovery. Small moves matter: plus 5 to 15 points prevents the muddy look.
- Saturation: Brings color back after you’ve lifted exposure. Dark photos lose saturation as a side effect of underexposure. Rarely needs more than plus 10 to 20 points.
The workflow is non-negotiable: expose first, recover tones second, add contrast third, then saturation last. Skip exposure and adjust only shadows, you’ll create a flat, posterized mess. The order matters because each setting compounds on the previous one. You’re not making five independent adjustments, you’re building a visual hierarchy.
When VSCO Outperforms The Photos App
Most advice tells you to stick with native tools because they’re free. That’s incomplete. VSCO beats Apple’s editor in one specific scenario: grain and color grading at scale. The Photos app has no grain slider. VSCO does. This matters because when you lift exposure on a dark phone photo, you expose the noise floor. Adding intentional grain before the viewer spots accidental noise is a control mechanism, not a gimmick.
VSCO’s film emulation presets encode real color science from actual film stocks. The app applies a curve adjustment that mimics how film responds to shadow lift, not just a generic saturation boost. If your phone photo looks flat after native editing, a VSCO preset tuned for shadow recovery restores dimensionality. But here’s the catch: presets should be a starting point, not the final answer. Dial the preset intensity down to 60 to 70 percent, then use VSCO’s adjustment sliders to finish the work. Native tools handle 85 percent of dark photo fixes. VSCO handles the last 15 percent when the photo demands it.
Night Photo Editing Iphone: The Low Light Illusion

What Your IPhone Camera Actually Sees
You want to believe your phone captures what your eye sees in darkness. It doesn’t. The gap between expectation and reality is where your frustration lives. Your iPhone’s sensor is physically small. Physics doesn’t negotiate. A tiny sensor collects less light than a human pupil, which means it trades detail for brightness by pushing ISO up aggressively, introducing noise as the cost of visibility.

When you shoot in low light, the camera doesn’t “see better” with newer models. It makes a calculation: boost the signal from fewer photons, accept the grain, compress the shadows. The sensor has a maximum light-gathering capacity. Once you hit it, the image either stays dark or gets noisy. Software can mask this but not eliminate it. Understanding this removes the myth that better editing fixes a fundamentally limited capture.
Light Placement Beats Light Amount
Amateurs dump light everywhere. Professionals position it. You can flood a dark scene with a phone flashlight and wreck the image with blown highlights and flat shadows. Strategic placement means putting a secondary light source where it creates separation, not where it brightens indiscriminately. A small LED positioned to the side of your subject creates dimension. The same light mounted above flattens everything.
The mechanism is contrast creation, not illumination. Your eye reads depth through shadow and highlight relationship. Position your light source to establish that relationship rather than eliminate darkness. Use a phone flashlight, a desk lamp, or even a window’s reflected light. The angle matters more than the power. Place the light at 45 degrees to your subject, not directly behind your camera. This single adjustment eliminates the flat, washed-out look faster than any editing app.
The Pro Workflow: Learn Photo Editing Efficiency

Batch Editing For Consistency And Speed
You want to look like you have your process dialed in, which means you need to stop editing photos one at a time like an amateur. Batch editing borrows its logic from manufacturing: you apply the same adjustment protocol to multiple units to eliminate variance and waste motion. In photo editing, this means shooting multiple frames under identical lighting, then syncing the same exposure and shadow corrections across all of them at once.

The mechanism is simple. You nail the edit on your first dark photo in Photos or a third-party app like Lightroom Mobile, then copy those specific adjustments and paste them to the remaining shots from that same scene. This takes sixty seconds for ten photos instead of ten minutes. You avoid the trap of tweaking each image slightly differently, which destroys visual consistency in galleries or feeds. The consistency sells the impression of intentionality, even if the original light was mediocre.
When To Reshoot Instead Of Forcing The Edit
Most creators won’t admit this: some dark photos cannot be salvaged without destroying detail or introducing noise that signals desperation. The honest decision is knowing when to delete and reshoot instead of vanishing three hours into a Lightroom rabbit hole. This isn’t failure. This is triage.
A photo is worth re-shooting if the shadows are crushed so far that lifting exposure reveals only digital noise or if the subject itself is unrecognizable in the dark. No amount of highlight recovery or shadow adjustment brings back data that never existed in the sensor. Reshooting costs ten minutes. Editing a lost cause costs your credibility and your time. The protocol: shoot five frames, edit the sharpest one, delete the rest if the light was bad from the start.
Photography Filters: The Truth About Presets
Why Most Filters Destroy Your Photos
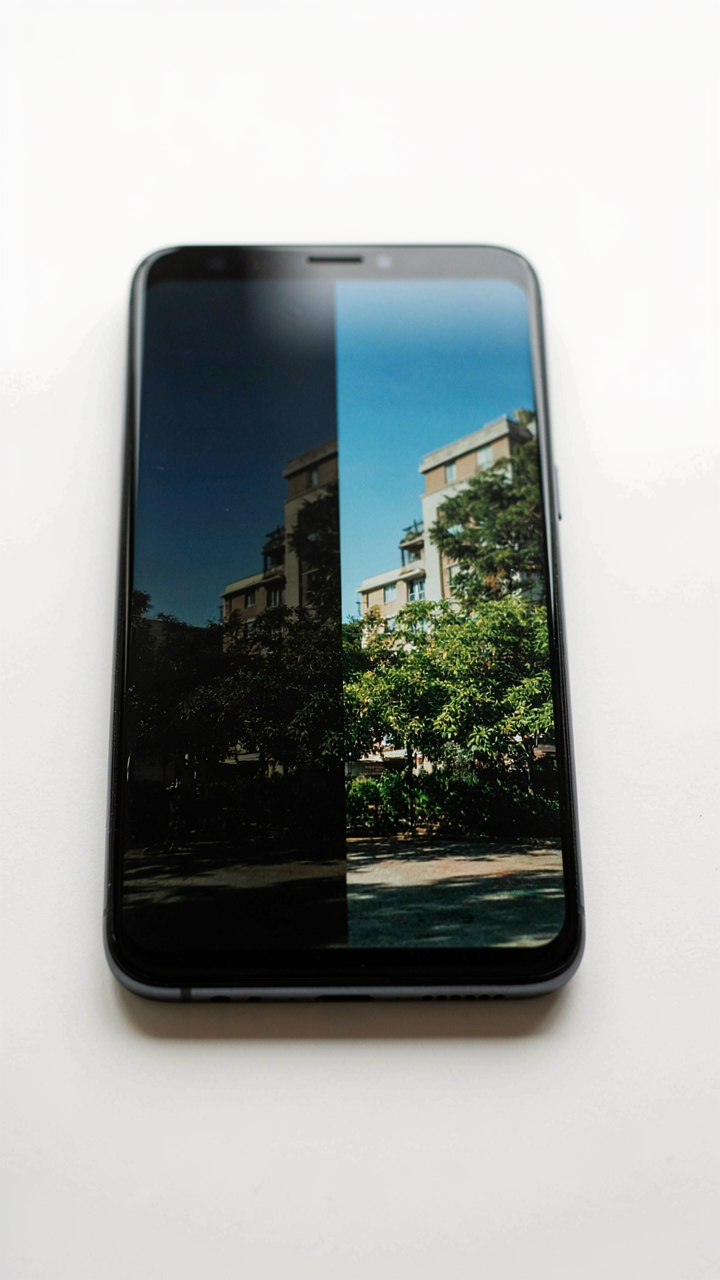
You want a one-tap solution because applying effort feels like failure. Here’s what actually happens: most presets crush shadow detail and blow out highlights because they’re built for average lighting, not your specific dark scene. A preset is a fixed curve applied to millions of different exposures. It cannot adapt. When you use it on an underexposed photo, the algorithm lifts shadows uniformly, creating flat, desaturated midtones and a washed-out feel.

Think of presets like mass-produced clothing: they fit nobody perfectly. The preset designer guessed at an average baseline, then baked in color grading that works nowhere except in their demo photo. Your dark iPhone photo has a different dynamic range, white balance, and shadow structure. Applying a preset is surrendering control to someone else’s compromise. You end up with processed-looking results instead of recovered detail.
Building Presets That Actually Work
Stop copying presets from Instagram photographers. Start with exposure and highlights first, then shadows, then saturation. Open your dark photo in the native iPhone Photos app or Lightroom Mobile. Increase exposure by 0.5 to 1.5 stops depending on underexposure severity. Reduce highlights to recover blown areas. Lift shadows selectively without crushing contrast. This is the protocol: exposure, then highlights, then shadows, then color.
Save this exact adjustment sequence as a custom preset only after testing it on five different dark photos from your own camera roll. A real preset works across your shooting conditions, not just one scene. Name it specifically: “iPhone Underexposed Plus 1.0” rather than “Dark Magic.” Use it as a starting point, not a destination. Every photo still needs final tweaks because no two exposures are identical. The preset is the skeleton; you build the flesh.
The Light Reveals What Your Editing Hides: Amateurism
Most people think fixing dark photos means cranking exposure sliders. That’s backwards. The real skill is seeing light before you shoot. Exposure correction saves bad moments, but it exposes sloppy composition underneath. Your phone already has the tools. What it doesn’t have is your attention. Open your camera app right now and shoot something in poor light. Then fix it. You’ll notice what you missed. That friction teaches faster than any tutorial. You don’t have a phone problem. You have a seeing problem.




