
The “Beginner’s Mindset” Delusion: Why Most DIY Fails
You Don’t Have A Cosmetic Problem
You want to believe this is fixable in a weekend because the alternative is admitting you bought broken equipment you don’t understand. Most beginners treat record player restoration like furniture refinishing. They focus on what’s visible: dust, scratches, worn labels. They ignore what actually determines whether the machine works.
A record player isn’t a decorative object. It’s an electromechanical system where every component depends on precise tolerances and electrical function. Cosmetic restoration creates the illusion of progress while the motor still has seized bearings, the cartridge tracking force is wrong, and the platter wobbles off-center. You’ll spend hours on appearance and own a broken machine that looks respectable.
The Capacitors Are Waiting To Hurt You
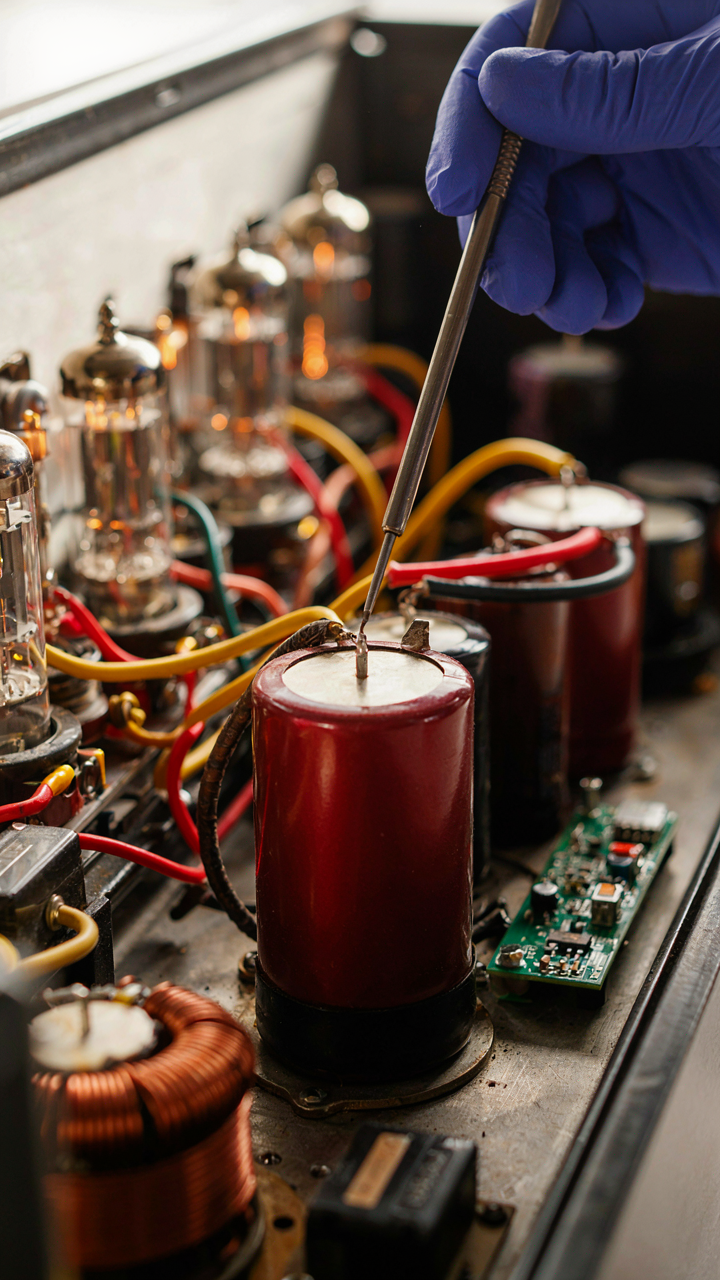
Vintage tube and transistor amplifiers contain capacitors that store electrical charge for decades. This is electronics as a field called “failure by design”—components store energy independent of external power input. Unplug a 1960s record player console for ten years and the capacitors retain that charge. Touch the wrong contact and you’re experiencing a shock that stops your heart.
Every restoration begins with a discharge protocol before touching anything inside the chassis. You connect a resistor across the capacitor terminals systematically. You wait. You verify the voltage reads zero with a meter. You discharge again. Skip this step and you’re not being brave; you’re being careless. The electrical hazard doesn’t care about your intentions.
Beyond Wiping Dust: The True Inspection Protocol For Vintage Record Players

When The Cartridge Actually Fails
You want to believe the machine just needs cleaning. That’s cheaper than replacement parts, and it preserves the fantasy that you got a deal. But most people confuse wear with failure, and that costs money. Think of a cartridge like a measurement instrument in physics: it translates physical motion into electrical signal. When the stylus wears or the cantilever bends, the translation breaks down before the part physically snaps.

A worn stylus won’t scratch records immediately. It tracks with more weight, which means groove damage accumulates slowly over time. Press the stylus gently against a white card and look for a flat spot on the diamond or sapphire tip. If the contact patch is wider than a pinpoint, the stylus is shot. Check cantilever alignment by viewing from the side at eye level. Any visible bend means the cartridge output will skew left or right channel, creating phase issues that sound like depth collapse even through good speakers.
Bearing Wear Tells The Story, Not The Look
Nobody talks about bearing condition because it doesn’t announce itself visually. A turntable can look pristine while the main bearing spindle shaft is worn into an oval instead of a circle. Structural integrity in record players depends almost entirely on how tight tolerances remain. Place the platter on the spindle and press down with one finger. It should resist with firm, even pressure all the way around. Any soft spot or lateral movement means the bearing has play, and that translates to wow and flutter during playback.
Check the subchassis dampers or springs if the unit has them. These isolate the tonearm from vibration. Press the tonearm gently downward and release. It should return to level without oscillating. If it bounces or takes three seconds to settle, the elastomers have degraded and lost their damping property. A failing subchassis is not a cosmetic problem. It becomes audible within five minutes of listening.
The Power System Paradox: Your First Real Hurdle In How To Restore Vintage Record Players
Capacitor Replacement Critical Thinking
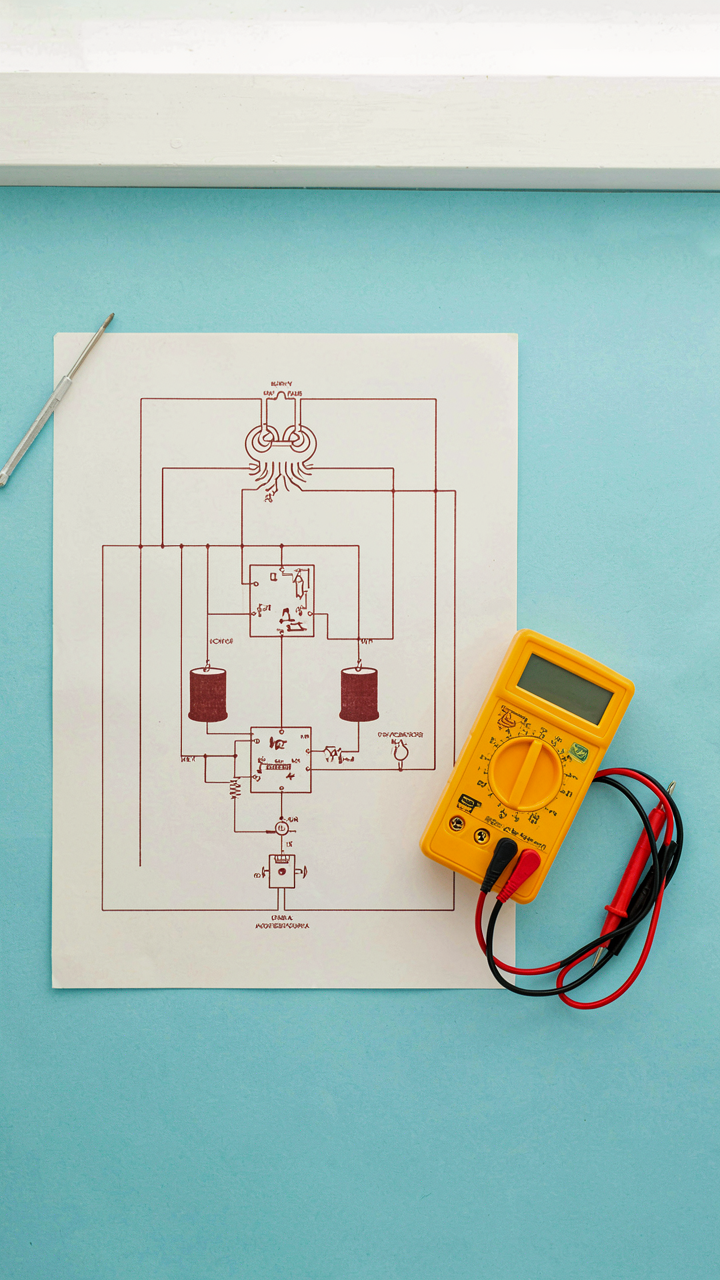
You want to skip this section because you think capacitors are simple and you’re afraid you’ll break something expensive. Here’s the mechanism: capacitors store electrical charge and degrade over time, especially in machines that sat unused for decades. Heat, humidity, and the electrochemical breakdown of the dielectric material kill them. You can’t resurrect a dead capacitor. You replace it.

The common advice says “replace all capacitors.” That’s incomplete. Vintage record players use electrolytic capacitors in the power supply to smooth voltage ripple, and film capacitors in audio circuits to block DC while passing AC signals. Electrolytic caps fail predictably and should be replaced. Film capacitors in signal paths degrade too, but they fail differently and often retain acceptable performance longer. Pull a schematic. Test voltage at key points before and after replacement. Don’t swap every component out of habit.
Transformer Health And Ripple Effects
Borrow thinking from electrical engineering: impedance is the resistance a component offers to alternating current. A transformer’s impedance determines how well it handles load changes without voltage sag. When you fire up a vintage turntable after years of dormancy, the transformer either stabilizes the power or it doesn’t. A degraded transformer can’t hold the line. Your motor speed drifts. Your preamp noise floor rises.
Transformers fail from heat stress, core lamination separation, and insulation breakdown in the windings. You inspect by listening for buzzing under load, measuring voltage output under no load versus full load, and checking for physical damage like burn marks on the core. If output voltage sags more than ten percent under load, the transformer is marginal. Replacement is your only fix. Source a period-correct spec or a modern equivalent with matching VA rating and output voltages. Matching the original transformer prevents cascading failures in the power supply circuit.
The Drive Mechanism Doctrine: Understanding Analog Motion
Belt Versus Idler Wheel Fundamentals
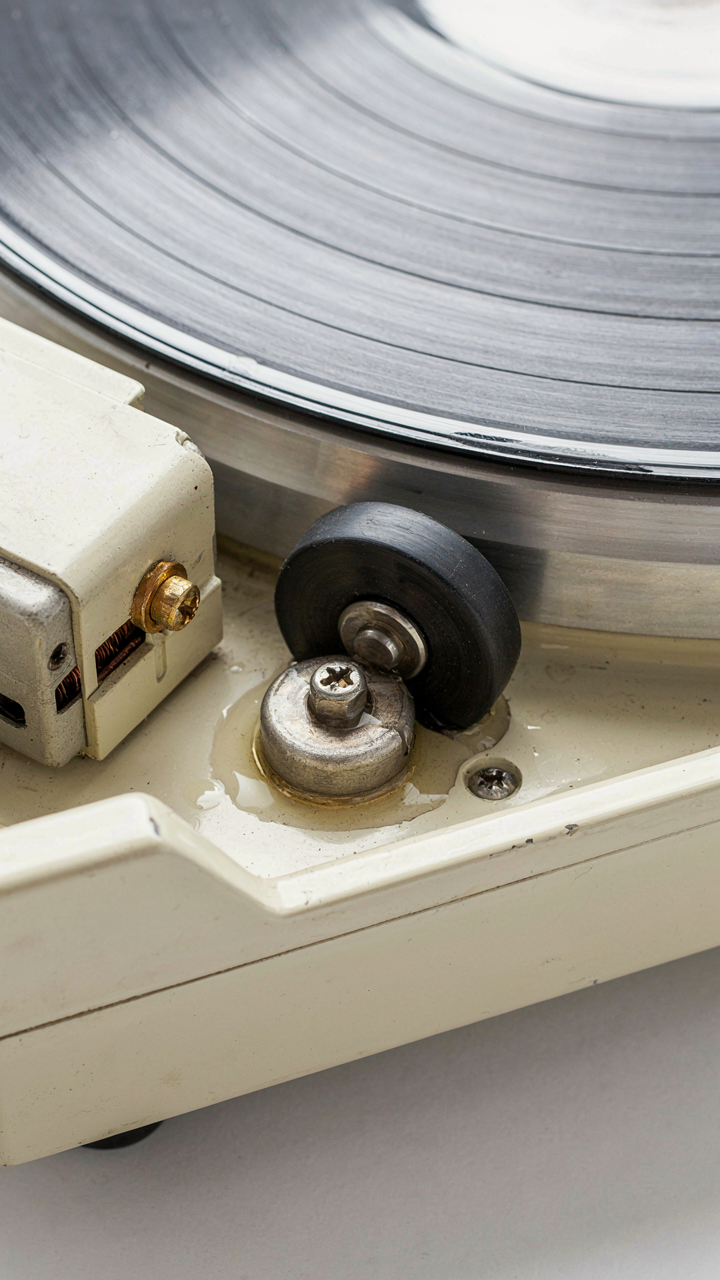
You care about this because you want to know which turntable is “better” without admitting you’re afraid of making the wrong repair choice. Stop. The mechanism difference is absolute, not subjective. A belt drive isolates the motor vibration from the platter through a rubber or synthetic cord; an idler wheel transfers motor torque directly through a small wheel pressing against the platter’s inner rim. Belt systems emerged in the 1970s specifically to solve a physics problem: motor vibration bleeding into audio. Idler wheels dominated from the 1950s through 1960s because they were cheaper and required less precision engineering.

The practical difference matters for restoration work. Idler wheels demand consistent pressure and a clean rubber surface, or speed wavers and flutter occurs. Belt drives fail differently: the cord stretches, loses grip, or dries out and cracks. Neither design is inherently superior. An idler wheel turntable in good condition will outperform a neglected belt drive. The restoration path you choose determines your labor cost and parts availability. If the idler wheel is cracked or the belt is slipping, you have specific, different fixes.
Lubrication Science, Not Just Oiling
The common advice is wrong: you don’t just “oil the motor.” Lubrication serves three separate functions in a turntable drive system, and using the wrong lubricant for the wrong part will destroy tolerances and create drag. Physics calls this viscosity management. The motor bearing needs light machine oil to reduce friction without pooling. The idler wheel (if equipped) needs a specific durometer rubber compound, not oil, because oil softens rubber over time. The turntable spindle journal bearing tolerates slightly heavier oil but still demands cleanliness because metal-on-metal contact at the nanometer level determines speed stability.
Temperature and material compatibility determine everything. A turntable operates at room temperature in an enclosed chassis, so you avoid synthetic oils that break down differently than mineral oils in that thermal envelope. The spindle bearing sits under modest load, spinning at constant RPM, so it tolerates slightly thicker viscosity than a motor bearing under variable load. Apply 3-in-1 oil or general machine oil to the motor. Use light sewing machine oil on the spindle bearing. Never introduce oil where a rubber idler wheel contacts metal, and never assume one lubricant covers all three points.
The Cartridge Tonearm Symbiosis: Precision You’re Missing

How Tracking Force Actually Works
You want the restoration to sound “right” without understanding why it matters. Tracking force is borrowed from physics—specifically, the relationship between pressure and contact area. When your stylus sits in the groove, downward force determines whether it floats above micro-detail or crushes into damage. Most people set it and forget it. They shouldn’t.

The tonearm’s counterweight isn’t decorative. It creates a mechanical balance that determines how hard the stylus presses into the groove. Too light: the stylus skates across and misses information, plus it jumps on warped records. Too heavy: it grinds the groove walls and wears both stylus and record. Manufacturers spec tracking force for each cartridge model, usually between 1.5 and 3 grams. You measure it with a scale designed for this purpose—a postal scale works, but a tracking force gauge gives precision without guesswork.
Recognizing Stylus Wear Before It’s Too Late
Visible wear happens faster than most people admit. A worn stylus looks rounded or flattened under magnification instead of maintaining a sharp elliptical or conical tip. Audio impact follows: high frequencies disappear first, then midrange detail collapses. The groove walls of your records take cumulative damage with each play using a degraded stylus.
Inspect your stylus every 40 to 50 hours of play time using a jeweler’s loupe at 10x magnification or higher. You’re looking for the original profile—either a point or a small ellipse depending on cartridge type. If the tip is visibly dulled, replace it immediately. Continuing to play with worn styluses turns your record collection into practice records that sound acceptable but lack the definition a restored player should deliver.
Acoustic Resonance: Applying Architectural Principles To Restoring Vintage Stereo Furniture

Cabinet Dampening: Materials And Methods
You want your restored player to sound expensive. Here’s what actually matters: the cabinet either absorbs energy or reflects it. Most people treat dampening as decoration instead of structural necessity. The real mechanism is simple. Sound waves hit the cabinet walls and cause them to vibrate at their own frequencies, which then radiates back into the room and muddies what the speaker produces. You’re not trying to make the box disappear. You’re controlling which frequencies it reinforces and which it kills.

Vintage cabinets from the 1950s through 1970s used particle board, plywood, or veneer over softwood frames. These materials naturally resonate. Adding mass and absorption material stops unwanted vibrations. Use materials that convert kinetic energy to heat. Rockwool, fiberglass batting, and natural cork work because they trap air in a matrix. Don’t use foam alone, which only absorbs midrange frequencies and leaves the problem frequencies untouched. Line the inside walls of the cabinet with a layer of dampening material roughly one to two inches thick, focusing on the largest panels where resonance modes develop strongest.
Vibration Isolation Strategies From Civil Engineering
Civil engineers isolate buildings from earthquakes using a principle called decoupling. Apply the same logic: separate the turntable from vibrations traveling through the floor or cabinet structure. The turntable motor, platter, and tonearm are precision instruments that lose accuracy when external vibrations reach them. Isolation isn’t about softness. It’s about creating a frequency break point where vibrations below a certain hertz pass through but higher frequencies don’t propagate upward into your playback system.
Use isolation feet or platforms that sit between the turntable and cabinet base. Rubber or cork compounds work well because they provide non-linear damping. The target is isolation at around 10 to 15 hertz, which catches most room vibrations and floor noise. Avoid spongy foam feet, which compress too easily and shift under the turntable’s weight. Heavy decoupling platforms filled with sand or shot work better than light ones because mass itself resists acceleration. Mount the turntable on isolated feet first, then set that assembly on a stable surface inside the cabinet. Test by tapping the cabinet while playing music and listening for buzzing or tonal changes that indicate insufficient isolation.
Rewiring Realities: Ditching The “Patch It” Mentality For Old Record Player Safety

Soldering Technique Beyond YouTube Hacks
You want the restore to look professional so people respect your competence. The real mechanism is that bad soldering creates intermittent failures that destroy components downstream, turning a two-hour fix into a weekend of troubleshooting. Most tutorials skip the fundamentals: temperature control, solder composition, and joint inspection matter more than speed.
- Iron temperature: Use 350-375°C for vintage turntable work. Too cold and you create cold joints that fail under vibration. Too hot and you damage PCB traces and component leads irreversibly.
- Solder composition: 60/40 tin-to-lead or lead-free equivalent. Old equipment used 60/40 primarily. Match the era when possible to avoid thermal expansion mismatches between dissimilar metals.
- Joint appearance: A good joint looks like a smooth cone, not a blob or a dull gray dome. Dull gray indicates insufficient heat or oxidized flux. Shiny indicates proper flow and cooling.
- Flux application: Use rosin core solder for electronics work, never acid flux. Acid flux corrodes traces and capacitors. Clean residue with isopropyl alcohol after cooling to prevent long-term corrosion.
- Wire stripping and tinning: Strip insulation carefully to avoid nicking copper. Tin both wire ends before joining. This reduces joint resistance and heat time at the component itself.

Every joint you make either holds for decades or fails under thermal stress from repeated power cycling. Test continuity with a multimeter after soldering cools completely. A solder joint that looks right but reads high resistance will cause hum, dropout, or total channel failure within weeks.
Grounding Principles And Fault Protection
The physics of electricity has a term called “return path,” and your vintage turntable’s safety depends entirely on it. Current must return to ground reliably, or stray voltage finds the path through the user instead. Most beginners rewire without understanding that grounding is not decorative.
The power cord ground wire connects the chassis to earth. The signal ground connects all audio circuits to a common reference point, usually the chassis itself. These are not the same circuit and must not be confused. If you bridge them incorrectly, you create ground loops that produce 50 or 60-hertz hum and expose users to electrical hazard. The cartridge signal ground, preamp ground, and power amp ground all require a star point: a single physical location where all grounds converge before returning to the power supply. Route power cables away from signal cables by at least three inches to prevent induced noise. Check for continuity between the grounded prong on the power outlet and the metal chassis with a multimeter set to resistance mode. Any break in this path means the unit lacks fault protection if the hot wire touches the chassis during a component failure.
The RCA Record Player Cabinet Restoration Conundrum: Surface Vs. Structure
When Veneer Repair Becomes The Real Work
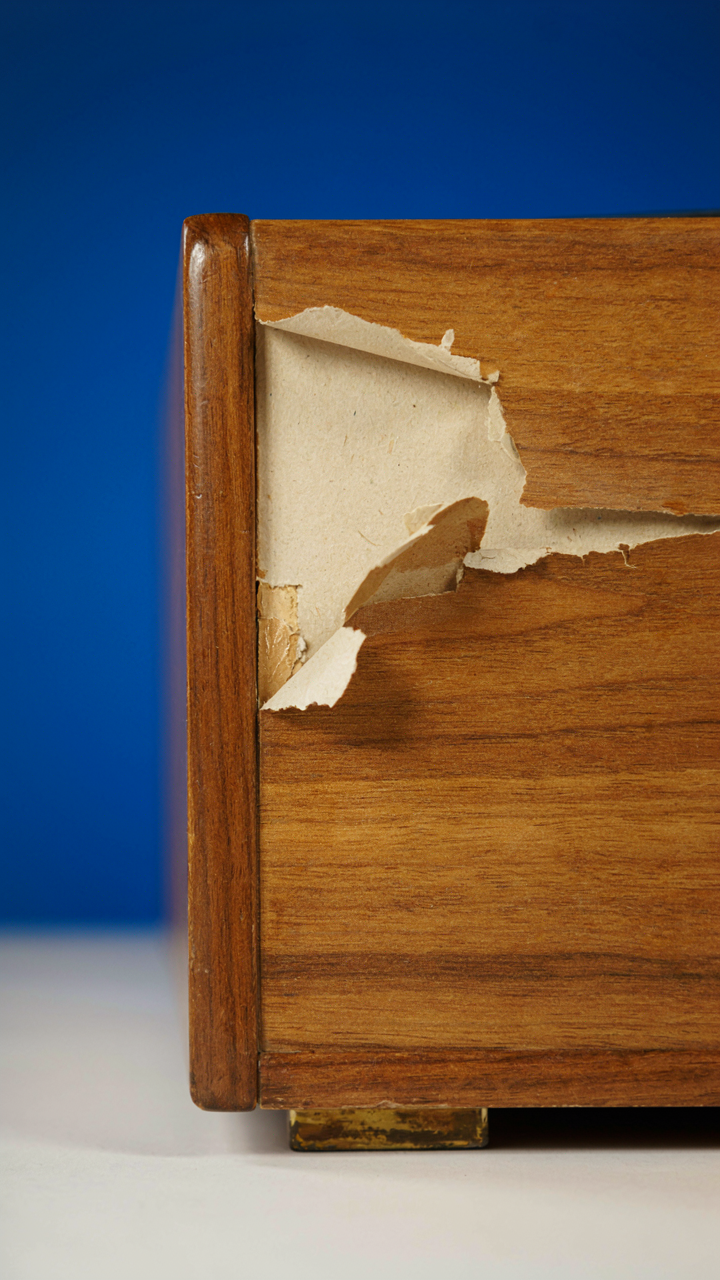
You want the cabinet to look restored without admitting you’re terrified of structural failure underneath. The mechanism is this: veneer damage signals moisture penetration that’s already compromised the substrate. RCA cabinets from the 1940s through 1960s used particleboard and plywood cores wrapped in walnut or mahogany veneer. Surface cracking means water got past the finish. Patching veneer while ignoring what caused the damage is cosmetic theater.

Real veneer repair demands identifying the moisture source first. Check cabinet corners, the bottom rail, and anywhere felt pads once sat. These areas absorb water and cause veneer to lift and crack. Strip back the damaged section, dry the substrate completely, assess the core integrity, reglue with period-correct adhesive, then clamp. Rushing to sand and stain over soft or rotted wood creates a cabinet that fails again in two years.
Checking What Nobody Sees First
Structural integrity operates like load-bearing walls in architecture. A cabinet’s frame distributes weight and stress through corner blocks, rails, and joinery. RCA used dowel joinery and sometimes mortise and tenon construction depending on the model year. Stress cracks radiating from joints signal that loads shifted, usually from past water damage or poor storage. You must reinforce these before cosmetic work, or the cabinet will separate.
Press your thumbnail against corner blocks and internal rails. Soft wood that dents easily means the structure won’t hold. Pull gently on the cabinet sides to check for flex or creaking. Excessive movement means joints have failed. Disassemble the cabinet, clean out old glue and debris from joints, dry thoroughly, reglue with modern wood glue rated for furniture, and clamp for 24 hours using cauls to distribute pressure evenly.
Testing And Calibration: The Unsung Heroes Of Diy Record Player Restoration

Reading Voltage Like A Language
You’re here because you’ve replaced parts and want proof you didn’t waste money on them. That’s the real driver. But proof only comes from measurement, and most people skip this entirely. Electricity operates on signal flow, a concept from systems engineering. In record player restoration, signal flow means tracing voltage from the power supply through the preamp to the output. A multimeter becomes your diagnostic instrument once you stop treating it like a magic wand and start using it systematically.

Set your meter to DC voltage first. Test across the power supply capacitors to confirm they’re delivering the correct rail voltage. Most tube players run 250-330V on the B+ rail. Solid-state machines typically need 12-24V on the power rails. Wrong voltage here kills everything downstream. Move methodically through the circuit: preamp input stage, tone control section, output buffer. Document each reading on paper. The pattern of voltage drops reveals where the signal is breaking down or where a component isn’t conducting properly.
Measuring What Your Ears Think They Hear
Audio output measurement isn’t about ego or certification. It’s about separating what you perceive from what’s actually happening. A turntable can sound acceptable and still be producing distorted or unstable output. Borrow or buy an audio interface with USB connection. Run the turntable output into the interface and use free software like Audacity to capture a 30-second sample. Record the same test track across multiple sessions over a week. Consistency matters more than absolute numbers. If output levels drift by more than 2dB between sessions, your power supply is weak or a coupling capacitor is failing. If total harmonic distortion climbs above 3 percent at moderate volume, your preamp circuit has a problem you haven’t found yet. Stop guessing and commit to one precise measurement protocol: same test record, same stylus pressure, same output level setting every time.
Beyond Aesthetic Fixes: The Longevity Mandate For Vintage Record Player Restoration Tips

Keep The Machine Running, Not In A Display Case
You want restoration to feel complete because you spent money and time. The real mechanism is different: decay accelerates when machines sit idle. Preventative maintenance borrows from systems engineering, where “mean time between failures” measures how long before a component breaks. Your turntable has the same rule. Dust accumulates faster in stored machines. Lubricants separate and thicken. Motors lose their torque memory.
Schedule maintenance on intervals, not urgency. Clean the tonearm and cartridge every fifty plays. Inspect the platter bearing quarterly. Replace the stylus before it degrades from worn diamonds scratching grooves. Oil the motor bearings annually using the exact weight specified in the original manual, not guesses. Run the turntable monthly even if you don’t play records, because friction and movement prevent rust and bearing lock-up. This is not optional if you claim the machine is restored.
The Right Part Costs What It Costs
Most advice says “find NOS parts online.” That’s incomplete. NOS stock from forty years ago sat in warehouses with temperature swings and humidity spikes. New old stock means nothing about condition. Buy parts from restorers who test them, not collectors liquidating inventory. A replacement stylus from a reputable source costs fifteen to forty dollars and will track properly. A cheap replacement from an unclear origin costs eight dollars and damages records. You don’t restore a turntable to destroy albums.
Original manufacturers still produce components for models that sold in volume. Technics supplies replacement platters and tonearm wires. Audio-Technica produces cartridges compatible with common headshell mounts. Thorens dealers stock bearing assemblies. Contact manufacturers directly before searching third-party sites. Document your exact model number and year. Request a parts compatibility list. Pay the marked price and get what works, or chase cheap parts and rebuild the same machine twice.
The Real Obstacle Isn’t The Player’s Age; It’s Your Unwillingness To Truly Understand Its Inner Workings

Most people treat vintage record player restoration like a repair checklist. Oil this, replace that, move on. That’s how you stay mediocre. The shift happens when you stop seeing the turntable as a broken thing and start seeing it as a mechanical system with a logic you need to understand. Every worn component tells you exactly what failed and why. Today, disassemble the tonearm on whatever player you own and trace how it connects to the cartridge. Feel the mechanical relationships. That single act destroys the fear that keeps beginners paralyzed. Curiosity beats YouTube tutorials every time.



