
The Minimalism Protocol: Unclutter Your Engineering Workspace
Stop Buying Tools You Don’t Use Yet
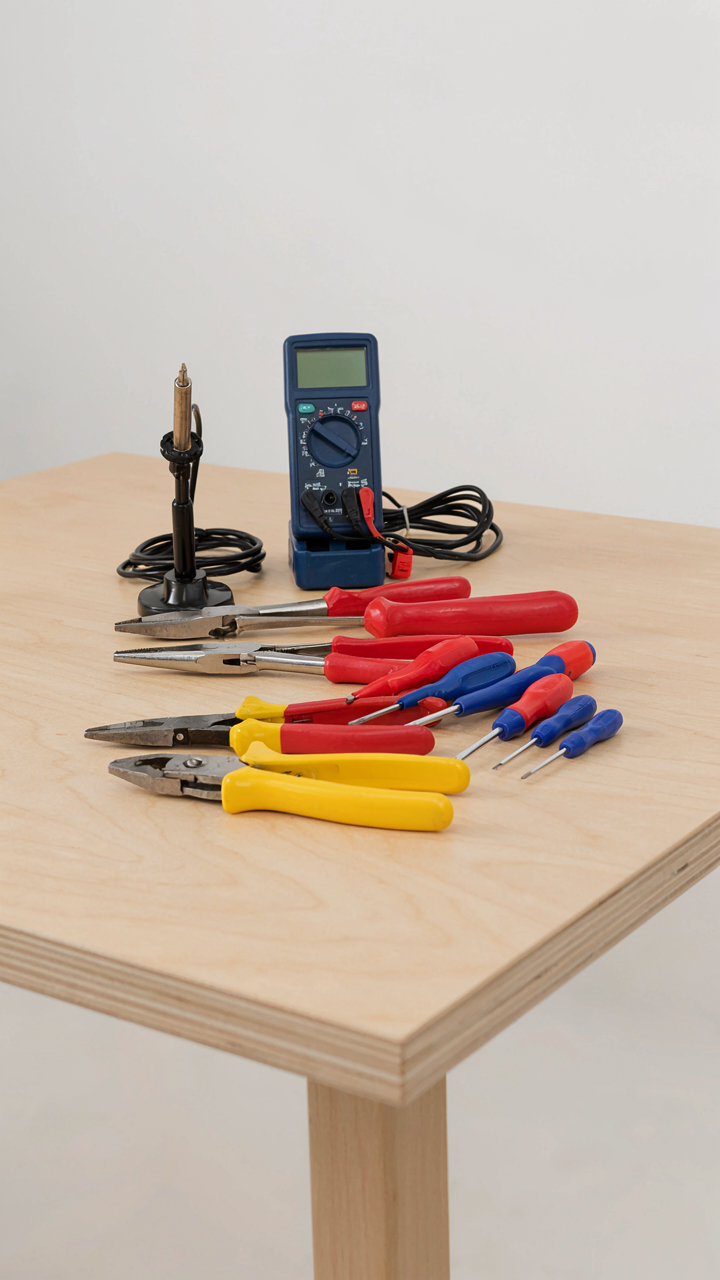
You’re afraid of being stuck mid-project without the right tool. That fear drives you to buy preventatively, which is how workbenches become storage units. The mechanism is simple: your brain treats potential future problems the same as present ones, so you optimize for a scenario that hasn’t happened. Small spaces punish this bias immediately. You need to reverse it. Core tools only means soldering iron, multimeter, needle-nose pliers, wire strippers, and a basic screwdriver set. Everything else enters your bench through earned necessity, not speculation. When you actually encounter a missing tool, you buy it then. Your workspace stays functional instead of cluttered.
The “just in case” inventory multiplies faster than you notice because each tool seems harmless alone. But thirty “maybes” consume half your usable surface. Constraint forces clarity. If your bench has four square feet of work space, you cannot afford tools waiting for hypothetical jobs. This discipline also sharpens your troubleshooting skills because you learn to work within limitations rather than accumulating your way out of problems. Start with what you touch weekly, not what you might touch next year.
One Tool Does Multiple Jobs
Military logistics borrowed the concept of force multipliers from physics, where leverage amplifies output from minimal input. Your workbench needs tool multipliers. A precision screwdriver set with interchangeable bits replaces five individual drivers. A digital multimeter measures voltage, resistance, and continuity, replacing three separate meters. An adjustable helping hands holds components and boards without dedicated clamps eating space. Don’t buy specialized gadgets when general tools work. This isn’t about cheapness. It’s about density. Small spaces reward tools with high utility-to-footprint ratios.
The common advice here is wrong. People recommend buying “quality” single-purpose tools because they’re “better.” They’re better at one thing and useless at everything else, which is expensive in a small space. A good adjustable wrench handles more fastener sizes than three fixed wrenches combined. Desoldering wick removes solder joints and cleans flux. A breadboard solves prototyping without needing a permanent layout station. Every tool you choose must earn its real estate through multiple applications. This is how you build a bench that works instead of one that looks complete.
Verticality Advantage: Redefining Your Electronics Workstation Footprint

Wall Mounted Storage Solves Your Real Problem
You’re scared of wasting money on a workbench that doesn’t fit your space. The mechanism is simple: gravity works downward, but walls work upward. Unused vertical real estate costs you nothing to claim. Pegboards, magnetic strips, and shelves exploit the one dimension most people ignore when they measure their bench area. You’re not gaining space. You’re redistributing existing space toward tools instead of air.

Pegboards hold small components, hand tools, and test leads at arm height. Magnetic strips catch screwdrivers, tweezers, and metal-frame calipers without any fastener installation. Steel or aluminum shelves above your work surface store parts bins, reference materials, and larger equipment. The key is proximity: tools within one reach motion cut assembly time and error rates. Mount strips 12 to 18 inches above your main work surface, not higher. You need sightlines and speed, not decoration.
Stackable Units Compress Your Inventory Footprint
Everyone says “use vertical storage,” which is useless advice because it ignores density. The real leverage is stacking: placing identical modular units directly on top of each other without wasted support structure. Economics calls this the multiplier effect. You buy one drawer unit, then buy three more of the exact same unit. Stack them. Your footprint stays constant. Your capacity quadruples.
Modular bin systems with uniform dimensions lock together without shifting during component retrieval. Transparent plastic drawers let you scan contents without opening each one. Label each drawer by component type or project, not by random organization. This matters because your brain recalls location faster than it recalls searching. Keep stacks no higher than five units so your fingertips reach the top drawer. The moment you need a step stool, you’ve created friction that kills workflow efficiency.
Dynamic Zones: The Micro Workshop Method

Carving Out Functional Territory
You want to believe a single folding table works for everything because admitting otherwise means you’ve failed at minimalism. The mechanism is simpler: your brain switches contexts slower than your hands can move tools. Borrowing from manufacturing lean principles, you apply “cellular layout” to your bench—each zone handles one primary task, reducing motion waste and cognitive load. Soldering lives in one corner. Testing occupies another. Assembly claims a third. This isn’t decoration. It’s the difference between finding your iron in three seconds versus thirty.

The zones don’t need physical separation. A 24-inch deep bench splits cleanly into three 8-inch strips running front to back. Left side gets heat and fumes—soldering station with ventilation access. Center holds components, test equipment, and your reference material. Right side stays cool for assembly work requiring steady hands. Your brain recognizes these territories instantly. Context switching drops. Output climbs. You stop wasting mental energy relocating your entire operation mid-project.
Collapse And Reset In Minutes
Common advice says “keep your workspace organized.” That’s useless. What actually matters is the teardown speed. You have a small space. Other people use it. The question isn’t whether you’ll need to reset—it’s how fast. Build your zones around tools that stay in place and materials that stack vertically. Your soldering iron rests in the same spot every time. Your multimeter returns to the same drawer. Components live in labeled bins that slide into wall-mounted racks. Your setup becomes reversible.
The protocol is specific: soldering tools get stored in a fireproof container with compartments—iron, solder, desoldering braid, cleaning supplies. Test equipment stays in a dedicated case that slides under the bench or onto a shelf. Assembly materials use shallow trays that nest together. When you finish, each zone resets to its baseline in under five minutes. Your small space becomes usable again. Next session, you rebuild the same zones from muscle memory. Consistency compounds into speed.
Power Grid Optimization: Electrical Workbench Essentials
Where Your Power Strip Should Actually Live
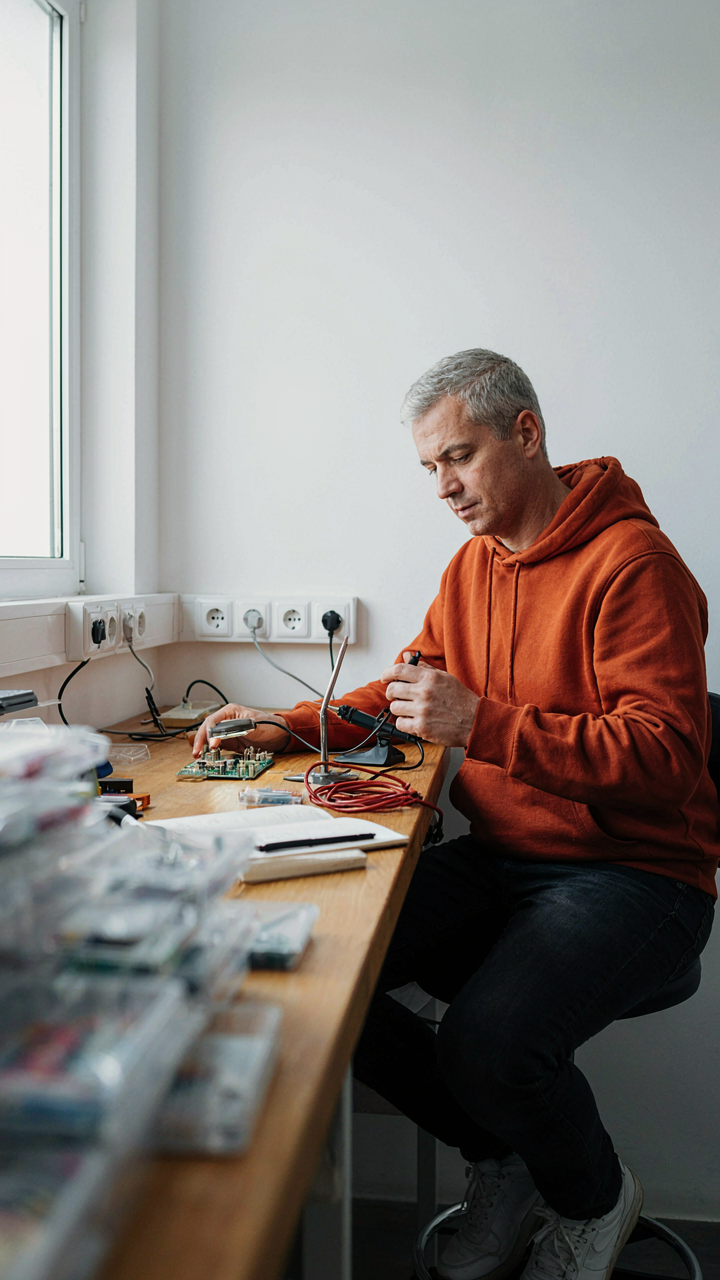
You want your workbench to look controlled because you think it reflects competence. The real mechanism is simpler: a power strip in the wrong spot forces you to route cables across your work surface, which creates trip hazards and kills your usable desk real estate. Mount or position your strip at the back corner of your bench, elevated slightly off the surface. This keeps the outlet face accessible without the cables dominating your active work zone. Your soldering iron, multimeter, and lamp all plug in from behind, not from the front where they crowd your hands and components.

The second move is frequency-based positioning. Heavy-draw tools like soldering stations and fume extractors go on one strip, low-draw devices like meters and lights on another. This prevents voltage sag when you fire up high-current equipment. Use a strip with individual switches for each outlet, not one master switch. You kill idle gear without unplugging, reducing phantom load and giving you granular control over what’s drawing power right now. Position the second strip perpendicular to the first, creating an L-shape that distributes current delivery across your workspace and prevents one failed outlet from taking out your entire setup.
Cable Routing That Doesn’t Fail
Most cable management advice is theater. People talk about “tidiness” when the real problem is that loose cables create electrical and physical hazards, plus they tangle every time you move equipment. Use cable clips rated for your wire gauge, not zip ties that degrade insulation over months. Route cables in distinct channels: one for AC power, one for signal lines, one for ground returns. Keep these separated by at least two inches. This prevents crosstalk and makes troubleshooting faster when something acts wrong.
Behind your bench, cables should run vertically down to the power strips, never horizontally across the back where they trap dust and heat. Use adhesive-backed clips every 6 inches on vertical runs, every 12 inches on horizontal runs. Label both ends of every cable with a small tag. When you need to swap a tool or trace a short three months later, you save 15 minutes of tracing. At the workbench edge, create a cable tray using a simple metal clip channel or even a rubber-lined PVC pipe cut lengthwise, securing excess coils there. This keeps working cables from dragging across your components while you solder or assemble.
Ergonomic Imperatives: Sustained Focus At Your Engineering Desk

The Chair, Lighting, And Monitor Setup That Actually Works
You want to believe discomfort is temporary, that you’ll push through it. You won’t. The mechanism is simple: sustained posture stress tanks your focus within 90 minutes, and a distracted engineer makes errors that cost hours to debug. Your chair needs a lumbar curve that matches your spine’s actual shape, not the marketing copy. Most office chairs flatten your lower back—that’s the problem everyone misses.

Your monitor height matters more than your chair. Place the top of the screen at eye level when you sit naturally. Your eyes should drift down 15 to 20 degrees to see the center. Lighting comes from the side or behind you, never in front. A single adjustable desk lamp over your left or right shoulder eliminates screen glare and lets you see solder joints clearly. Position it so your own shadow doesn’t fall on the work surface.
Movement Breaks That Preserve Cognitive Performance
The borrowed principle here comes from neurobiology: neuroplasticity requires state change. Your brain can’t sustain intense focus on fine motor work indefinitely without triggering attention collapse. A five-minute break every 45 to 60 minutes of soldering or component placement isn’t laziness—it’s system maintenance. Stand, walk, or stretch. The motion resets blood flow and resets your visual accommodation distance.
The protocol is mechanical, not motivational. Set a timer. When it fires, you stop. Walk to another room or stand and touch your toes. Don’t check your phone—that keeps your brain in task mode. Your next session will have sharper focus and fewer mistakes. This compounds over a full workday into measurable time savings because you’re not reworking solder joints or replacing components you damaged while fatigued.
The OODA Loop Of Organization: Rapid Electronics Bench Adaptation

Observe Your Actual Friction Points
You want to feel organized without admitting you’re disorganized, so you buy containers and assume they’ll fix it. They won’t. The OODA loop comes from military strategy—Boyd’s decision cycle of Observe, Orient, Decide, Act—and your bench’s bottleneck is the observation phase. Most people skip it entirely. You need to watch yourself work for three days minimum. Notice where your hands go first. Notice what you reach for twice. Notice where you stop to search.

The real data isn’t in your head. It’s in the dead time. When you solder, do you fumble for solder wire? When you probe, do you hunt for leads? When you unsolder, do you dig through drawers for wick or braid? That friction repeats every single session and compounds across months. Your job is to document it coldly, without justification. Not “I should organize my resistors better.” Instead: “I reach for 10k resistors four times per project and they’re currently in a bin on the lower shelf.” That’s the mechanism you’re revealing.
Iterate The Smallest Change First
The common advice here is wrong: don’t reorganize everything at once. That’s theater. It burns energy and reverts within two weeks because you didn’t solve the real problem. Your first change should be surgical. Move one category of tools closer to your primary work zone. If you solder constantly, solder iron, wire, solder, and wet sponge live within arm’s reach. Not organized. Just proximal.
Run one full project session with this single change. Time it. Note the difference. This isn’t about speed improvement for its own sake—it’s about proving the mechanism works so you trust the next iteration. Once that sticks, move the second category. Each cycle takes two to three days before you implement the next change. Slow iteration beats rapid reorganization because your muscle memory adapts instead of fighting you.
Digital Integration: Expanding Your Electronic Workbench Beyond Physical Space

Simulation Tools: Design Without The Parts
You want to feel like you’re “doing real work” without spending money or taking up space. That’s the trap. The mechanism is this: simulation lets you test circuit behavior before you breadboard anything, which means you catch design errors at zero cost and compress your actual bench time to assembly and debugging only.

SPICE simulators like LTspice and Ngspice run transient analysis, frequency response, and stress testing on schematics. You build the circuit in software, run it through realistic conditions, and watch voltage and current behavior in real time. This catches topology problems that wouldn’t show up until you’d wasted an hour at the bench. The simulation sits on your laptop. No hardware required.
Digital Documentation: The Real Workbench Multiplier
This is where most people fail. You don’t document for future you. You document to free up mental RAM right now so you can think about the next problem instead of remembering which pin does what.
- Schematic versioning: Use KiCad, EasyEDA, or Altium to store schematics as files. Label every net, every value, every component reference. Export PDFs alongside the working file so you have a locked visual record of what you built and when.
- Code repositories: Store all firmware, scripts, and configuration in Git (GitHub, GitLab, or self-hosted). This gives you history, branches for experiments, and a searchable log of every change you made and why.
- Project notes and logs: Keep a plaintext or markdown file in your project folder. Record calibration values, pin mappings, quirks you discovered, and fixes that worked. This becomes your reference when you return to the project six months later.
- Bill of materials automation: Generate BOMs directly from your schematic tool. Tag suppliers and part numbers. This eliminates transcription errors and speeds up ordering for revisions or replication.
- Image capture protocol: Photograph working setups, oscilloscope traces of correct behavior, and debug states. Store these with timestamps in your project folder. Visuals beat memory every time when troubleshooting repeats.
The system works because documentation becomes searchable infrastructure. You stop relying on your workbench as storage and start using it as a tool. When you need to rebuild or modify a design, you pull the files, cross-reference the notes, and start exactly where you left off. Your digital layer becomes the real workbench.
The “Less But Better” Philosophy For Your Electrical Workshop Design

Buy Once, Use Forever
You want permission to spend money without guilt. Here’s the mechanism: cheap tools hide their true cost in friction. Every time you grab a loose probe, recalibrate a drifting meter, or fight a flimsy clamp, you lose focus on the actual work. That lost focus compounds. One quality multimeter outlasts ten budget ones because you’ll actually use it consistently instead of abandoning it for something that works.

A Hakko soldering iron, a Fluke multimeter, precision screwdrivers, and calibrated tweezers form your core. These aren’t luxury items. They’re force multipliers that pay for themselves in time saved and mistakes prevented. Precision tools reduce rework. Rework kills small space setups. Buy the tier that professionals choose, not the consumer tier.
Clear Your Bench, Clear Your Mind
You’ve accumulated components like a hoarder accumulates mail: slowly, without intention. Electronics takes inventory discipline that most makers skip entirely. Keep active projects on the bench. Everything else lives in labeled, sealed containers in storage. Half your workspace problems vanish when you remove 60 percent of what sits there.
Start by sorting: what do you use monthly, what did you buy for one project three years ago, what’s dead or counterfeit. Donate or recycle the third category. Container the second. The first stays accessible. This isn’t minimalism theater. This is the difference between a bench that works and one that controls you.
Your Biggest Obstacle Isn’t The Bench Size; It’s Your Unexamined Assumptions About What Constitutes A Real Workshop

You’re waiting for permission to start. You think a real workbench demands a garage, a budget, a perfect setup. Stop. Move your soldering iron to the corner of your desk today. One tool. One project. The workshop exists the moment you stop performing the role of someone who has a workshop and start acting like someone who builds things. Your space doesn’t validate you. Your output does.