The Illusion Of DIY Synth Kit

Kits Are Assembly Instructions With Markup
You want to feel like a builder instead of a consumer. The mechanism here borrowed from economics is called value extraction through perceived agency. A DIY synth kit doesn’t teach you synthesis—it teaches you to follow a schematic someone else wrote, solder components someone else selected, and call it creation when you’re done. You’ve paid a markup of 40-60% over component cost for the privilege of following instructions that remove decision-making at every stage.
Real DIY means choosing oscillator topology, understanding why a Moog ladder filter behaves differently than a Steiner-Parker design, and troubleshooting when something doesn’t work because you designed it that way. Most kits eliminate this entirely. They pre-select cheap capacitors, lock you into one signal path, and ship with a manual that treats you like you’re assembling furniture. The assembly fee is what you’re actually paying for—not education or capability.
The Cost Of Prefab Thinking
Kits promise time-to-satisfaction. What they deliver is learned helplessness disguised as accomplishment. Once your kit synth is built, you’re locked into its design. Want a different filter? Can’t modify it without understanding filter theory, which the kit never forced you to learn. Want to add CV control to a parameter? The PCB wasn’t designed for it. You hit a wall fast because the kit was designed to reach completion, not to be a platform for growth.
The actual cost compounds over time. You build the kit, feel satisfied for a month, then realize you need something the kit can’t do. Now you either hack it badly or buy another kit. You’ve spent money and hours learning how to follow instructions instead of learning electronics. Start with a single oscillator design you build from theory, not a kit. Build it wrong. Fix it. That’s the education.
Beyond The Manual: True “How To Make A Synth Kit”

Reading The Circuit, Not Just Following Steps
You want to build something and have it work immediately without understanding why. That’s the real motive here. The mechanism is this: a schematic is a map of energy flow, not a list of assembly instructions. Most builders treat schematics like IKEA diagrams—match the picture, tighten the bolt, move on. That guarantees you’ll hit a wall the moment something doesn’t work or you want to modify behavior.

A schematic shows voltage paths, signal routing, and how components interact. Start by tracing signal flow from input to output, not by reading left to right. Identify where audio enters, where it gets shaped, and where it exits. This takes maybe fifteen minutes per circuit. The payoff is immediate: you’ll spot design choices instead of just following wiring diagrams. You’ll know why a capacitor sits in that spot and what happens if you swap its value.
Isolating Function From Form
The common advice says learn component symbols and move on. That’s incomplete. What matters is understanding what each part actually does to the signal. A resistor doesn’t just exist—it limits current flow and creates voltage drops that shape tone. A capacitor doesn’t just sit there—it blocks DC while passing AC at different rates depending on frequency.
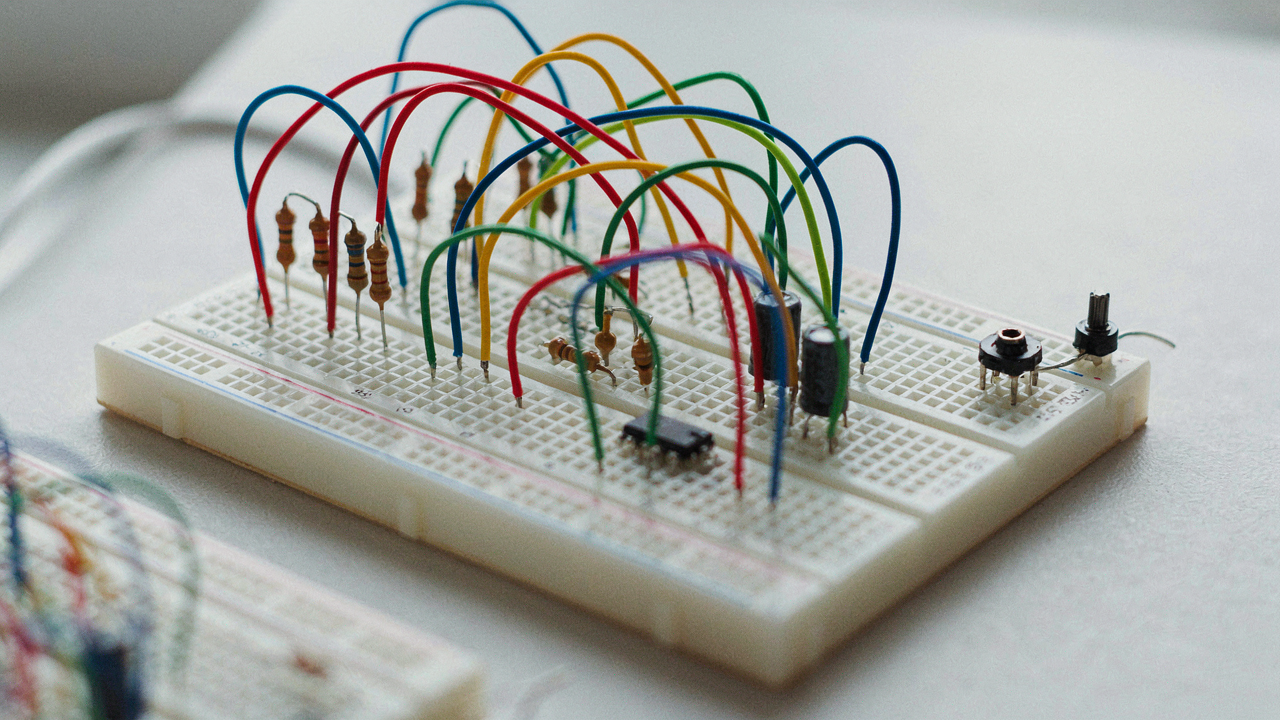
Map each component to its core function: voltage control, filtering, oscillation, or gain staging. Once you see the pattern, you can predict behavior without guessing. A 100k resistor in series with a capacitor creates a specific time constant. Lower the resistor value, the time constant shrinks. This isn’t theory—it’s a mechanical relationship you can test on a breadboard before soldering anything permanent. Write down the function of every part before assembly, then verify your predictions once power flows through.
The Engineer’s Mindset: DIY Electronic Music Synthesizer
Breaking Sound Into Voltage
You want to feel like you understand something complex without actually building it. That’s the real draw here. The mechanism is this: sound is voltage moving through time, and voltage obeys the same physics laws as water pressure or electrical current in any circuit. Once you accept that oscillators, filters, and envelopes are just voltage control systems, not magical black boxes, you stop building randomly and start designing intentionally.

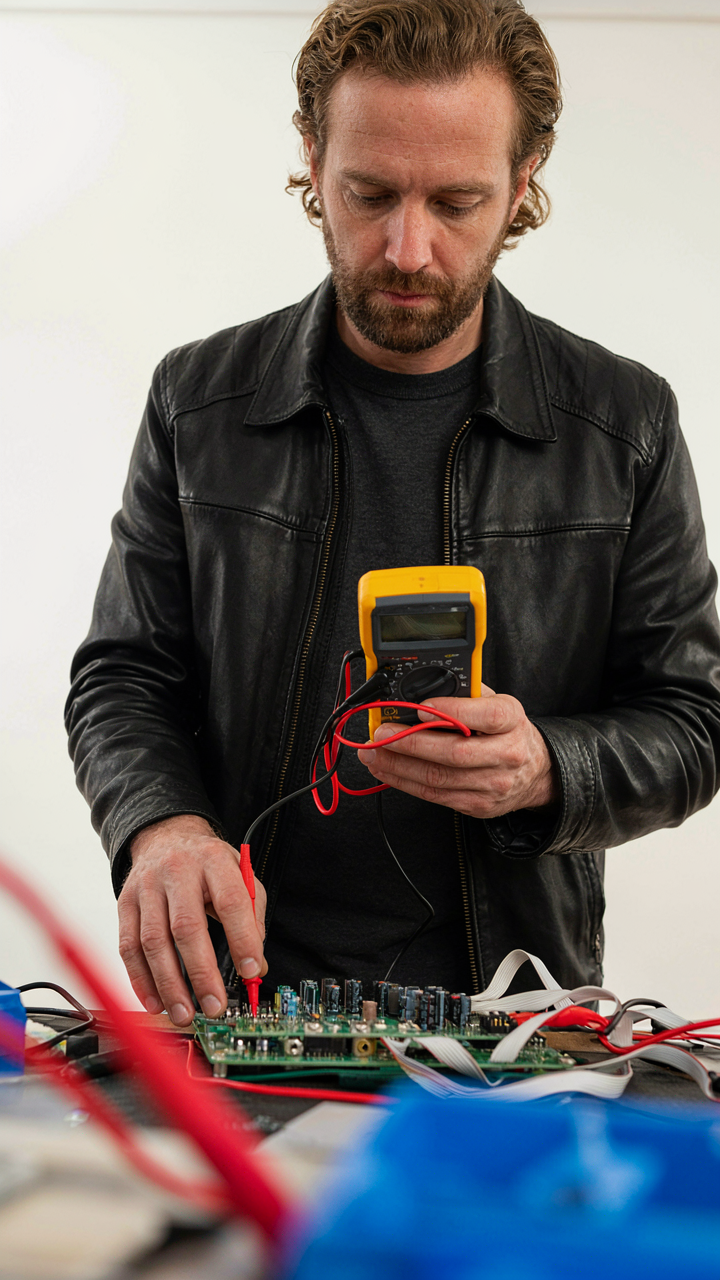
Most DIY synth builders skip this step and jump straight to wiring. They treat circuits as recipes instead of systems with cause and effect. Voltage is the language. An oscillator generates repeating voltage waves at audio rate. A filter removes frequencies by attenuating voltage at specific points. An envelope shapes amplitude by controlling how voltage rises and falls over time. Learn to read voltage behavior on a multimeter and you’ve unlocked the entire framework.
Translating Schematics Into Physical Reality
Schematics are maps, not instructions. The common advice says “follow the schematic exactly,” but that misses the actual skill: understanding why each component sits where it does in the signal path. Think of circuit design like topology in mathematics, where the relationships between components matter more than their exact placement on a board. Move a capacitor one position and you change the circuit’s behavior completely.
The translation from diagram to soldered board requires you to recognize signal flow. Audio enters stage one, gets processed, feeds into stage two, and exits as output. Every component either amplifies, filters, routes, or controls that signal. Wire accordingly. Test voltage at each stage with a multimeter. If you see the wrong voltage level somewhere, you’ve found where the design breaks. This is not intuition. This is systematic troubleshooting that catches mistakes before they become expensive solder joints.
The “Keep Synth Kit” Protocol: Obsolescence Resistance

Build For Swap Outs, Not Replacement
You’re afraid you’ll spend money on a kit and it’ll feel dead in three years. That fear is valid. The real mechanism is this: closed systems trap you. Borrow from industrial design’s concept of modularity. A modular synth kit lets you replace one oscillator without scrapping the entire voice architecture. Each component sits in its own slot. You upgrade the power supply without touching the filter. You swap a broken envelope generator for a newer one without redesigning your patch bay. The economics work backward from typical gear. Instead of buying a new synth, you buy new modules. Your core investment survives.

The kit structure matters more than the components inside it. Standardized formats like Eurorack or Kosmo exist because they solve the modularity problem at the format level. Buy a kit built around one of these standards. It means a decade from now, modules from different makers still fit your frame. You’re not locked into one manufacturer’s ecosystem. You’re buying into an infrastructure that other people maintain and expand. That’s the difference between a keeper and a museum piece.
Repairability Starts With Documentation
Everyone says “choose quality parts.” That’s lazy advice. Real repairability means you can diagnose what broke and fix it without reverse engineering the whole unit. The mechanism is information architecture. Your kit needs a schematic you can actually read. Not a blurry PDF. Not a circuit board with no labels. Build or buy kits where the designer published the full schematic, component values, and PCB layout. You need to know exactly what went wrong and exactly what part to replace.
Repair ability is not a feature you add later. It’s a decision made during design. Some kit makers include test points on the PCB. Some provide a service manual with troubleshooting steps. Some use through hole components instead of surface mount, which you can solder by hand. These are not accidents. They are choices. When you evaluate a kit, ask whether you can repair it with a soldering iron and a multimeter. If the answer is no, you’re buying a disposable instrument.
The Iteration Loop: DIY Synthesizer Kit Evolution

Variation, Selection, And What Actually Survives
You want to know if your kit design choices matter. They do, but not for the reason you think. Evolutionary biology gives us the framework: variation produces mutations, selection pressure kills the weak designs, and retention locks in what works. Your DIY synth kit succeeds or fails by the same mechanism. You build ten oscillator circuits slightly different ways. Nine sound muddy or unstable. One rings clean and tracks pitch reliably. That one gets retained. You don’t keep all ten because they’re “diverse.” You keep the one that survived the selection pressure of your ear and your meter.

Most builders confuse iteration with experimentation. They tweak randomly and call it learning. Real iteration means you change one variable, measure the output, and decide: keep or discard. When you swap a 100k resistor for a 47k in a VCO’s frequency range circuit, you’re not exploring. You’re selecting. The oscillator either tracks better across octaves or it doesn’t. Document which value wins. That’s retention. This is how Moog’s ladder filter became the standard, how the Steiner-Parker topology emerged as superior to competing designs, and how your kit design compresses years of trial into months.
Build, Test, Discard What Fails
The common advice here is “prototype everything first.” That’s backwards. Prototyping slows you down if you’re chasing sound. Real speed comes from building actual circuits, patching them into your kit, and hearing what breaks. A breadboard simulation of a filter won’t tell you if the PCB layout creates noise coupling. A schematic review won’t reveal if your envelope generator needs more output current than theory predicts. You learn what matters by building and failing fast.
Set a testing protocol before you start: oscillator stability across temperature and voltage, filter resonance range without self-oscillation, envelope timing accuracy, and output noise floor. Build one module. Test it against those metrics. If it passes, document the component values and PCB trace routing. If it fails, identify the specific failure mode, change one thing, and retest. Don’t redesign half the circuit chasing a hunch. Change one component or one trace width. Record the result. Your iteration log becomes your design bible for the next kit revision.
Beyond Standard: DIY Synthesizer & Sequencer Kits

Control Interfaces That Actually Work
You want a synth that feels expensive and responds like your hands matter. The real mechanism is feedback latency. In control systems engineering, latency is the delay between input and output. Your DIY synth kit’s responsiveness lives or dies on how fast the microcontroller processes a knob turn, button press, or CV input and translates it to sound. Most builders skip this entirely and wonder why their instrument feels dead.

The common advice is to slap arcade buttons and potentiometers on any enclosure. Wrong. Start by choosing your control input method based on CPU overhead. Analog potentiometers require ADC conversion, which takes processing time. Capacitive touch sensors require filtering to avoid jitter. Rotary encoders need debouncing logic. Map each input type to your microcontroller’s capability before building the physical interface. Test the latency with a simple tone generator first, then iterate on the enclosure design once you know the electronics work.
Sequencing That Responds To Intent
Stop thinking of sequencing as a separate module bolted onto your synth. That’s backwards. Your DIY synth kit’s sequencer should inherit the same architecture as your sound engine. If your synth uses a master clock, your sequencer must read from that same clock source without drift. If your synth processes CV signals, your sequencer must output quantized CV on the same resolution and timing precision.
The integration point is the timing protocol. Some kits use hardware timers for clock generation. Others layer software timing on top of the microcontroller’s clock cycle. Decide which approach your chosen platform supports, then build the sequencer around that constraint, not against it. Mutable Instruments’ Grids module and Elektron’s sequencers both use external clock inputs for this reason. Your DIY version needs the same flexibility to play well with external gear or stay locked if you want it standalone.
The Art Of Imperfection: Your First DIY Synthesizer

When Mistakes Become Your Sound Design
You want permission to build something that sounds “professional” on your first try. That’s not what happens here, and that fear is exactly why you need to understand the mechanism. Borrowed from signal processing: noise is just information you haven’t learned to use yet. Most DIY synth kits generate unwanted artifacts—oscillator drift, component tolerance variance, breadboard crosstalk—because physics doesn’t care about your intention. These aren’t failures. They’re the price of admission.

The common advice says “minimize noise.” Wrong. Noise in a DIY synth kit is acoustic fingerprint data. A hand-soldered oscillator will never track perfectly across octaves like a factory unit. A breadboard patch will pick up 60Hz hum. These deviations become your signature because they’re unrepeatable and they’re yours. Early synth pioneers like Alvin Lucier and Pauline Oliveros didn’t fight circuit instability—they composed with it. Your kit’s inconsistencies are not obstacles to overcome. They’re the raw material of a sound nobody else will ever replicate.
Turning Glitches Into Intent
Start documenting what your circuit does wrong. Record three minutes of each oscillator running alone through your patch. Note the frequency drift rate, the harmonic content of the noise floor, the way filter resonance peaks shift under load. This becomes your reference library. When you later hear that same sonic character emerge in a patch, you’ll recognize it as yours, not as a mistake to fix.
The protocol is simple: patch something, record it, listen back with the intention of keeping it rather than correcting it. A 555 timer oscillator will never hold pitch like a precision VCO. Use that. Stack it with a stable oscillator and the beating pattern becomes a modulation source. Crosstalk between digital and analog sections of your kit? That’s a bonus LFO nobody designed. Build your first patch around these accidents, not despite them.
The Open Source Advantage: Synth Diy Wiki & Beyond

Leverage Community Knowledge And Schematics
You want the shortcut without looking like you’re taking one. That’s the real reason you care about open source synth documentation. The mechanism is simple: thousands of builders have already solved your problems and published the solutions for free. You’re not starting from theory anymore.

Community wikis and schematic databases compress decades of trial-and-error into searchable formats. Synth DIY communities have mapped every common circuit topology, documented component tolerances, and flagged the traps beginners hit. This isn’t opinion sharing. This is accumulated engineering truth.
- Synth DIY Wiki: Centralized schematics and build guides for classic circuits like the Steiner Parker filter and Moog ladder filter, with component substitutions already tested.
- GitHub Synth Repos: Open source hardware projects with full documentation, PCB layouts, and firmware. Builders contribute modifications that solve real problems.
- Electronics Textbooks On Demand: Foundational circuits documented in free PDFs covering oscillators, envelope generators, and VCAs with derivations intact.
- Discord And Forum Archives: Searchable records of builders solving edge cases: noise floor issues, component sourcing problems, and calibration procedures.
- Build Logs And Modifications: Documented iterations showing what changed and why. This teaches you the reasoning, not just the schematic.
The value isn’t in the information itself. It’s in the pre-filtered signal. Someone already tested whether that alternative capacitor works, whether that power supply design is stable at 9V, and how to bias that op-amp correctly. You pull the answer and move forward instead of debugging for weeks.
Contribute Your Own Designs And Modifications
Most builders hoard their designs because they believe scarcity creates value. It doesn’t. What creates value is the feedback loop. When you publish your build, you get tested in the wild. People find your mistakes. They push your design further. Your next version gets better.
Contributing doesn’t mean sharing perfect work. It means publishing schematics, PCB files, and build notes early enough that others can iterate on them. Document what you changed and why. State your component choices and the trade-offs you made. This accelerates the entire community’s output. Your modification becomes someone else’s baseline. They improve it. The cycle compounds.
From “How To Make A Synth” To “How To Invent Sound”

Replication Is The Trap Door
You want to build a synth because you think mastering someone else’s design will unlock your sound. It won’t. The real mechanism at work here mirrors evolution in biology: variation drives selection, not imitation. Most DIY synth builders stop at copying a Moog ladder filter or a classic VCO topology because the internet canonized them. You’re not learning synthesis—you’re learning reverence for dead engineers.

The gap between replication and innovation is where your actual voice lives. Start with known circuits, but immediately ask what breaks when you change component values, swap topology sections, or feed signals in unexpected paths. A 1K resistor instead of 10K in a filter feedback loop doesn’t just alter the sound—it forces you to understand why that part of the circuit exists. This is how you build from understanding instead of from a schematic.
Your Instrument Reflects Your Constraints
Stop thinking your synth should do everything. Constraints breed innovation faster than capability does. You chose DIY because you wanted control, but most builders interpret that as “more options.” Wrong. Every parameter you add dilutes your ability to exploit what actually matters. A synth with a fixed filter cutoff but variable resonance forces you to compose differently than one with 15 modulation sources.
Map your artistic output against the physical limits of what you’re building. If you work in drones, a synth with one oscillator and deep modulation capability serves you better than a 4-voice polysynth. If you chase percussive sounds, design for fast envelope times and minimal sustain. The instrument you build should make your worst ideas impossible and your best ideas inevitable. This is where equipment becomes extension rather than obstacle.
The Real Limitation Isn’t Your Soldering Iron; It’s Your Imagination Confined By Instructions

Most people build a DIY synth kit exactly as the manual demands, then wonder why it sounds like everyone else’s. The circuit board doesn’t care about your obedience. Swap a resistor value. Patch the filter feedback into itself. Break the intended signal flow. Your next move: grab your kit and deliberately modify one component before you even power it on. The best sound you’ll ever make lives one decision away from following the rules.



