
The Material Science Of Cabinet Decay
How Wood Dies From The Inside
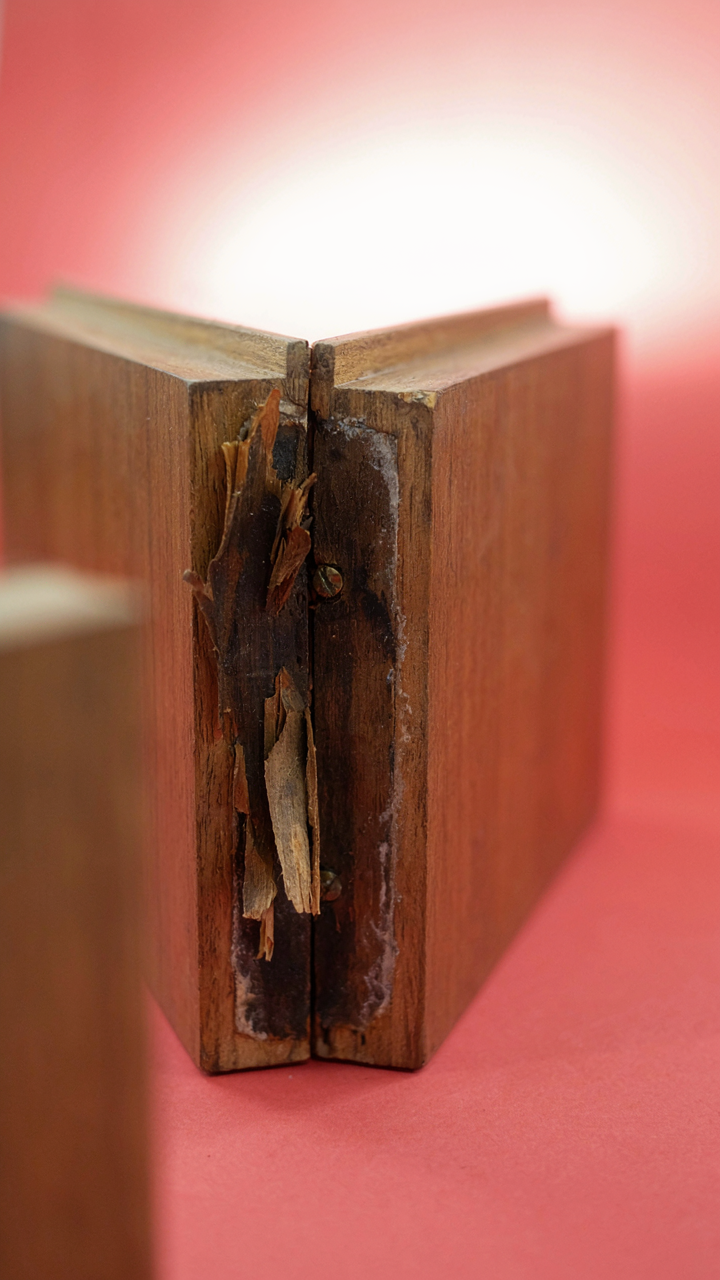
You want to restore a vintage speaker because you’re afraid it’s already too damaged to save. Here’s what actually happens: wood degradation follows the same thermodynamic principle as rust on metal. Moisture moves into wood fiber, temperature cycles force expansion and contraction, and the wood loses its structural integrity from repeated stress. The cabinet doesn’t rot all at once. It fails in layers, starting where you can’t see it.
Vintage speaker cabinets typically use plywood or solid wood panels glued with hide glue or early synthetic adhesives. These adhesives fail when moisture penetrates the wood grain. Water absorption causes the wood to swell; when it dries, it shrinks unevenly. This cycle repeats every season in an uncontrolled environment. The cabinet corners separate first because they bear the most stress during these cycles. A cabinet stored in a basement or garage experiences accelerated degradation compared to climate-controlled space. You assess cabinet integrity by checking for soft spots, separation at joints, and visible warping before you touch anything else.
When Veneer Separates, The Whole Frame Fails
Veneer detachment isn’t a cosmetic problem. It’s a structural failure that signals deeper cabinet compromise. When veneer lifts from the substrate, it exposes the core material to moisture penetration, which accelerates the decay you can’t yet see.
Most vintage speaker cabinets use thin wood veneer over plywood or particle board. The glue bond breaks when moisture creeps between layers or when wood movement exceeds the adhesive’s tolerance. This happens fastest at edges and corners where adhesive coverage was thinnest during manufacturing. Once veneer lifts, the exposed substrate absorbs moisture like a sponge, compromising the joints and bracing that hold the cabinet rigid. The cabinet loses its ability to control resonance, and the speaker performance degrades even before you power it on. To stop further damage, you must re-glue separated veneer or remove it completely before addressing the underlying wood condition.
Beyond Shine: True Cabinet Refinishing For Acoustic Integrity

Strip Back To Bare Wood First
You want the cabinet to look restored, but that’s not why you’re actually here. You’re afraid a refinish will kill the sound. The mechanism is simple: every layer on that cabinet either dampens or reinforces vibration. Old finishes, dust, and oxidation act as unintended damping agents. They change how the wood resonates. You strip them because you’re resetting the acoustic equation, not because bare wood looks better underneath.

Most restoration guides skip this and sand straight over contamination. Wrong move. Old lacquer, shellac, and wax don’t sand evenly. They gum up, clog your paper, and leave you with an inconsistent substrate that won’t accept new finish uniformly. Use chemical strippers on heavy buildup first. Mineral spirits cleans residue after stripping. Only then do you sand. The goal is bare wood with consistent porosity across the entire cabinet surface.
Seal Selectively, Dampen Where It Matters
Cabinet acoustics borrowed the concept of impedance from electrical engineering. Think of impedance as resistance to energy transfer. A bare wooden cabinet has low impedance—vibrations move freely through it. Seal the interior with lightweight damping material, and you increase impedance, controlling unwanted resonance peaks. The exterior finish seals the wood itself, but the real acoustic work happens inside.
Most people apply finish to the inside and call it damping. It’s not. Interior finish does nothing for resonance control. You need actual absorption material—fiberglass insulation or mineral wool—strategically placed on interior cabinet walls, especially behind the driver. Apply new exterior finish only to the outside surfaces, keeping it thin enough that wood can still vibrate naturally. This preserves the cabinet’s acoustic character while protecting the wood from moisture and UV damage.
Grill Cloth: Not Just Fabric, But A Sonic Filter

Acoustic Transparency Determines What Reaches Your Ear
You want the grill cloth to disappear sonically so you can pretend the speaker sounds like it did in 1965, but cloth is actually an acoustic resistor. Using the physics framework of impedance, grill cloth acts as an acoustic load that absorbs and scatters high frequencies before they leave the cabinet. Tighter weaves block more treble. Looser weaves let it through with minimal loss. The original manufacturer chose a specific weave density to shape the speaker’s tonal character, not just to protect the cone.

Different materials absorb different frequency ranges. Cotton blends from the 1970s rolled off harshness above 8kHz. Synthetic materials introduced later had flatter response but different damping characteristics. When you replace cloth with the wrong material, you don’t restore the speaker—you create a different instrument. The restoration goal is matching the original weave density and fiber type, not upgrading to museum-quality acoustically transparent fabric. Check manufacturer documentation or photos from period reviews to identify what came stock.
Frame Integrity Keeps Cloth Performing Its Function
Most people underestimate how much tension matters. Loose grill cloth resonates and diffuses sound. Tight cloth stays acoustically neutral. The common advice to just glue new cloth over the old frame is incomplete and lazy. If the wooden frame warped, shifted, or cracked, the new cloth will never seat properly, and you’ve wasted material and created uneven acoustic absorption across the speaker face.
Inspect the frame for gaps between wood and mounting edge before installing cloth. Sand any raised grain or rough spots that will telegraph through. Use period-appropriate mounting methods: original speakers typically used contact cement or fabric staples, not hot glue. Stretch the cloth evenly from the center outward in both directions. Uneven tension creates dead zones where cloth sags and acoustic performance collapses. Secure the cloth around the entire perimeter before trimming excess.
The Resonance Dampening Protocol For Vintage Speaker Cabinets
Internal Bracing And Cabinet Stiffness
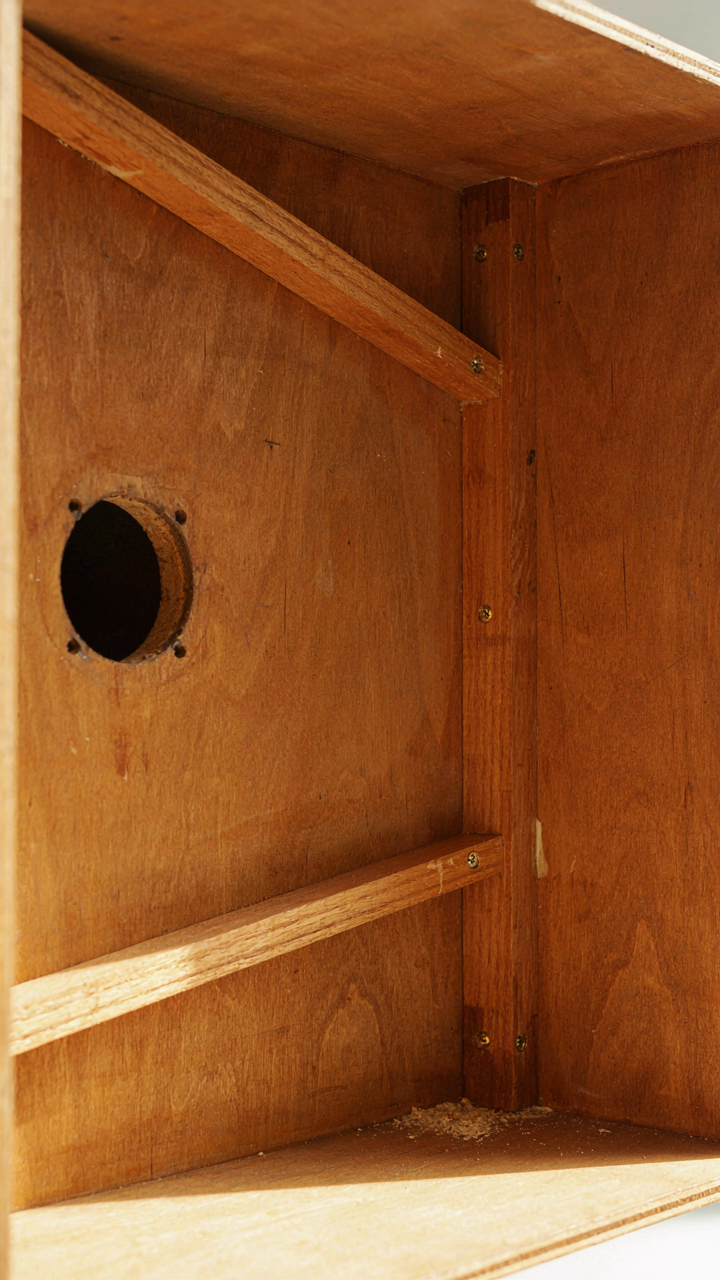
You want this to sound “warm” again because you think the cabinet lost something. It didn’t. The cabinet is flexing, and that flex is turning signal into distortion. Bracing strategies borrow from structural engineering, where triangulation defeats lateral movement. Your vintage cabinet needs the same principle: cross-bracing converts the box from a resonant chamber into a rigid acoustic vessel that lets the driver do the work instead of the walls doing it for you.

Most vintage cabinets ship with minimal internal structure because manufacturers optimized for cost, not accuracy. Adding braces means identifying the cabinet’s weak axes—typically the larger panels that vibrate at mid-bass frequencies. Route internal wooden braces from corner to corner, or run them parallel to the baffle board. Glue, don’t screw. Screws create vibration points. The goal is to raise the cabinet’s fundamental resonance frequency above the driver’s tuning range so the box stops speaking and starts containing.
Strategic Damping Material Placement
Filling a cabinet with rockwool or fiberglass is lazy consensus advice that wastes money and kills detail. The real mechanism is this: damping material only works where sound energy actually bounces. Most energy concentrates near the driver and the rear panel. Dumping material everywhere dilutes its effectiveness and muffles transient response—the thing that makes old speakers sound alive.
Place damping in clusters, not blankets. Line the rear panel with 1 to 2 inches of open-cell foam or rockwool. Add targeted absorption around the driver’s magnet assembly to kill backwave reflections. Leave the upper corners and side panels bare. This concentrates energy dissipation where it matters and preserves the cabinet’s natural acoustic character. Measure before and after with a microphone at the listening position. If the midrange flattened, you over-damped.
DIY Speaker Restoration Project: The Crossover Network Deception

When Capacitors Stop Being Capacitors
You want to restore this speaker because you think the drivers are shot. They’re not. The crossover network aged into uselessness while you weren’t looking, and now the frequency response is broken in ways that sound like speaker failure. Capacitors don’t just stop working—they drift. Their capacitance value shifts with temperature, time, and electrical stress. A capacitor rated at 10 microfarads might measure 8.5 microfarads after forty years. That impedance shift changes the crossover’s cutoff frequency, which means the tweeter gets fed bass it was never designed to handle and the woofer bleeds into midrange it should’ve abandoned.

The physics term is capacitive reactance—how much a capacitor resists current at a given frequency. Your vintage crossover depends on exact capacitance values to route the right frequencies to the right drivers. When those values drift, the acoustic outcome isn’t subtle degradation. It’s a phase shift at the crossover point that creates cancellation in the midrange and a tonal collapse most people blame on the drivers themselves. Measure every capacitor with a quality meter. If values deviate more than ten percent from the marked spec, replace them with film capacitors rated for audio—not electrolytics, which drift faster and fail harder.
Inductors And Resistors Hide Damage Quietly
Common advice says check resistors for visible burn marks and inductors for continuity. That’s incomplete. Resistors drift in value the same way capacitors do, and a two-ohm inductor winding that reads continuity can still have internal corrosion breaking the signal into fragments. Decades of heat cycling and moisture expand and contract the wire, creating micro-fractures in the insulation that don’t trigger an ohm meter but absolutely wreck the audio path. You need to measure inductance with an LCR meter, not just test for on-or-off continuity. A fifteen-millihenry inductor that’s drifted to twelve millihenries will alter the network’s behavior at specific frequencies and create phase distortion nobody can pinpoint without measurement.
Resistor tolerance compounds the problem. Even quality carbon film resistors from the seventies were manufactured to ten or twenty percent tolerance, meaning a 1k resistor could legitimately be 900 ohms or 1.1k ohms from the factory. After decades, thermal stress pushes them further off. Metal film resistors are more stable, but finding period-correct replacements that match the original tolerance is nearly impossible. Replace all resistors and inductors, not just the visibly damaged ones. Measure the originals before removal to document what you’re replacing, then install modern equivalents with tighter tolerance. The crossover network is a precision circuit. Imprecision compounds across every component.
How To Restore Vintage Speakers: Driver Rejuvenation, Not Replacement
Surround Material And The Physics Of Decay
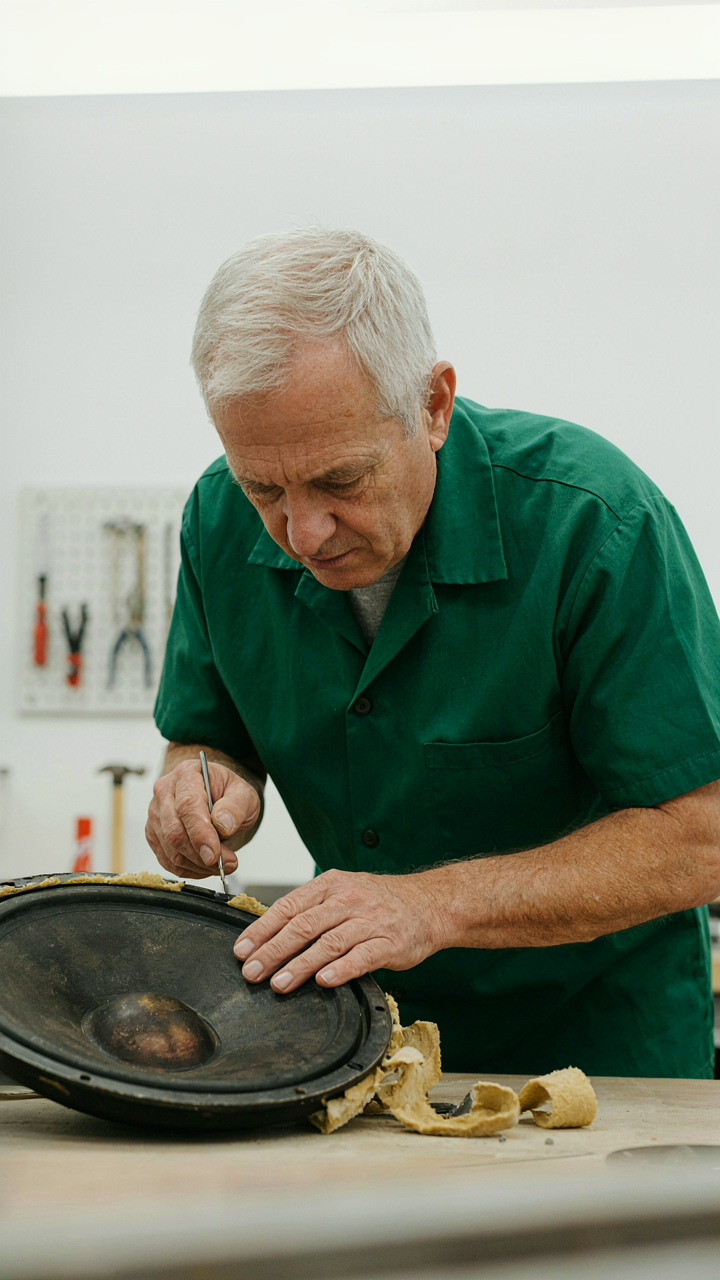
You want to replace the driver because you think it’s dead. It’s not. Most drivers fail at the surround, not the coil, and you’re about to learn why this matters for cost and sound. The surround operates under the same stress principle as a mechanical bearing: repeated compression and extension cycles degrade elasticity until the material fractures or hardens. Foam surrounds from the 1970s and 1980s oxidize. Rubber surrounds dry out. Neither recovers.

The material you choose determines how long your repair lasts. Foam surrounds should be replaced with foam. Rubber with rubber. Mixing materials creates impedance mismatch in the suspension geometry, which changes how the cone moves and shifts the driver’s resonant frequency. Use a surround kit matched to your driver’s specifications, not what’s cheapest. The cone won’t travel properly otherwise, and you’ll hear it as distortion at low frequencies.
Voice Coil And Dust Cap Reality
Most people skip the dust cap inspection because it looks fine. This is where failures hide. The dust cap protects the voice coil from debris, but it also vents heat. If it’s cracked or delaminating, dust enters the gap and causes the coil to rub against the magnet. This produces scratching at volume and eventual coil failure. You can’t hear this problem until it destroys the driver. Catch it before it burns out.
Inspect the voice coil by removing the dust cap carefully. Look for carbon dust inside the gap, burn marks on the bobbin, or coil windings that have shifted position. If you find any, the coil has already rubbed. Don’t reassemble. Replace the dust cap with a material that matches the original, typically kraft paper or cloth, and apply it with flexible adhesive that allows thermal expansion. This simple step extends driver life by years.
Restoring Old Speakers Guide: The Thermodynamics Of Audio Heat, Pressure, And Performance

Cone Mass, Stiffness, And Damping Behavior
You want to know this section because you’re afraid a restored speaker won’t sound “right” and you’ll have wasted time and money. The real issue: most restorers treat cone condition as cosmetic when it’s actually the core mechanism of sound production. Physics borrows the concept of resonance from mechanics. A speaker cone has natural resonance, meaning it vibrates at specific frequencies determined by three variables: the mass of the cone material, the stiffness of the surround and spider suspensions, and internal damping that absorbs vibration energy.

When you restore a vintage speaker, you’re not just replacing parts. You’re preserving or reconstructing the original mass-stiffness-damping ratio the engineer designed. Paper cones, cloth surrounds, and rubber spiders each contribute specific dampening characteristics. Replacing a cloth surround with modern foam changes damping behavior and shifts resonance frequency. If the cone’s structural integrity is compromised, mass increases unevenly, creating asymmetrical resonance peaks that no equalization corrects. The restoration protocol requires measuring or estimating original cone mass before deciding whether repairing or replacing yields the intended acoustic signature.
Energy Transfer And Efficiency Loss
Efficiency in speaker design means how much electrical input power converts to acoustic output rather than heat. Vintage speakers typically operated at 85-92 dB SPL per watt, which seems low until you understand why. Poor voice coil winding tolerances, heavy magnets, and high resistance meant most energy dissipated as heat in the coil and magnet rather than moving air. Restoring a speaker means accepting this inherent inefficiency rather than fighting it.
The practical consequence: restoring a vintage speaker means using correct amplifier wattage, not upgrading to modern high-wattage sources. A restored 1970s 8-ohm driver rated at 15 watts expects exactly that electrical load. Supplying 50 watts risks voice coil failure, not improved performance. Power handling limits exist because thermal design was passive. The magnet, pole piece, and coil windings had no heat dissipation engineering beyond natural convection. Measure voice coil resistance with a multimeter. If it reads within 10 percent of original specs, thermal capacity remains intact. If resistance is significantly higher, coil degradation has reduced power handling capacity further, and you must supply even less power during restoration testing.
How To Fix Old Speakers: Wiring The Unseen Bottleneck

Oxidation And Signal Loss
You care about this section because bad wiring makes your restoration look finished while sounding dead. The mechanism is simple: oxidation reduces conductivity, and conductivity is resistance’s inverse—borrowed from electrical physics. Resistance converts signal energy into heat instead of sound. A corroded wire joint acts like a tiny resistor inserted into your audio path. The signal weakens before it reaches the driver. You don’t hear distortion. You hear volume drop, muddy tone, and loss of detail that no EQ fixes.

Vintage speakers lived in basements, attics, and garages where humidity and temperature swung constantly. Copper oxidizes to green or black copper oxide when exposed to moisture and air. This oxide layer sits between the wire and terminal, blocking electron flow. Even visibly clean solder joints can hide oxidation underneath the surface. The older the speaker, the thicker this layer grows. Signal loss compounds across multiple connections—voice coil lead to terminal, terminal to crossover, crossover to driver. One bad joint ruins the entire chain.
Clean Oxidized Terminals First
You’ll read advice about replacing all vintage wiring immediately. That’s overkill and wrong. Most original wiring survives fine if you clean the actual problem: the connection points. Terminal corrosion is where resistance lives, not in the copper wire itself.
- Desoldering braid or solder sucker: Remove old solder completely from each terminal before reheating. Trapped oxidation under fresh solder stays conductive. Clean terminals first, then resolder.
- Brass wire brush or 0000 steel wool: Scrub the terminal post and the wire end until bare metal shows. Work until you see shine, not gray tarnish. Do this immediately before resoldering.
- 60/40 rosin core solder only: Use flux-core solder, never acid-core. Rosin activates oxide removal during heating. Old solder joints used this formula for a reason.
- Wet sponge contact: Wipe the soldering iron tip on a wet sponge before each joint. A clean tip transfers heat faster and prevents solder from bridging terminals accidentally.
- Heat the terminal, not the solder: Let the iron sit on the joint for two seconds. The terminal heats first. New solder flows on in a thin ring around the post.
Resoldering takes thirty seconds per connection. You’ll restore conductivity and lower resistance back to original spec. Most vintage speakers need only this step, not rewiring. The contact resistance drops to near zero when you eliminate oxidation mechanically, then seal it with fresh solder.
Vintage Speaker Restoration Project: Calibration, Not Guesswork

Measure Before And After
You want proof that your work actually improved the speaker, not just permission to call it done. Frequency response measurement is the tool—it’s signal processing borrowed from acoustics engineering, where a signal becomes data instead of opinion. A simple USB measurement mic, free software like REW (Room EQ Wizard), and a sine wave generator give you the actual curve your speaker produces across the audible spectrum before restoration and after.

Place the mic at ear level, twelve inches from the speaker cone in a treated room or at least away from hard reflective walls. Run a frequency sweep from 20Hz to 20kHz and export the graph. You’re looking for peaks and dips in the response. Loose surrounds, torn cones, and damaged tweeters create predictable anomalies—usually dips in the midrange or a rolled-off high end. After repair, rerun the same measurement. If the curve flattens and extends further into the treble, the restoration worked. If nothing changed, you either missed the root problem or the speaker never had one to begin with.
Critical Listening With Known References
Measurements don’t lie, but they also don’t capture the full picture—so you verify with ears on tracks you know intimately. Pick three reference recordings: one vocal-heavy jazz track, one orchestral piece, and one modern pop mix. Play them on the restored speaker before and after work. What you’re listening for is clarity in the vocals, separation between instruments, and whether the high end sounds fatigue-free or shrill. Distortion and blur indicate unfinished work. Crisp transients and stable stereo imaging indicate you got it right.
Use the same playback chain and volume level each time. Sit in the same spot. Most people skip this step because it requires baseline discipline—you have to know what “good” sounds like on known material before you can judge what “restored” sounds like on an unknown speaker. Listen for five to ten minutes per session, not longer. Ear fatigue ruins judgment. Document what you hear each time. The mechanism here is simple: if the speaker sounds noticeably different and better on familiar material, the restoration succeeded.
The Real Obstacle To Restoration Is Rarely Skill; It Is Your Impulse To Cut Corners

You’ll skip the cabinet prep because “good enough” feels like progress. You’ll use whatever cloth is cheaper. You’ll ignore the oxidation on the binding posts. This is where restorations die. Not from incompetence. From impatience. The speakers that survive decades are the ones someone refused to rush. Pick one component today—the grill cloth or the cabinet veneer—and commit to doing it right. Everything else follows. Shortcuts don’t age well, but proper restoration does.



