
The Inverse Lighting Principle: How To Take Silhouette Pictures Iphone

Place Your Light Source Behind The Subject
You want people to think you know what you’re doing with a camera. That’s the real reason you care about this. Here’s what actually works: silhouettes require backlighting, which is the opposite of how you’ve been taught to light things. Borrow this from cinematography: backlighting is called “separation” because it divorces the subject from the background by placing the light source directly behind it. Your iPhone’s sensor reads brightness from the brightest area in the frame. Point that brightness behind your subject, not at it.
Position your light—sun, window, lamp—directly behind and slightly above the subject. The iPhone will meter off that bright background and crush the subject into darkness. This is intentional. You’re not trying to recover detail in shadows. You’re trying to eliminate it entirely. The distance between light and subject determines edge definition. Closer light creates softer halos. Distant light creates harder, cleaner edges. Shoot in manual exposure mode or lock exposure on the shadow area to prevent the camera from brightening the subject as compensation.
Eliminate Front Light Contamination Completely
Most people say “turn off your flash.” That’s incomplete advice. Any light reaching the front of your subject kills the silhouette because it fills the shadows and reveals detail you don’t want visible. This isn’t an aesthetic preference—it’s a technical constraint. Your subject becomes a gray midtone instead of pure black, and the whole effect collapses. Check your shooting environment with actual intentionality. Side windows, reflective surfaces, and ambient light leaking from nearby sources all count as front light contamination. Move your position, not your subject. Change your angle. Face away from secondary light sources. The silhouette effect depends on absolute darkness on the subject’s facing side.
Shoot during golden hour or in controlled indoor environments where you control the light direction. Outdoors at midday, the diffuse light is too strong to fight. Position yourself so the sun is directly behind your subject and nothing reflects light back onto the subject’s face or body. Use your iPhone’s live view to scan for light leaks—any brightening on the subject side breaks the silhouette. Once you’ve eliminated front light, expose for the background, lock that exposure value, and shoot.
Beyond Golden Hour: Unconventional Light Sources
Streetlights And Urban Glow
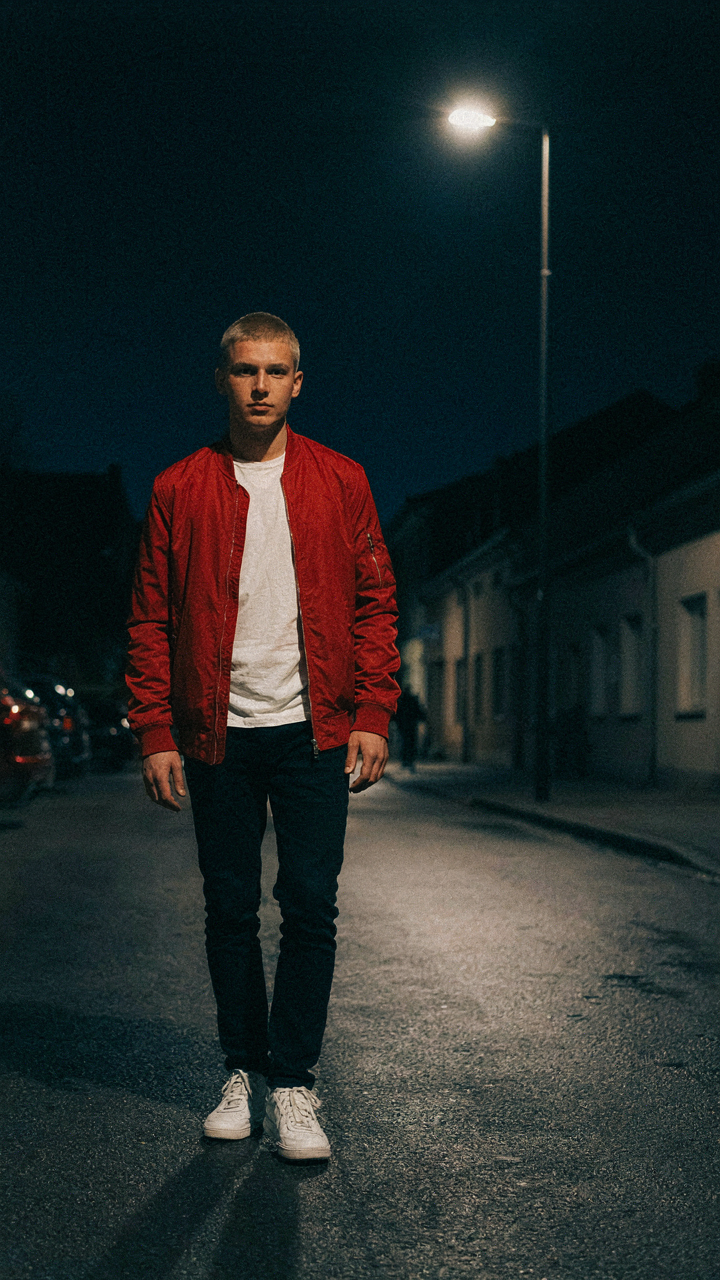
You want these shots because they signal you know what most phone photographers don’t. The mechanism is simple: artificial light sources create edge definition that sunlight can’t match. Streetlights emit focused beams with hard falloff. This contrast between lit background and subject silhouette reads cleaner on screen. Urban environments give you consistent, repeatable light geometry. Position your subject between the source and camera. The iPhone’s sensor handles sodium vapor and LED differently, but both compress into high contrast when metered correctly. Expose for the light source itself, not your subject.

Most photographers chase sunset because it’s the default answer. Streetlights work better for silhouettes because they’re directional and isolated. A single lamp creates a defined pool of light with sharp boundaries. This eliminates the diffused glow that makes golden hour silhouettes feel soft and clichéd. Night shooting also removes competing light sources, so you control the entire contrast ratio. Meter on the lamp, lock exposure, then position your subject to intercept that light path.
Ignoring Daylight Entirely
The common advice says shoot silhouettes during golden hour or blue hour. That’s incomplete. The real constraint is contrast ratio, not time of day. Neon signs, window displays, car headlights, and monitor screens all produce silhouettes. These work because they’re bright enough to separate from ambient light. Dusk doesn’t own silhouette photography. You’re choosing based on the light itself, not a calendar slot. Find a bright background source and expose for it. Your subject becomes negative space automatically.
Test this protocol: locate any bright point source, place your subject in front of it, meter on the bright area, lock that exposure. Your iPhone will render everything between you and that source as pure black. This works at noon under a skylight, at midnight under a neon sign, or at three in the afternoon under a shop window. Time becomes irrelevant. Only the brightness differential matters. Light sources that exceed ambient by at least two stops produce usable silhouettes.
The Subject Deconstruction Method For Silhouette Photography

Stripping Down To Shape Essentials
You want this to look effortless, which is why you’re actually avoiding the real work: deciding what matters. The mechanism is brutal simplicity. A silhouette is pure shape against light, so every detail you keep either strengthens the outline or muddies it. Your eye processes the negative space around your subject before it processes the subject itself. Remove visual clutter from the frame. Eliminate busy backgrounds, conflicting textures, and anything that doesn’t define the edge of your subject’s form.

The iPhone camera sees what you frame. If your subject has a complex outline against a complex background, the silhouette reads as noise instead of form. Strip accessories, ask your subject to remove hats or loose clothing that fragments the perimeter, and position them so the light source creates clean separation. The goal is a readable shape, not a detailed portrait. Clean edges win. Messy edges lose.
Poses That Project Shadow Authority
Gesture design borrowed from film composition: a strong silhouette needs what cinematographers call “readable staging.” Your subject’s pose must communicate intention through shape alone, because color, texture, and facial detail are gone. Generic standing poses produce generic shadows. Profile shots, angular arms, asymmetrical weight distribution, and extended limbs create visual tension that reads instantly as confident rather than static.
Test poses by having your subject hold a shape for 10 seconds while you frame it. Watch how the outline changes with head tilt, shoulder angle, or arm placement. A raised arm creates visual energy. A bent knee disrupts a flat line. Turned shoulders generate dynamic tension. Photograph the shape you want to see, not the person you’re shooting. The best silhouette pose is the one that communicates instantly to someone who can’t see the face.
Framing For Impact: The Negative Space Dictum

Empty Space As Subject
You want people to feel something from your photos without knowing why, and negative space is the mechanism that makes that happen. Borrow from figure-ground perception in visual psychology: the silhouette is the figure, but the void around it becomes the actual subject. Most photographers treat empty space as leftover real estate. It’s not. It’s the container that forces the viewer’s eye to land on the silhouette and stay there.

The iPhone’s limited dynamic range makes this work in your favor. When you expose for the sky or a bright background, the foreground collapses to pure black. No detail survives. This isn’t a limitation—it’s compression. The viewer has nowhere else to look but the outline. Maximize this by leaving at least 40 to 60 percent of the frame empty around your subject. The isolation compounds the impact.
Breaking Rules For Sharper Contrast
The rule says center your subject for balance. Break it. Conventional composition treats the silhouette as one element among many. That’s the wrong frame. Position the silhouette off-center or flush against an edge so the void dominates the majority of the composition. This creates tension. Tension holds attention.
Symmetry is another rule worth violating. A centered, symmetrical silhouette reads as static and formal. Asymmetrical placement against a large empty field creates urgency and visual weight. The silhouette appears to push against the space around it. Tilt the horizon line slightly instead of leveling it perfectly—a one or two degree deviation reads as intentional, not accidental, when paired with extreme negative space.
The Exposure Blackout Protocol: How To Take Silhouette A Picture

Manual Exposure Control For True Black
You want this to look professional, not like you forgot to expose correctly. The mechanism is simple: your iPhone’s camera defaults to metering for the entire frame, which means it brightens the dark subject to a readable grey. Silhouettes demand you override that instinct.

Open the Camera app and tap the screen where your backlit subject sits. A yellow box appears with a sun icon beside it. Drag that sun icon downward to reduce exposure. Stop when the subject turns completely black with no detail visible. This is the real move most tutorials skip: you’re not adjusting for mood, you’re breaking the camera’s auto-compensation system.
Lock Focus And Exposure Before The Shot
The camera wants to help you. That’s the problem. Once you’ve set manual exposure, press and hold on your subject until you see “AE/AF Lock” at the top. This prevents the camera from re-metering when you reframe or the light shifts slightly. Most people take the shot immediately after adjusting exposure, then wonder why the second frame reverted to grey.
Lock both exposure and focus to the same spot on the backlit subject. The camera will hold those settings until you tap elsewhere. Take multiple shots without breaking the lock. This consistency matters when you’re editing a series. The exposure value stays constant across frames, making your editing pass faster and more coherent.
Reframing Perspective: Borrowing From Military Camouflage

Merge Subject Into The Backdrop
You want people to notice your silhouette by making it disappear first. That sounds backwards because most advice tells you to “pop” your subject. That’s incomplete. Military camouflage strategy teaches concealment through integration, not separation. The mechanism: a silhouette only reads as intentional when its edges align with or blend into background structure. Your subject doesn’t stand out. It emerges from the visual noise.

Position your subject so its outline shares the same tonal range as the background behind it. Shoot into backlighting where the sun creates a halo that softens your subject’s perimeter. The iPhone’s sensor will crush detail on both edges simultaneously, creating natural integration rather than contrast. This is why shooting into direct light works better than shooting with side or front lighting.
Disruptive Patterning For Complex Forms
Silhouettes with intricate outlines need visual anchors or they collapse into blobs. Military units use disruptive patterns to break up recognizable shapes so the eye can’t lock onto a single form. Apply this to your subject: position it where background elements interrupt its outline. A tree branch crossing a person’s head. A building corner cutting through a shoulder. These interruptions create micro-patterns that trick the brain into reading complexity instead of flatness.
The iPhone captures these disruptions best when you frame tightly. Zoom in so background elements actually cross your subject’s perimeter. The silhouette remains readable because humans recognize partial forms instantly. Your eye completes the missing edges automatically. This prevents the dead, featureless look that kills weak silhouettes. Shoot from angles where foreground or background layers naturally fracture your subject’s outline into sections.
Editing For Absolutism: Post Processing For Silhouette Pictures

Push Blacks To True Zero
You want the silhouette to look like a cutout, not a muddy shadow. That’s the real reason you’re reading this section. The mechanism is simple: your iPhone’s default processing leaves crushed blacks with retained detail. You need to destroy that detail intentionally.

Blacks in silhouette photos operate like a light meter’s zero point in physics. Everything below that threshold becomes a single value with no variation. Open your editing app and pull the blacks slider until the darkest areas of your subject hit pure black with zero texture. This isn’t subtle. You’re not preserving detail—you’re eliminating it on purpose.
Contrast sits next to blacks in most editing interfaces. Push it past where it feels natural. The goal is maximum separation between your subject and the background. If the silhouette edge looks soft or blurred, raise contrast until it hardens. The edge should read as a boundary, not a gradient. This is the difference between a silhouette that works and one that disappears into the frame.
Color Grading That Stays Invisible
Most advice says to add color grading to make silhouettes “pop.” That’s backwards. The silhouette already pops because of what it removes. Color grading should serve the shape, not fight for attention.
Desaturate slightly if the background has competing colors. A warm sky works better than a blue one because it doesn’t pull the eye away from the dark shape. If you’re keeping color, restrict it to the background only. The silhouette itself stays black or near-black. One color grade rule: if you notice the color before you notice the shape, you’ve gone too far. Delete the grade and start again.
Temperature shifts work better than saturation increases. A slightly warmer tone feels intentional without adding noise. Cool the image if the mood calls for it, but keep the adjustment subtle enough that it reads as atmosphere, not technique. The final step: export and view on multiple screens. Blacks that look true on your phone might crush differently on a computer. Adjust until the silhouette holds its shape everywhere you view it.

The Unseen Layer: Adding Narrative To Shadow Pictures

Environment As The Real Subject
You want silhouettes to feel important because you want the viewer to care without being told what to care about. Here’s what actually works: the environment does the narrative work silhouettes can’t. In photography, silhouettes operate like negative space in graphic design—the emptied form forces the viewer’s brain to fill context from what surrounds it. A silhouette of a person jumping means nothing. A silhouette of a person jumping in front of a specific sunset, a recognizable building, or a particular landscape means everything. The iPhone camera captures this layering naturally because its sensor renders backgrounds with enough detail to anchor meaning.
The mistake most people make is treating the background as decoration. It isn’t. It’s the mechanism that transforms a black shape into a narrative. Frame your silhouette against something with inherent story weight: a cityscape that suggests aspiration, a window that implies confinement, a natural formation that suggests scale or vulnerability. The silhouette’s power lives in the contrast between what you can’t see of the subject and what you can see of their world. Shoot with the environment as the primary composition element, and position your silhouette to interact with it, not float in front of it.
Tension And Stillness As Motion
Motion isn’t about movement. It’s about arrested potential—the moment before or after action completes. Silhouettes excel at this because you strip away the visual noise that distracts from body position and gesture. An arm extended upward holds energy. A bent knee suggests landing. A turned head implies discovery or reaction. The iPhone’s ability to freeze motion cleanly means these gestures read instantly, even as pure shadow.
Emotion emerges from posture under constraint. A silhouette hunched forward reads as burden or fatigue. The same figure with chest open and arms wide shifts to liberation or celebration. The viewer doesn’t consciously analyze posture—they feel it. Frame your subject to emphasize the specific body position that carries the emotion you want to land. Position them so their silhouette’s outline itself becomes the message, not requiring context to decode. This is why timing matters more than composition when shooting silhouettes: capture the gesture that speaks on its own.

Common Pitfalls: How To Take Silhouette Photos

Where The Edge Breaks
You’re worried your silhouette won’t look clean. That’s the real problem here, and it matters because a messy edge destroys the whole effect. Haloing happens when your phone’s processor oversharpens the boundary between subject and background, creating a glowing outline that kills the silhouette’s punch.
The mechanism is optical, not artistic. Your iPhone’s computational photography stacks multiple exposures to recover detail in shadows. When the subject is genuinely dark but the background is bright, the phone’s edge detection algorithm doesn’t know which pixels belong to which layer, so it compensates by creating artificial contrast at the boundary. The fuzzy fringe you see is the phone blending conflicting depth information.
The Editing Trap That Ruins Everything
Most people destroy silhouettes in post. You increase contrast, pump blacks, add clarity, then watch the edge become a smeared mess. Stop. Silhouettes don’t need heavy-handed editing because the mechanics are already working in your favor.
When you darken shadows further in editing software, you’re fighting against the phone’s original exposure reading. The silhouette was already correctly exposed when you took the shot. Increasing black levels only increases the compression artifacts at the edge. Leave the shadows alone. Adjust only white balance and exposure if needed, then stop. Your iPhone’s native silhouette already contains all the drama it needs.
The Repetition Principle: Mastering Photography Through Volume
Shoot Until Light Becomes Visible
You want to skip ahead because you think you already understand light. You don’t. Most people never do because they stop shooting before the pattern emerges. In cognitive psychology, they call this the “threshold effect” – your brain doesn’t recognize a pattern until you’ve seen it enough times to build the neural pathway. iPhone silhouette photos operate on the same principle. You need volume to train your eye to predict where the edge will blow out before you press the shutter.
Here’s what volume actually teaches you that theory cannot:
- Golden hour timing shifts daily: The exact minute when backlight becomes usable changes by ten to fifteen minutes depending on season, latitude, and atmospheric conditions. Shooting across weeks reveals this drift.
- Subject distance from light source matters more than light intensity: A person five feet from a window creates a different silhouette edge than someone twenty feet away, even in identical conditions.
- Phone angle creates cumulative edge degradation: Tilting your iPhone even slightly changes how the sensor meters the silhouette perimeter. Fifty shots at different angles teach you the mechanical limits.
- Contrast ratios between subject and background are learnable: After shooting variations, you develop an intuition for which backgrounds will hold detail versus which ones will crush to pure black.
- Your specific phone’s sensor has quirks: Every iPhone generation handles highlight clipping differently. Volume forces you to understand your exact tool instead of chasing generic principles.
Quantity is the only accelerant. One thoughtful shot teaches you nothing. Fifty shots across different conditions teach you the mechanism. Your job is to shoot enough that predicting the silhouette edge becomes automatic, not intellectual.
Learn More From What Failed
The common advice is to study your best work. That’s backward. Your failures contain the actual data. When a silhouette falls flat, the cause is visible. When it works, you often can’t articulate why because the conditions aligned by accident.
Document every failed attempt with specific notation: the time, the subject distance, the phone angle, the background color, and where the silhouette lost definition. After twenty failures with clear patterns, you’ll identify the boundary between recoverable and irredeemable shots faster than any tutorial could teach. This becomes your personal silhouette failure map, and it’s the only tool that accounts for your exact environment, your phone model, and your editing workflow. Reference it before every shoot.
Your Fear Isn’t Bad Photos; It’s The Inability To See Beyond What Everyone Else Chases

Most photographers chase golden hour because Instagram told them to. You’re different. You see silhouettes as a permission slip to ignore trends and shoot what actually moves you. The skill isn’t technical. It’s training your eye to recognize drama before you raise your phone. Stop waiting for perfect conditions. Shoot something in hard backlight today and study what you actually captured instead of what you thought you’d capture. The best photographers aren’t obsessed with gear or rules. They’re obsessed with seeing first.



