
The Light’s Language: Deconstructing Soft Early Light

Why Sunrise Light Matters Before The Sun Clears The Horizon
You want sunrise photos because you think they’ll make you look like you have taste. The real mechanism is physics. When the sun sits below the horizon, light travels through more atmosphere than it does at noon. This distance scatters blue wavelengths and leaves reds and oranges. Your iPhone’s sensor doesn’t invent this warmth. It captures what’s actually there. The longer light path means softer shadows and lower contrast. This is why sunrise photos feel different, not just look different.
Your iPhone’s computational photography stacks this scattered light across multiple frames. The software recognizes the low-angle sun and adjusts exposure to preserve detail in both shadows and highlights. Most people think soft light just means less harsh contrast. That’s incomplete. Soft light means the light source is diffused across a wider area of the sky, which lowers the angle of incidence on your subject and reduces specular reflection. Shoot during the window when the sun is still below the horizon but the sky is illuminated. That’s where the actual technical advantage lives.
Dust, Moisture, And How Particles Hijack Color
Atmospheric particulates don’t ruin sunrise photos. They engineer them. Dust, salt crystals, and water vapor suspended in air act like millions of tiny mirrors. They scatter incoming light in all directions. Your iPhone’s camera sees this scattered light as fill light. Without particles, sunrise would be just orange sky bleeding into dark silhouette. With particles, you get gradation and depth. The particles absorb and redirect wavelengths differently depending on their size. Larger particles scatter all wavelengths equally, which is why haze looks white. Smaller particles scatter blue preferentially, which is why the sky gets that deep orange-to-red gradient near the horizon.
Your location determines particle concentration. Coastal areas have salt aerosols. Urban areas have combustion byproducts. Rural areas have dust and pollen. These aren’t obstacles. They’re variables you control by choosing where to shoot. After rain, particles wash out of the air. Sunrise will look colder and clearer but lose the warm color saturation. Before rain, particles accumulate and intensify color. The iPhone’s sensor captures whatever mix of scattered wavelengths exists at that moment. Adjust your location or wait for atmospheric conditions that match the color palette you need from the shot.
Beyond The Horizon: Pre Dawn Reconnaissance Protocol

Mapping Light Paths With Terrain
You want to feel like you know something others don’t before you even press the shutter button. That’s the real draw here. The mechanism is borrowed from cartography: aspect ratio determines illumination intensity. On terrain maps, aspect measures slope direction relative to the sun’s path. For iPhone sunrise photos, aspect means identifying which hillsides, buildings, or water surfaces face the incoming light versus which ones block it. You can’t shoot what you can’t predict.

Google Maps terrain view and topographic apps like Gaia GPS show elevation data before you arrive. Study the geography the night before. Note ridgelines running north-south versus east-west. A ridge running perpendicular to sunrise direction creates a sharp shadow line. One running parallel to sunrise diffuses light gradually across the frame. The iPhone’s sensor performs better with gradual light transitions than hard shadows. Scout the location’s actual terrain, not just the general direction.
Urban Versus Natural Light Interference
Most sunrise advice pretends all light is equal. It’s not. Streetlights, building reflections, and neon from nearby businesses pollute the predawn sky with orange and magenta wavelengths. Your iPhone’s computational photography tries to correct for this but often oversaturates or flattens the genuine light. Natural environments emit cleaner light because the only sources are the sun’s rays scattering through atmosphere and water vapor.
City locations require you to position yourself to block artificial light sources from the frame’s foreground. Stand with your back to buildings when possible. Waterfront cities are worse because reflected streetlight bounces off water and fills the entire sky. Rural locations give you cleaner light but demand you arrive earlier to capture the actual moment of color emergence. Position scouting determines whether you’re fighting light pollution or using it deliberately as a compositional element.
The IPhone’s Raw Power: Unlocking ProRAW For Sunrise Photography

Capture More Light, Keep Your Shadows
You want ProRAW because you think it makes you a real photographer. That’s not the mechanism. ProRAW matters because sunrise light collapses into extreme contrast in seconds, and standard iPhone formats discard shadow detail the moment you expose for the sky. ProRAW uses a physics principle called bit depth—think of it as the number of tonal steps your sensor records between pure black and pure white. Standard formats give you 256 steps. ProRAW gives you 4,096. That difference decides whether your foreground stays a featureless void or reveals the landscape beneath.

The practical result: you shoot once and recover shadow information in post-production that would be permanently gone in JPEG or HEIF. Sunrise throws this problem at you harder than any other time of day because the sun rises fast and the contrast window closes faster. Shoot in ProRAW, expose for the sky, and the ground stays salvageable. You cannot recover data that was never captured. This is why format choice, not technique, determines your output ceiling.
Edit With Raw Data, Not Compromises
Standard iPhone formats lock you into compression choices made at capture time. You cannot undo them. ProRAW hands you the actual sensor data and lets you make those decisions in post-production when you can see the full image on a larger screen and think clearly. This is where flexibility lives—not in some vague editing freedom, but in concrete control over highlights, shadows, white balance, and color grading without generational loss of quality.
Open a ProRAW file in Lightroom or Adobe Camera Raw and you get slider ranges that matter. Recover blown highlights by 2 to 3 stops. Pull shadow detail from near-black into usable tones. Shift white balance without color noise blooming across the image. These moves fail or degrade catastrophically on standard formats. You need the raw data intact to make them work. Capture in ProRAW, then use Lightroom’s shadow slider to bring foreground detail into the frame.
Manual Control’s Mandate: Shutter Speed For Motion And Mood

Exposure Compensation Over ISO Guessing
You want the shot to look intentional, not like you fumbled through settings while the light changed. Here’s what actually matters: exposure compensation is your lever, not ISO. In photography, exposure is the total light hitting the sensor, and the iPhone lets you control it directly by swiping up or down on the screen before you shoot. Most people chase ISO instead, cranking it up to preserve shadow detail, then wonder why their sunrise looks grainy and flat.

Tap the sun or brightest part of the sky, then slide down to darken the frame. This forces the iPhone to keep shutter speed slower and aperture narrower, preserving the dawn’s actual color range. The sensor’s dynamic range is fixed, so fighting it with higher ISO just adds noise without recovering real detail. Set exposure minus one to minus two stops, lock it, and shoot. The result reads as deliberate, not accidental.
Motion Intention Over Arbitrary Sharpness
Forget the myth that every sunrise photo needs needle-sharp detail across the frame. Motion blur is a tool, not a failure. When shutter speed slows, moving elements like clouds or water capture their actual state at dawn, not a frozen slice. The iPhone’s default behavior favors shutter speed around 1/60th of a second in low light, which is exactly where intentional blur starts to register without looking like camera shake.
Hold the phone steady on something solid, or use a basic tripod. Let clouds move through a two-second exposure if the light allows it. This requires manual control through apps like Halide or Procamera, not the stock camera. The mechanism is simple: lower light equals longer shutter duration, and longer duration captures motion as a quality, not a problem. Shoot at minus two stops exposure, hold still for two seconds, and watch how the sky records as something alive instead of static.
The IPhone’s Unseen Lens: Overcoming Digital Artifacts

Lens Flare And Ghosting Control
You want sunrise photos that look professional so people assume you know what you’re doing. What you’re actually fighting is physics. Lens flare occurs when light bounces internally between the iPhone’s lens elements, creating unwanted artifacts. Ghosting happens when the same light reflects multiple times, producing repeated phantom images of the sun. Both are optical problems, not software failures. They’re strongest when the sun sits in or near your frame.

The standard advice says “just reposition until flare disappears.” Wrong. You control flare by understanding angle. The iPhone’s wide camera has seven lens elements with multiple air-glass surfaces. Position the sun at the frame edge, not the center, and light hits the lens at an angle that minimizes internal bouncing. Ghosting vanishes when you keep direct sunlight completely outside the frame but use it to backlight your subject. This requires intentional framing, not luck.
Noise Reduction In Low Light
Your phone kills detail when it shouldn’t, and you think that’s the sensor’s fault. It’s not. The iPhone applies computational noise reduction so aggressively in dawn light that it flattens texture and smooths away the grain that makes sunrise photos feel real. This happens in the image processing pipeline before you even see the shot. The camera trades resolution for a “clean” image.
Disable Smart HDR when shooting in the fifteen minutes before sunrise breaks over the horizon. Smart HDR layers multiple exposures and applies noise reduction across all of them, compounding the flattening effect. Shoot in standard exposure mode instead. Use exposure compensation to lift shadows if needed, but let the image retain its native grain. The noise is information, not failure. Preserve it by keeping your shutter speed above one-hundredth of a second.
Compositional Command: Framing For Impact, Not Just Beauty

Rule Of Thirds: Effective Vs. Lazy Application
You want the rule of thirds to feel like you discovered something instead of following instructions. That’s the real motive here. The mechanism is simple: your eye doesn’t naturally land at the center of a frame. It gravitates toward the intersections where a divided grid meets. Most photographers place a horizon on the top or bottom third line and call it done. That’s lazy. The actual leverage comes from placing your subject—the sun, a tree, a rock formation—at an intersection point, not just on a line. Your iPhone’s grid overlay shows both. Use the intersections, not the lines. Placing the sunrise sun at the lower left intersection creates more tension than centering it or floating it on a middle line. The frame feels intentional because the eye has to work slightly harder to resolve the composition.

When the sun sits at an intersection during that golden moment just after it clears the horizon, the surrounding space around it matters more than the sun itself. A horizon placed on the top third line with the sun at the lower left intersection forces the viewer to read the entire frame. Skip placing secondary elements (clouds, silhouettes, landforms) in the dead center or along the middle third. Instead, use the remaining three intersection points to anchor supporting details. This creates visual weight distribution that reads as deliberate. Test this on your next three sunrise shoots. Place subjects only at intersections. Compare those frames to ones where you placed elements on the lines. You’ll see the difference immediately.
Leading Lines And Depth Manipulation
Depth manipulation comes from optics, not from wishing hard. In optics, linear perspective is what happens when parallel lines converge toward a vanishing point as they recede into space. Your iPhone camera uses the same principle. A road, river, fence line, or shadow cast by terrain pulls the viewer’s eye backward into the frame. During sunrise, shadows are the most aggressive leading lines you have. They stretch long across flat ground. Point your camera so that the shadow of a tree, building, or rock formation runs diagonal from the lower corner toward the sun or a point behind it. The shadow itself becomes the navigation system. Don’t just include a leading line. Make it the primary route into the frame. That means the line should start at or near the bottom edge and travel toward the focal point. The sun becomes the endpoint, not the starting point. The path matters more than the destination.
Your iPhone’s dynamic range during sunrise means you can expose for the sky and still retain detail in foreground terrain where leading lines originate. Shoot with the line in shadow and the sky exposed. This contrast makes the line visually distinct and impossible to miss. A washed-out leading line disappears into overexposed sky. A defined leading line with proper exposure becomes the skeleton of the entire composition. When you frame a shot, ask: what line carries the eye into this frame? If no line exists, move your position until one does. Don’t settle for a static sunrise photo. Use leading lines to force the viewer’s eye on a specific path from entry point to the sun itself.
The Post Processing Playbook: How To Take Sunrise Photos Iphone To Pro Grade

Surgical Edits Inside The Native Editor
You want your sunrise photos to look like you know what you’re doing without spending money on software. That’s the real game here. The iPhone’s native Photos app editor has the precision most people never bother learning because the sliders look simple. They’re not. Exposure, shadows, and highlights control is where the mechanism lives. A sunrise photo needs surgical lifting in the shadows first, then constraint in the highlights so the sky doesn’t blow out into white paste. Most people panic and crank contrast. That’s wrong. Contrast amplifies everything equally. What you need is targeted midtone recovery and selective highlight compression.

Start with shadows at plus 20 to 40 depending on how dark your foreground is. Then drop highlights by 15 to 30 to preserve sky detail. Saturation goes up by 5 to 15 points max. More than that looks artificial fast. The edit isn’t done in one pass. You adjust shadows, then check highlights, then adjust again. The native editor’s biggest weakness is no layer masking, so you’re always editing the whole frame. That’s why restraint matters more than aggression. One final step: zoom into 100 percent and check the transition between sky and land. That line will expose every mistake immediately.
Color Grading Without The Pretense
Color grading borrows from cinematography, where the goal is emotional consistency across frames, not individual perfection. On iPhone sunrise photos, this means one coherent color story, not random tweaks. The common advice says “add warmth to sunrise shots.” That’s incomplete. You’re not adding warmth everywhere. You’re shifting specific color channels to create depth. The temperature slider moves all colors at once. What actually works is the color cast tool. Drop a cool cast into the shadows, keep the midtones neutral, and let the highlights stay warm. This creates separation and dimension that a flat warm edit never achieves.
The mechanism is contrast through color, not brightness. Your foreground feels darker and more dimensional when it’s cooler. Your sky feels more alive when the highlights have warmth without saturation. Test this: edit a sunrise shot with only the temperature slider, then undo it and use color cast instead. The second version reads as intentional. The first reads as a filter. Finish by checking the saturation of individual channels in the native editor’s color tool. Reduce cyan and blue by 5 to 10 points to avoid that processed look. The edit is complete when the eye moves through the image from foreground to sky with no jarring color shifts.
Beyond The Golden Hour: Capturing The Narrative Of Sunrise Pictures
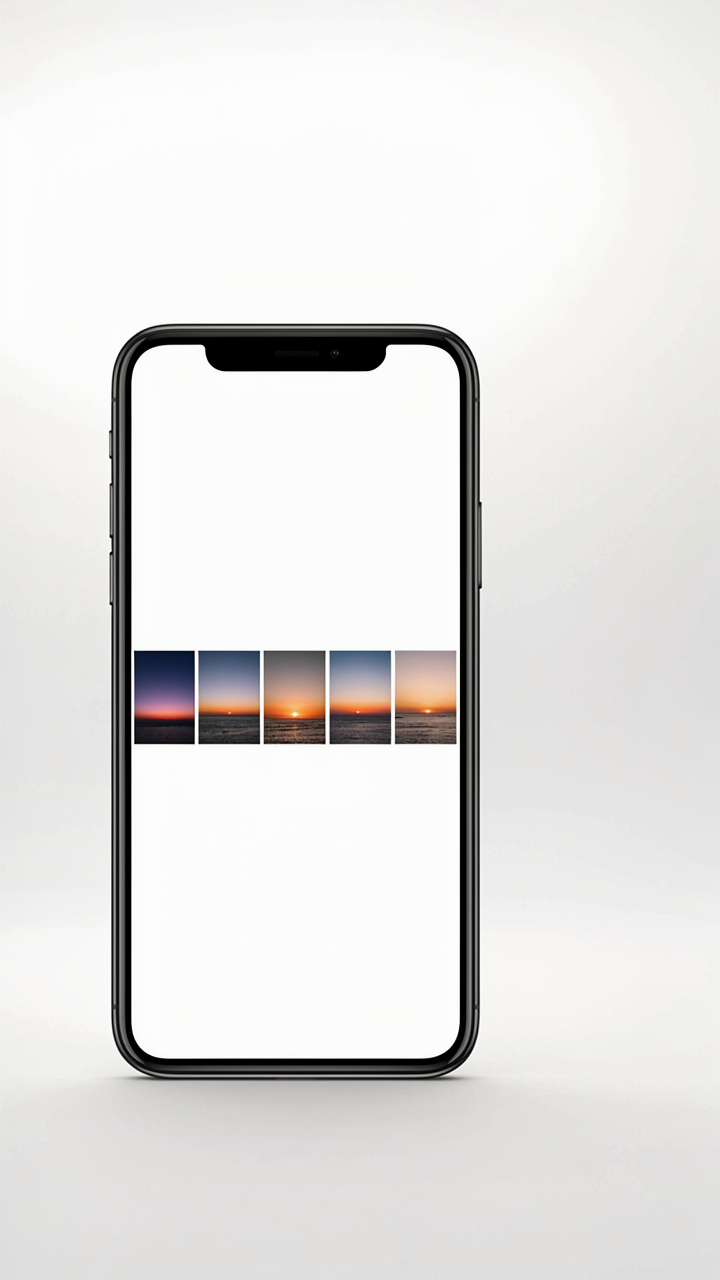
The Sequence Builds Momentum
You want the shot that proves you were there and that you saw something worth seeing. The real mechanism is this: a single frame stops time, but a sequence proves change happened. Narrative lives in transition, not stasis. Your iPhone captures this through HDR processing across multiple exposures, which means it’s already built to handle the dynamic range shift from pre-dawn blue to orange light. Shoot in bursts or deliberately take 3 to 5 shots over 2 to 3 minutes as the color shifts. Each image shows a progression the viewer’s brain recognizes as authentic observation.

The sequence also masks technical mistakes. One frame with blown highlights becomes context in a series showing where the light was heading. You’re not trying to nail one perfect moment anymore—you’re documenting a transformation. Open your iPhone camera, tap and hold to lock focus on the horizon, then shoot every 30 to 60 seconds as the sun position changes. The iPhone’s automatic white balance will shift across the series, which is exactly what you want. This gives you editorial material instead of a lottery ticket.
People Define The Scale
Most sunrise photography advice treats the landscape as the subject and people as visual pollution. That’s backwards. A human silhouette or a recognizable figure gives your viewer a reference point for what “vast” actually means. Without scale, a dramatic sky reads as a phone wallpaper. With it, the image becomes a moment someone inhabited.
Position a person between the camera and the light source so they appear as a defined shape against the bright sky. The iPhone’s metering will expose for the brightness, rendering the figure dark and legible. This works because contrast creates narrative: the person becomes the subject and the landscape becomes context. You’re no longer showing light—you’re showing how light changed someone’s experience of being outside. Take the shot with the person off-center, following the rule of thirds, then take one with them centered. Compare them afterward to see which one actually holds attention.
Equipment Edge: The Minimalist IPhone Photography Toolkit
Tripod Stability As A Force Multiplier
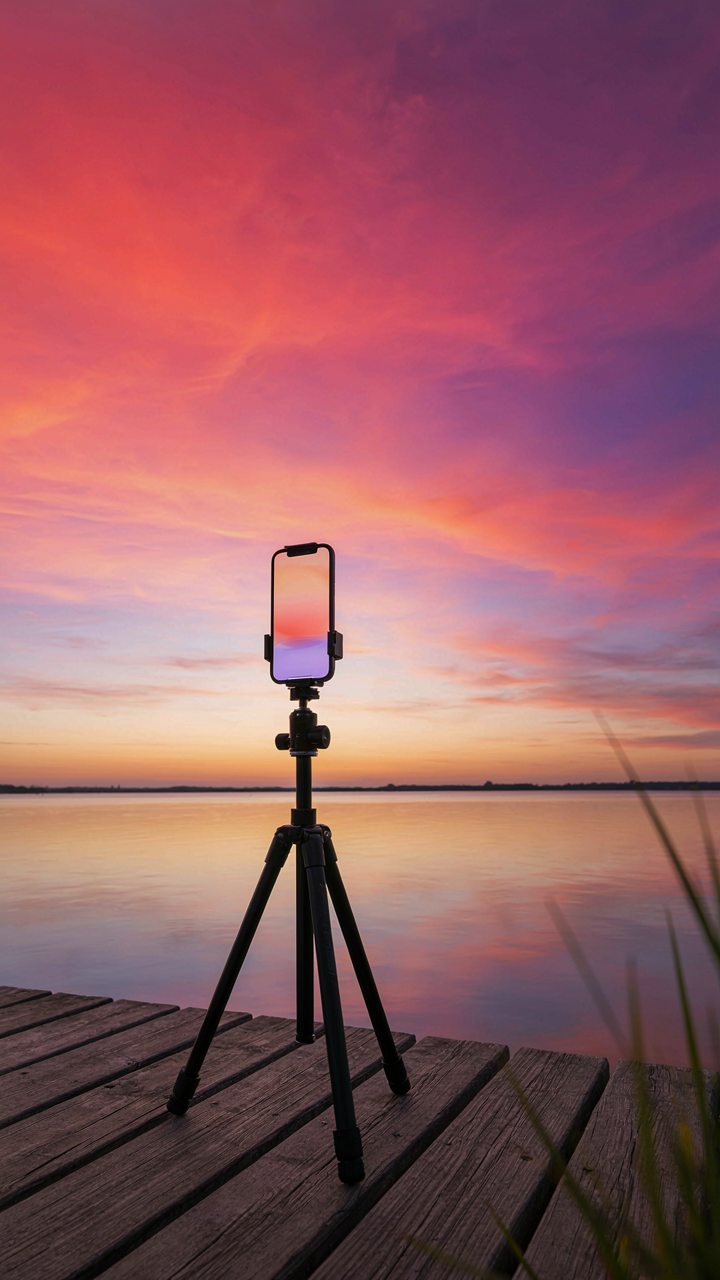
You want permission to buy gear because you think it makes you a real photographer. It doesn’t. What actually matters: a tripod eliminates the single variable that kills sunrise shots—camera shake during low-light exposure. In military strategy, force multiplication means using limited resources to create disproportionate output. A tripod does this for iPhone sunrise photos by letting the sensor capture light for longer without degradation, extending your usable window before the sun dominates the frame.
- Compact ball head tripod: Holds your iPhone steady at any angle without drift. Weight under two pounds. Packs into most camera bags without bulk.
- Phone clamp mechanism: Grips iPhone from sides, not bottom, preventing vibration transfer from tripod legs during wind exposure.
- Low-angle positioning: Most sunrise shots work better at waist or knee height, not eye level. Tripod lets you exploit this without arm fatigue.
- Timer or remote trigger: Eliminates finger tap shake entirely. Even a two-second delay works. Your hand never touches the phone during capture.
- Weighted base configuration: Position the tripod so the heaviest leg points downwind. Prevents topple-over in early morning gusts common near water.

The mechanism is simple: longer exposure time plus zero camera movement equals cleaner shadows and smoother color gradients in the pre-dawn light. You get the same sensor output as a ten-thousand-dollar camera would produce under identical conditions. That’s not hyperbole—it’s physics. Exposure time is the primary variable. Get this right and external lenses become optional, not necessary.
When External Lenses Create More Problems Than Solutions
Forget what you’ve heard about wide-angle iPhone lens attachments improving sunrise compositions. They don’t improve anything—they trade one constraint for another and introduce optical degradation you don’t need. Most clip-on lenses reduce sharpness at the edges by 15-20 percent due to light refraction through additional glass elements. The iPhone 15 and 14 Pro models already have a 48-megapixel sensor with a native wide angle. You’re paying money and carrying weight to make your photos worse.
The real limitation isn’t your lens—it’s your position. If a wider view would help your shot, move backward or change your vantage point. This takes thirty seconds instead of screwing on a lens, and you keep optical quality intact. External macro lenses work slightly better for detail work, but sunrise photography doesn’t demand macro. Your battery drain also increases when you rely on external glass because your phone’s autofocus motor works harder to compensate for optical aberrations. Stick to the native lens. Shoot from the right position.
Why Your DSLR Photography Tips Fail On IPhone Sunrise Photo Edit IPhone

Sensor Size: Where Optical Physics Meets Computational Reality
You want to believe your DSLR knowledge transfers to iPhone because admitting it doesn’t means starting over. It doesn’t. In optical physics, aperture and sensor size define the light-gathering equation. Your full-frame DSLR collects photons across a 36x24mm surface. An iPhone 15 Pro sensor is roughly 1/1.3 inches, which means it captures maybe 12 percent of the photons in the same light. The DSLR rule book becomes useless here because you’re operating at fundamentally different constraints.
The iPhone compensates through computational stacking and tone mapping, not through optical purity. You cannot stop down to f/2.8 and expect shallow depth of field like a DSLR. You cannot trust your instinct about how aperture and ISO interact because the iPhone is binning pixels, applying noise reduction during capture, and already deciding what the image should look like before you touch edit tools. Stop importing DSLR thinking. The camera operates on entirely different physics.
Computational Photography Versus Optical Purity
The advice to “chase optical quality first, edit second” is incomplete. Computational photography isn’t a fallback for weak optics—it’s the primary mechanism iPhone uses to build an image. When you shoot an iPhone sunrise photo, the camera captures multiple frames at different exposures in milliseconds, aligns them, and blends them before the image hits your library. You’re not shooting a single frame like a DSLR. You’re shooting a composite that’s already been engineered by Apple’s algorithms.
This changes your editing strategy entirely. Heavy editing on an iPhone sunrise photo often fights the computational work already done, which is why overediting produces halos and unnatural transitions. The image you see in the Camera app has already had dynamic range compression, color grading, and detail enhancement applied. Your job is surgical: adjust exposure selectively, preserve the computational blending, and understand that adding contrast often means undoing the tone mapping the iPhone already applied. Work with the algorithm, not against it.
Your Fear Of Missing The Perfect Shot Obscures The Fundamental Truth: True Mastery Is Forged In Repetition, Not Fleeting Magic
You’re waiting for the light to be perfect. You’re not. You’re waiting for permission to start. The magic happens when you shoot fifty sunrises, not one. Your iPhone captures the same light every morning. You just haven’t shown up consistently enough to see it. Tomorrow, set your alarm thirty minutes earlier than you think you need to. Shoot before you think. The perfect shot emerges from showing up when it’s still dark outside, not from chasing it when it’s already gone.



