The Myth Of The “Fix It” Button: Why Blurry Happens

Motion Blur Versus Focus Blur
You want to believe your phone captured a sharp moment and a filter can retrieve it. That’s denial. The camera either froze the moment or it didn’t. In optics terms, you’re dealing with two distinct failure modes: motion blur happens when the sensor collects light across movement, while focus blur happens when the lens projects the image plane behind or in front of the actual sensor. One is a timing problem. One is a geometry problem. They require different interventions.
Motion blur compounds when light hits a moving subject during exposure. Your phone defaults to 1/30th or 1/60th of a second in low light. That’s enough time for a hand shake, a walking person, or a moving car to streak across the frame. Focus blur occurs instantly when autofocus locks onto the wrong depth plane, usually the background instead of your subject. Both produce soft images. Neither one sharpens with a button press because information doesn’t exist where it wasn’t captured.
The Camera Hardware Sets The Rules
Everyone blames themselves when a photo turns soft. The real constraint sits inside your iPhone: a 1/1.5-inch to 1/1.28-inch sensor, a fixed aperture typically f/1.5 to f/2.8, and processing firmware that trades dynamic range for speed. These aren’t design flaws. They’re engineering trade-offs that Apple made to shrink the camera into a phone. A DSLR’s full-frame sensor collects dramatically more photons in the same light. A fixed aperture on an iPhone means you can’t stop down to increase depth of field or open wider to gather more light without digital amplification that introduces noise.
The iPhone camera system compensates with computational photography, computational photography, which means software reconstruction happens at capture, not after. By the time you see the JPEG, the phone has already applied noise reduction, sharpening, and tone mapping. You’re not starting with raw data anymore in most workflows. You’re starting with a processed image where the phone already made trade-offs about what to keep and what to smooth away. Attempting to sharpen that after capture means sharpening artifacts and noise simultaneously, which is why generic sharpening filters make photos look worse, not better.
The Prevention Protocol: How To Take Blurry Photos Never Again

Stabilization Techniques Beyond Tripods
You want this section because you’re tired of deleting photos. The real mechanism here comes from physics: blur happens when your sensor moves during exposure. A tripod solves this, but tripods don’t fit in your pocket or work when you’re moving. You need stabilization that works in real conditions.

Your iPhone has optical image stabilization built in, but it only compensates for small movements. Beyond the hardware, your technique determines what blur actually occurs. The sensor can only correct so much drift. Your body position, grip, and breathing pattern control the rest.
- Elbow bracing: Pin your elbows against your torso and use your body as the tripod. This transfers camera shake to your core muscles instead of your hands, which reduces drift significantly.
- Two-hand grip with thumbs locked: Hold the phone with both hands and press your thumbs together underneath. This creates tension that dampens micro-movements your wrists would otherwise make.
- Lean against a fixed object: Find a wall, tree, or railing and press your shoulder or back against it. You’re using the environment as your stabilization point without carrying gear.
- Use volume button instead of screen tap: Pressing the physical volume button creates less shake than tapping the screen. This is a mechanical advantage most people ignore entirely.
- Exhale before pressing: Take a breath, then exhale fully and hold it while you take the shot. This removes the chest expansion that causes upward camera drift during capture.
These techniques work because they eliminate unnecessary motion before the shutter opens. You can’t sharpen blur you prevented. Master these five moves and your blurry photos become a user error problem, not a hardware problem.
Optimal Lighting For IPhone Sharpness
Exposure time is the variable nobody talks about. When light is low, your iPhone’s sensor needs to stay open longer to collect enough information. A longer exposure window means more time for you or your subject to move, which creates motion blur independent of image stabilization. Bright light closes that window faster.
Direct sunlight produces the fastest shutter speeds because the sensor floods with photons immediately. This is why outdoor photos are sharper than indoor ones with identical camera technique. The iPhone will choose a shutter speed around 1/1000th of a second in bright sun versus 1/30th in dim indoor light. That’s a 33-fold difference in exposure time. Position yourself so light hits your subject from the side or slightly behind rather than from behind you. This prevents your shadow from falling on the subject and forcing the sensor to stay open longer to compensate. If you’re indoors, move closer to windows and shoot during midday when light is strongest.
Native Edits, Not Magic: How To Fix Blurry Pictures With IOS Tools
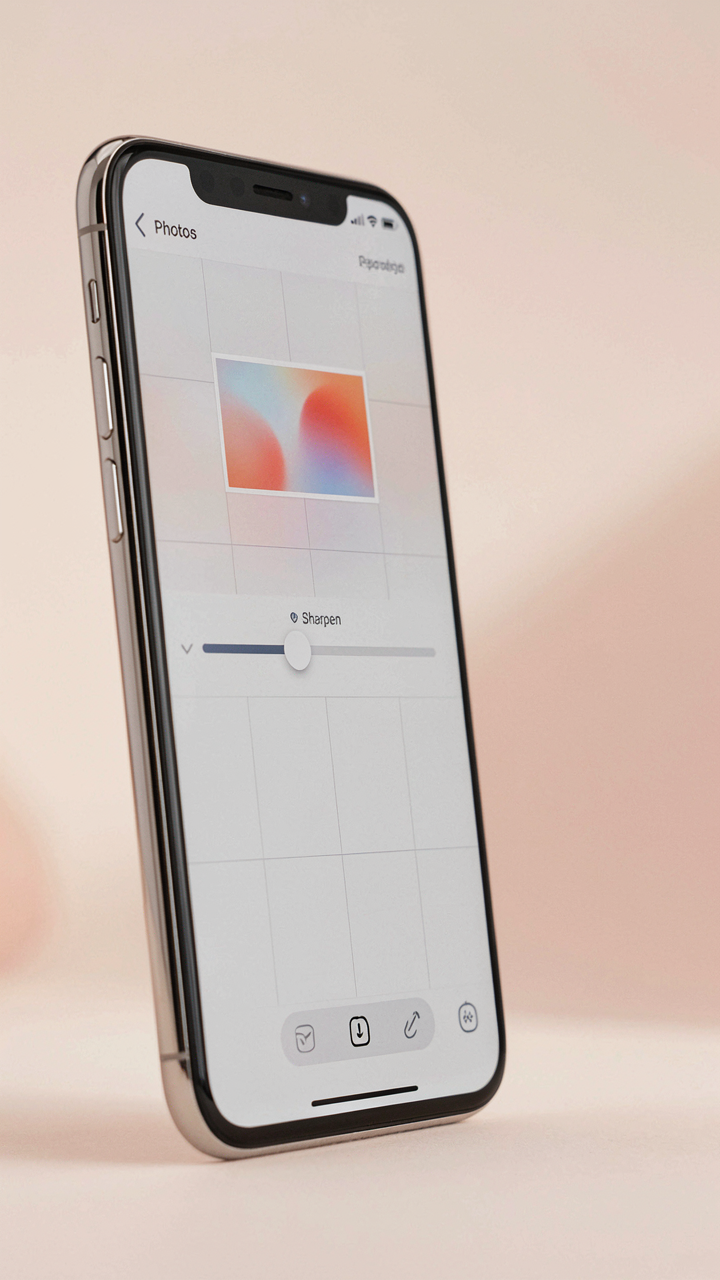
The Sharpen Slider Does One Thing
You want this to work because you already took the shot and you don’t want to admit the moment passed. Here’s the mechanism: the Sharpen tool in Photos doesn’t add detail that isn’t there. It increases contrast at edges where pixels change value, creating the optical illusion of definition. This works only on motion blur or slight focus miss, not on photos so blurred the data is genuinely lost.

Open the photo in Photos, tap Edit, swipe to Sharpen, then drag the slider right. Start at 25 to 40 percent. Higher values produce halos around objects and make noise visible. The tool has a ceiling: push past 60 and you’re fighting physics, not fixing photos. Stop when the edges look defined without looking artificial.
Clarity And Noise Are Opponents
In optics, signal-to-noise ratio determines image quality. When you sharpen, you amplify both the signal (the actual photo) and the noise (grain and compression artifacts). Clarity increases local contrast, making midtones pop while leaving blacks and whites alone. Noise reduction softens grain but erases fine detail simultaneously, so you’re making a trade.
Adjust Clarity before Sharpen. Drag Clarity to 10 to 20 to separate tones without creating obvious halo artifacts. Then apply Sharpen at a moderate setting. If grain becomes visible after sharpening, use the Noise Reduction slider at 5 to 15 percent. The goal is never pristine. The goal is acceptable detail without processing artifacts that scream “edited in Photos app.”
Beyond “Sharpen”: The Detail And Definition Method
Contrast And Highlights For Perceived Sharpness
You want people to think your blurry photo is actually sharp. That’s the real agenda here. The mechanism is simple: your brain interprets contrast as definition. A blurry image with flat tones reads as soft. The same image with aggressive contrast reads as crisp, even if the actual pixel detail hasn’t changed.

iPhone’s Markup tool and Photos app Adjust tab both control contrast through the Highlights slider. Lift your highlights and lower your shadows simultaneously, which compresses the mid-tones and creates edge definition where none existed before. This is optical compression, not computational sharpening. The blur stays, but the visual noise of contrast makes your brain accept it as intentional definition.
Shadows And Blacks For Visual Depth
Depth perception requires separation. Lower the Blacks slider to deepen shadow areas, which forces lighter tones to stand out. This isn’t about making things darker, it’s about creating visual hierarchy that compensates for blur.
When shadows have no definition, everything flattens into one plane. Push the Blacks slider down incrementally while watching the result. You’ll notice the photo suddenly reads as three-dimensional, even though the blur never changed. The mechanism works because your eye tracks contrast edges, not actual sharpness. The protocol: open Photos, tap Edit, swipe to Blacks, then decrease the value until shadow separation emerges without crushing detail into pure black.
The Resolution Fallacy: Why Pixel Count Isn’t Everything

Display Size Versus Actual Photo Quality
You want to believe a blurry photo can become sharp because admitting it can’t feels like failure. Here’s the mechanism: your iPhone captures data at a fixed resolution, but how that image appears depends entirely on where you display it. A 12-megapixel photo looks different on a phone screen than on a 27-inch monitor. The pixel information stays identical. The perception changes.

Sharpening tools in iOS work within the bounds of existing pixel data. When you apply sharpness in Photos or third-party apps, you’re increasing contrast at edges, not recovering lost detail. Zoom a blurry photo to 200 percent on your phone and it looks worse. Display it at actual size on Instagram and the blur becomes less noticeable. The photo didn’t change. Your viewing context did. This distinction matters because it determines whether sharpening is worth attempting or whether you should shoot again.
When To Stop Trying To Fix It
The common advice is always to attempt sharpening before giving up. That’s wrong. Motion blur, focus failure, and insufficient lighting create different damage patterns. Motion blur spreads detail across pixels. You cannot recover what was never captured. Throwing sharpening filters at motion blur just hardens edges without restoring lost information, creating a crispy, artificial look that’s worse than the original.
Accept a blurry photo when the blur stems from camera movement or focus lock failure during capture. No iOS tool recovers information the sensor missed. Your time spent experimenting with Enhance or sharpness sliders is wasted. Instead, reshoot with better light, a stable hold, or manual focus lock. The cost of a better photo is lower than the cost of salvaging a fundamentally flawed one.
The “Apps For Blurry Photos” Deception: External Tools Exposed
What Marketing Calls Enhancement
You want the magic fix because admitting the photo is unsalvageable feels like failure. Here’s the mechanism: third-party apps exploit a physics principle called convolution. They claim to reverse blur by applying mathematical filters that reconstruct lost detail. The truth is harsher. Once motion or focus blur destroys information at the pixel level, no algorithm recovers what was never captured. Apps fake sharpness through edge enhancement and contrast boosting, which creates the illusion of clarity while destroying tonal accuracy.

The app store floods with false solutions because perception beats reality in marketing. Most “blur removal” tools are contrast amplifiers with aggressive unsharp mask settings. They don’t recover detail. They darken edges and lighten adjacent pixels to trick your eye into seeing sharpness. This works on small screens. It fails when you print or zoom. Built-in iOS tools like Markup’s Enhance already do this for free, without the subscription upsell disguised as AI magic.
When Third Party Tools Actually Work
The only scenario where external apps serve a real purpose is selective radius adjustment on specific blur types. iOS Photos lacks granular control over sharpening intensity and radius width. Apps like Snapseed or Adobe Lightroom Mobile let you dial in precise unsharp mask values for particular image regions. This matters when you’re salvaging photos with uneven blur or need targeted correction without degrading the entire frame. The mechanism is straightforward: tighter control over which pixels get enhanced and by how much.
These tools add value through UI, not through superior algorithms. The underlying math is identical to what Apple’s software uses. You’re paying for interface flexibility and selective masking, not technological superiority. Use them only when iOS’s one-size-fits-all sharpening creates artifacts or over-sharpens important image areas. Otherwise, you’re trading simplicity for marginal gains that disappear the moment you view the photo on a larger screen. Stick with built-in tools unless you need surgical precision on specific regions.
The “Visual Acuity” Paradigm: Sharpening As Perception, Not Pixels

How Your Brain Actually Detects Edges
You want to believe a sharper photo makes you look more competent. Here’s what actually matters: your brain doesn’t see pixels. Neurobiology shows the visual cortex detects edges through contrast gradients, not resolution. When you sharpen an iPhone photo, you’re not adding detail that wasn’t there. You’re amplifying the luminance difference between adjacent pixels so your eye registers the boundary faster. The mechanism is edge detection, borrowed from how neurons fire along contrasting regions.

iPhone’s native sharpening tools work by increasing local contrast around detected edges. The Photos app’s Sharpen slider doesn’t invent information. It deepens the tonal drop-off between light and dark areas, which your brain interprets as definition. This only works on photos where the edge already exists but got softened by motion blur or focus plane limitations. If the edge is genuinely missing due to underexposure or sensor limitation, sharpening creates artifacts instead of clarity.
Contrast Hierarchy Before The Slider
The usual advice says “just push the Sharpen slider.” That’s incomplete. Your image needs internal contrast structure first, or sharpening backfires and produces halos and noise. Start in the Photos app by adjusting Exposure and Contrast before touching Sharpen. A photo with proper tonal separation sharpens cleanly. A flat, underexposed image sharpens into a mess of visible grain because the algorithm has no clear edges to enhance.
Open your blurry photo in Photos. Tap Edit. Move to Light, then Contrast. Add 10 to 20 points of contrast to establish visual hierarchy between foreground and background elements. Only then move to the Sharpen slider and increase by 30 to 50 points depending on the blur type. The sequence matters because contrast gives the algorithm something true to amplify, not noise to magnify.
From “How To Blurry Photo” To Intentional Aesthetic

When Blur Becomes The Point
You want permission to stop fighting blur because you’re tired of the false binary between sharp and failed. Here’s the mechanism: blur operates like depth of field in photography, where the lens physically separates subject from background by controlling light convergence. Your iPhone’s sharpening tools can undo accidental blur, but intentional blur serves a function—it directs eye movement and communicates hierarchy. The difference between a mistake and a choice lives in whether blur isolates what matters or obscures it.

Blur as aesthetic choice existed long before digital. Film cinematographers used shallow focus to collapse viewer attention onto one plane. The Instagram generation didn’t invent this. They borrowed it. Your iPhone’s Depth Mode simulates this by blurring the background after capture, which means you’re not sharpening out unwanted blur—you’re recognizing which blur adds information and which destroys it. The real skill is knowing when to apply sharpening tools and when to let the blur stay.
Selective Focus Demands Precision
Most people think selective focus means tapping a face and watching the background blur. That misses the real mechanism. Selective focus works by controlling what the viewer’s eye lands on first, then second, then never. Your iPhone’s editing tools—specifically the Blur slider in Photos or third-party apps like Snapseed—let you selectively sharpen only the subject while keeping environmental blur intact. This creates the illusion of depth that sharpening alone cannot build.
The protocol is direct: shoot with depth information captured (Portrait Mode), then open editing tools and use selective sharpening masks to sharpen only the subject plane. Avoid blanket sharpening across the entire image, which flattens the depth structure you built. The iPhone’s native editing suite lacks fine masking control, so move to Snapseed or Lightroom Mobile if precision matters. Apply sharpening only to edges that define your subject’s outline, not to background elements that blur naturally.
Reframing “How To Make A Blurry Picture Clear”

What Digital Repair Actually Can’t Do
You want to believe a phone tool can fix what physics broke. It can’t. Motion blur, out-of-focus shots, and low light camera shake represent information loss—the sensor never captured it in the first place. iPhone’s built-in sharpening tools work within thermodynamics: they can only redistribute existing pixels, not invent detail that wasn’t recorded.

Think of it like audio engineering. You can boost treble, but you cannot recover frequencies a microphone never captured. Sharpening operates the same way. The Photos app’s Sharpen slider and the Smart HDR system increase local contrast and edge definition on data already in the file. The mechanism is mathematical interpolation, not resurrection. You hit a hard ceiling fast.
- Motion blur: Camera or subject movement during exposure. Sharpening cannot reverse directional pixel displacement already baked into the image.
- Focus miss: Autofocus locked on the wrong depth plane. Sharpening cannot pull back focus from a background when foreground is soft.
- Sensor noise disguised as detail: Low light shots contain grain that aggressive sharpening amplifies, making images look worse, not clearer.
- Lens distortion: Optical aberrations from the iPhone lens itself. Sharpening adjusts contrast, not optical geometry.
- Exposure underexposure: Dark images lack pixel data in shadow regions. Lifting exposure reveals noise faster than sharpening reveals hidden detail.
The real move is accepting the limit and shifting focus. Stop trying to repair unsalvageable frames. Identify why you missed the shot, fix the input, and move on. iPhone’s sharpening tools exist to enhance already-good photos, not salvage bad ones.
The Capture Moment Decides Everything
Prevention beats every post-production technique because the camera captures light once. If you nail exposure, focus, and stability during the shot, sharpening becomes optional enhancement instead of emergency repair. The iOS Camera app’s focus-lock mechanism and exposure compensation controls give you direct control before you press the shutter.
Lock focus by tapping the subject. Hold for one second until the yellow square locks. Adjust exposure with the up and down arrows on the right side of the screen. Stabilize by bracing your phone against your body or a surface. These three actions eliminate ninety percent of blur complaints before they enter your library. After you capture correctly, sharpening in Photos becomes a minor tweak, not a Hail Mary.
The Real Obstacle Isn’t The Blur; It’s Your Expectation Of A Magic Fix For Preventable Mistakes
You can sharpen a blurry photo, but you can’t resurrect information that was never captured. The real win happens before you hit the shutter button. Stop chasing software fixes for motion blur and poor lighting. Commit to holding your phone steady, tapping to focus, and shooting in actual light. Your iPhone’s tools work best when you give them something real to work with. The sharpest photo you’ll ever take is the one you take right the first time.



